
Working with Presets
How to speed up your workflow and reduce errors by having InDesign take care of your checklist items


This article appears in Issue 131 of InDesign Magazine.
These days, you hear a lot of talk about automation and which jobs will be done by machines or artificial intelligence. While society grapples with the larger implications of this, for me, personally, automation means simply handing over as many mundane, repetitive tasks as possible to my computer in my daily workflow. The more I delegate, the more I am free to focus on the creative work—the stuff we humans are better at than the machines. For example, I try to take advantage of every opportunity to use presets in InDesign.
Presets offer two major benefits. First, they save you from having to remember all the specific settings you must use to achieve a desired result. Second, they also save you the time and energy you’d spend on configuring a bunch of menus and checkboxes correctly every time you create or output a document.
You may think using presets is a simple, beginner topic, but this article includes some important tips for every InDesign user. Let’s take a look at how to use three kinds of presets: new document presets, print presets, and PDF export presets.
In the Beginning: New Document Presets
Recently I took my graphic design students on a field trip to a print shop, and I couldn’t help but ask the printer what the most common problem was in incoming client files. I was not surprised to hear that the most frequent error is lack of bleed. New document presets can totally prevent this problem!
Document preset basics

Figure 1. Only a few new document presets are shown by default. Click the View All Presets button to see more.
The New Document dialog box
presents us with various presets, grouped into Print, Web, and Mobile categories. At first, each category displays only a few presets. Click the View All Presets button just beneath the categories, and you’ll reveal several more choices (Figure 1).
Regardless of what kind of document you typically need to create—a newsletter, a press release, a business card, social media story, or something else—start by picking the preset that is the closest to what you need and use it as the foundation for a custom preset. To customize it, make whatever changes you want in the Preset Details area on the right side of the dialog box. Be sure to reveal the Bleed and Slug settings—hidden by default—by clicking the disclosure triangle. (You don’t want to make that common mistake of omitting bleed.)
When all the settings are to your liking, click the icon that looks like an arrow pointing to a disk drive (Figure 2).

Figure 2. After arranging all settings to your liking, click the button to save and name your preset.
Now it’s time to give your new preset a name. But don’t just type the first thing that comes into your head. Take a minute and give it a really good, descriptive name that will remind you of the preset’s purpose later. If you do a good job of naming your presets, you will always be clear on what each does and which to choose. For example, my list of document presets includes “4 page A5 folder with bleed,” “130 × 200 mm Pocket Book for Publisher X,” and so on (Figure 3). Once you have the perfect name in place, click Save Preset.

Figure 3. Clearly descriptive names make it easy to choose the right custom preset for any job.
Wasn’t that easy? Now the next time you need to create the same kind of document, you can just choose your preset from the Saved category and all the settings will be exactly the way you want them—with no worry or effort on your part.
Managing your document presets
Although some folks work solo, most of us work as part of a team. In that environment, presets can be even more powerful. You can export and share them with your colleagues to get the whole team working consistently and efficiently.
You can manage your document presets by choosing File > Document Presets > Define. From the dialog box, you can export any or all of your document presets by selecting them in the Presets list and clicking Save (Figure 4).

Figure 4. Select all the presets you want to save out to a shareable file.
InDesign will export a single document settings (DCST) file that you can share with others, or use yourself as a backup or if you need to set up InDesign on a new computer (Figure 5). You can use the same dialog box to load document presets from a DCST file.

Figure 5. Document presets are contained in DCST files.
To edit a preset, simply double-click it in the list or select it and click the Edit button. Either method opens the Edit Document Preset dialog box, which is similar to the legacy New Document dialog box. Here, you’ll also find buttons for creating new presets, and deleting existing presets.
Skip the Dialog Box
One of the best reasons to save presets is that you can use them without fiddling with the options in a dialog box. For example, if you want to create a new document based on a document preset, hold down the Shift key and select the preset name from the Document Preset dialog box. Similarly, if you want to export a PDF using a specific PDF preset, you can hold down the Shift key and select it from the File > Adobe PDF Presets submenu. You simply need to provide a name and location for the file, and InDesign does the rest without bothering you with an options dialog box.
Let’s Get Physical: Print Presets
Think about all the crazy scenarios where you had to produce a hardcopy of your InDesign layout with very specific settings.
Maybe you needed to share your guides and grids as a hardcopy draft with your team. Or you wanted to see a 5 × 5 grid of reader’s spreads to judge if a book design was consistent and determine how much more work needed to be done. Or maybe you needed to print an advertisement as a proof with a slug area where the client could sign off on the design. These are just a tiny fraction of all the possible scenarios that require you to remember a whole host of print settings. In these scenarios and more, print presets can free you from the minutiae to focus on the creative.
Print presets to the rescue!
Choosing File > Print Presets opens a dialog box just like the one for managing document presets. You can use the controls to create, edit, load, save, and delete presets in the same fashion as described above (Figure 6).

Figure 6. Once you’ve managed new document presets, the Print Presets dialog box will look very familiar.
Just note that print preset files are saved as PRST files, and as with document presets, they may contain multiple presets in a single file (Figure 7).
Figure 7. Print presets are contained in PRST files.
Selecting a print preset opens the Print Dialog box and populates it with all the settings that you saved in the preset (Figure 8). From there, you can just click Print or make any last minute tweaks that are necessary.

Figure 8. Choosing one of your saved presets will apply all the right settings instantly.
Printing from InDesign to any printer involves a dance between the application, the operating system, and the printer driver, usually in the form of a Postscript Printer Description file (PPD). PPD files describe all the features and capabilities of a printer, including built-in fonts, available paper sizes, resolution, and so on. To simplify the process, you can save print presets that configure the settings to use the printer features you need for various scenarios.
Polish Your List of Print Presets
Using presets is all about efficiency, so your list of presets should be organized and easy to navigate. Check out this article by Anne-Marie Concepcion at InDesignSecrets for tips on tidying up your presets.
For my printer, for example, I have presets for single-sided and double-sided output, long-edge and short-edge binding, as well as grayscale and color. That gives me six presets in all, and I love knowing that I can just pick one of the presets and I’ll get exactly what I want out of my printer.
Other features that you may need to configure on your printer include substrates (labels, thick paper), trays, and finishing. Spend some time to get to know your printer’s features!
To create a print preset, I recommend that you first print a test job to confirm that you have all the settings correct. Then choose File > Print again. InDesign’s Print dialog box will display your last used settings, so all you need to do is click Save Preset at the bottom of the dialog box, and you’re on your way.
Key settings for print presets
After choosing paper size and orientation in the General options of the Print dialog box, take a good look around in the Setup options. There are some key settings here. Beware of Page Position, which defaults to Upper Left. If you are printing double-sided, you will want to have the Page Position as Centered (Figure 9).

Figure 9. Page Position is one of the key Setup settings in a print preset.
Thumbnails allows you to print multiple document pages on a single sheet of paper (Figure 10). I use them for planning purposes and as printed storyboards of my presentations. They’re extremely handy, so I’m sure you’ll find your own uses for them.

Figure 10. Use Thumbnails to print several reduced pages on one sheet of paper.
In the Marks and Bleed area, you can include Bleed and Slug settings (if your paper size is bigger than the document page), as well as set Crop Marks. In general, the Offset value for the marks should equal the Bleed amount if you don’t want to risk having the marks end up on your trimmed print (Figure 11). There are also some legacy settings here that are obsolete, but I like Page Information because it gives me the name of the document along with the print date to help me keep track of my printouts.

Figure 11. Usually, you’ll want to choose matching values for Bleed and Offset.
In the Output settings, you should turn on Simulate Overprint in the print presets for your home/office printer (Figure 12). But you need that turned off for commercial printing—otherwise you might get unpleasant surprises where colors overlap in your layout.

Figure 12. Always turn on Simulate Overprint when printing to a desktop printer.
Also, if you are working with spot or specialty colors, you may want to create a preset that outputs separations to create overlays for the purpose of checking that your dielines, spots, and varnishes will all output as intended.
If you want to speed up home/office print jobs, there are several options in the Graphics settings that may help. Proxy or None are great options for copy proofing, and Optimized Subsampling will give you the best speed-to-quality ratio (Figure 13). If you’re looking for higher quality, you can try the All option to send all image data, but I doubt that you will notice any difference with most home/office printers.
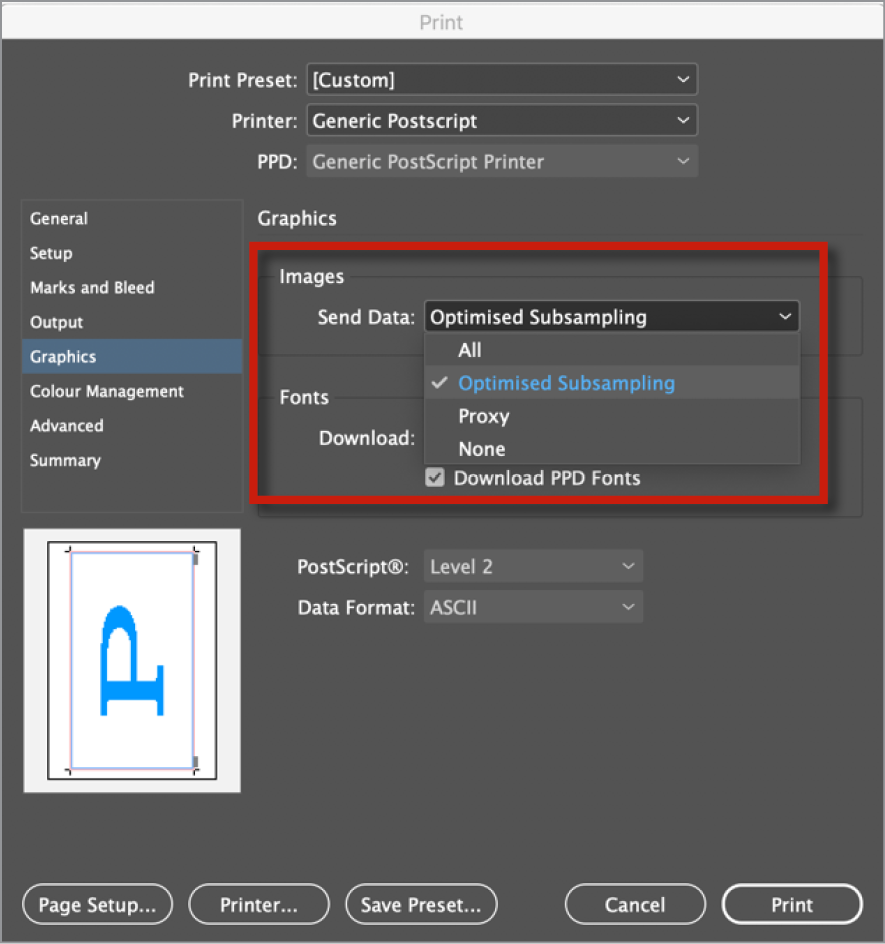
Figure 13. Printing usually involves a tradeoff of speed vs. quality. Optimized Subsampling gives you a good compromise between the two.
As for Fonts, subsetting is usually the way to go. You are, after all, printing and not saving a file you might need to edit.
Color management is a big topic, but it’s good to know that you have the option to choose the Document profile, which will optimize colors for the selected printer, or Proof, which will simulate another device. For example, I sometimes want to check that I have enough contrast on a newsprint ad by simulating newsprint on my office printer.
In the Advanced area, Print as Bitmap may offer a useful workaround if you have complex art that fails to print normally (Figure 14). Basically, it will turn your pages into the equivalent of flattened Photoshop files before printing.

Figure 14. Print as Bitmap provides a fail-safe option when the complexity of your content overwhelms your printer.
Yes, it is tedious to check all these settings, but that is exactly why you should use presets! There are so many ways to miss one of the checkboxes if you do it manually. And think of how much better you’ll sleep knowing that a correctly configured preset will always print the job right.
Don’t Forget the Description
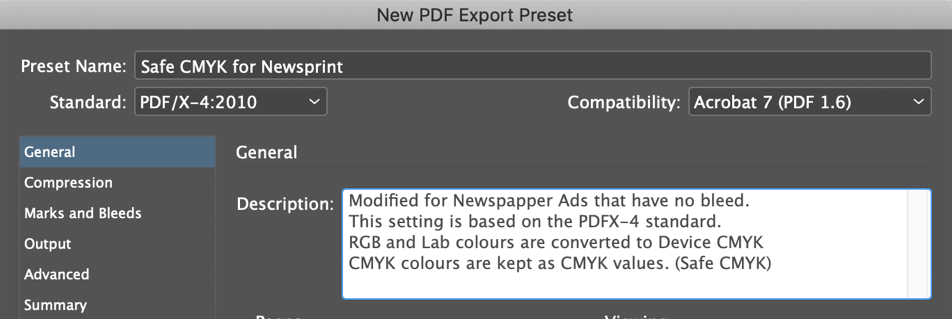
Whenever you create or modify a PDF preset, remember that you can add notes in the Description field found in General settings.
Orderly Output: Adobe PDF Presets
To round out our discussion of presets, let’s consider the uses of PDF presets. PDF Presets are managed in much the same way the other presets are, except that you can save them one at a time only, and exported PDF presets (JOBOPTIONS files) can be used by other Adobe applications, including Acrobat, Illustrator, and Photoshop.
Creating PDF presets
To create a new PDF preset, choose File > Adobe PDF Presets > Define. Select one of the existing presets in the dialog box as your starting point, and click New. Many of the options for PDF presets are similar to those for print presets. Here are a few key settings.
In the General settings of the New PDF Export Preset dialog box, you can use the Viewing options to determine how the PDF pages are displayed in Adobe Acrobat or Reader. If you are sending a magazine or book for proofing, for example, choosing the Two-Up Continuous (Cover Page) Layout will allow your client to view the pages as spreads with a cover page and better understand your magazine layout choices (Figure 15).

Figure 15. The Two-Up Continuous (Cover Page) layout is good for magazine and book proofs because it will display spreads correctly.
Color Management and Compression settings are hotly debated, but with presets you can have a number of formats clearly named so that each printer will receive a file tailored to their needs. On the color management side, some folks want everything converted to device CMYK, so there will be no further color changes, while others will want a “late binding” workflow that leaves colors untouched so they’re not tailored to a specific device or substrate. The compression debate has on the one side, purists who are paranoid about any kind of compression and fear simplification of the raw data through downsampling. On the other side are the more relaxed folks who think that the screening process and substrate are more destructive than most digital compression. And the truth is probably that we will have to compromise, depending on the requirements of our service providers and the wishes of our clients.
Preset Panorama
For more tips on harnessing the power of presets, check out these articles at InDesignSecrets.
Share Your InDesign Print Presets
Save Print Presets in InDesign for Each Printer in Your Office
Standards suggestions
In my opinion, it’s best to start with one of the PDF/X formats, because they are based on the International Standards for Print and Packaging (Figure 16).

Figure 16. When in doubt start with PDF/X-4, the modern standard for many professional print jobs.
Sticking to a PDF/X-compatible standard will also ensure clear communication with all parties involved as to the output intent, and allow you to more accurately proof colors in Adobe Acrobat. Steve Werner discusses the different Standards in this article. And the Ghent Work Group is a great resource for industry tried-and-tested settings, including InDesign preflight profiles as well.
If your print service provider offers you a JOBOPTIONS file, take the time to familiarize yourself with all the settings it contains. It may reveal their assumptions about how you are expected to work with regard to color management, including whether they want you to convert all your images to CMYK before creating a PDF.
Presets for Proofing
At some point in your workflow, you will probably want to send a PDF proof to your client or colleague. If the proof just needs to show the content, the [Smallest File Size] preset that ships with InDesign may be perfect for you. Using a PDF preset will also help to prevent problems if you plan to use the Import PDF Comments feature in InDesign. For the commenting workflow to go smoothly, you need to output single pages (not spreads), and Bleed needs to be turned off for comments to appear in the right places.
Presets for Packaging
When you use InDesign’s Package command, you can also create a PDF to include with the packaged files. Consider making a preset for this use.
Perfecting Presets
It’s not overstating things to say that every InDesign user should be using presets. They give you more time to be creative and make you less likely to miss some checkbox while rushing to meet a deadline. If you are a scripter, then you can leverage presets in your scripts to make them even more versatile. If you are a service provider, then providing your clients with good presets can make your workflow more efficient, with fewer errors and increased customer satisfaction. So any time you find yourself repeatedly filling all the right settings in a dialog box, see if you can save them as a preset. You’ll be glad you did.
Commenting is easier and faster when you're logged in!

Recommended for you
InDesign Magazine Issue 147: Illustrator vs. InDesign
Issue 147 has articles on InDesign vs. Illustrator, InCopy vs. Word, emphasizing...

InDesign Magazine Issue 106: Hidden Color Tools
We’re happy to announce that InDesign Magazine Issue 106 (February 2018) is...

A Closer Look at Obscure Features
Blink and you might miss these 20 obscure InDesign features worth knowing