


When Adobe released the July 2024 version of InDesign, I was glad to see the program finally getting some love after years of insignificant updates. However, after having some time to test it, I think most people should avoid using one of the new features, Generative Expand, because it has some significant drawbacks at present. To be fair, the feature is labeled “(Beta)” and for some good reasons described below. That’s the bad news. The good news is, there’s an easy alternative that avoids most of the problems: simply use the Generative Expand feature in Photoshop instead.
Problems with Generative Expand in InDesign
When you use Generative Expand in InDesign, the image that is produced is different in many aspects from the original. Here are the ones I’ve seen so far.
File Management: Original Link and File Name Lost
The generated image is embedded in the InDesign file, replacing the original, so the link to the external file is lost. It’s also given a generic name with no indication of what the original was called. So, unless you know what all your images look like, and/or have a very organized file management system, you may have trouble tracking down the original.
Potential Color Management Problems
If you have a color-managed workflow, this could be a biggie. The generated image has no color profile. Any profile that the original image was tagged with is discarded. Without diving too deep into color management here, one problematic scenario is if you’re working on a document that has a different working space than the one that was embedded in the original image. That embedded profile was the key to keeping the image color consistent through output, regardless of the working space of different documents it might be placed into. When that key is discarded, other things can happen. Bad things. InDesign will have no idea how it was supposed to interpret the colors, and it will assume the current working space is correct. This can lead to color shifts when you print or output a PDF.
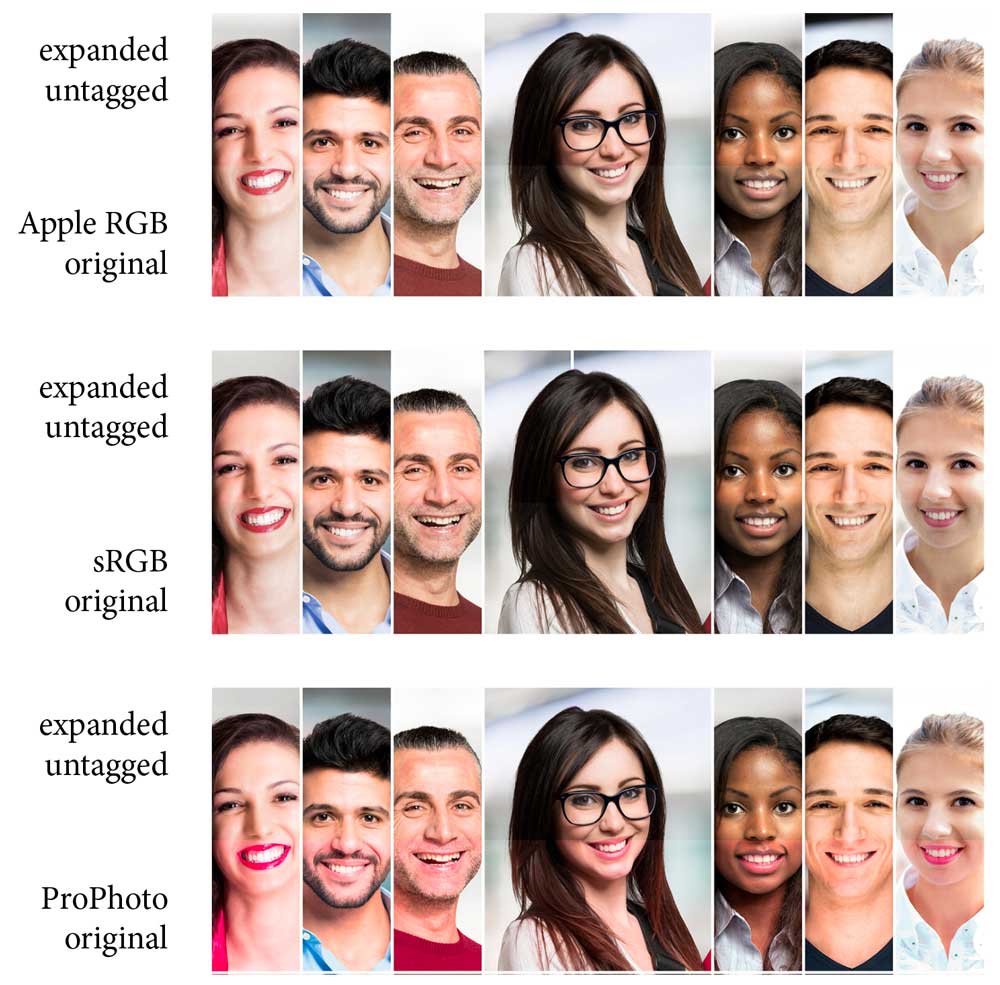
Here are some examples of the shifts that can occur when you expand images that were originally tagged with various RGB profiles and placed in an InDesign document with the Adobe RGB working space (the default for all of the prepress color settings). In each case, I just opened up the top of the image frame to add some pixels above the models’ heads with Generative Expand.


It might be hard to see the difference in these compressed screenshots, but it can be very noticeable in the actual files. To make it easier to see the difference, I overlaid the two images and closed up the top of the frame on the original.
If you use a PDF preset that leaves the colors unchanged, you may be able to keep out of trouble with a good print service provider. But if you use a preset that converts all colors to the destination space (e.g. Press Quality, X1a), the damage is done, at least in the PDF. Not to mention that if you started with a CMYK original, it will be replaced with an untagged RGB file. That is not what you want for your print workflow.
Changes in Resolution, Scaling, and Metadata
Generated images will be 72 ppi actual resolution, though they’ll be scaled down in InDesign to have a higher effective resolution, which may or may not match the original. And unless the originals were at 72 ppi, the scaling will be different.
At least the program warns you.

You can see all the differences in the Links panel if you duplicate the original image in the layout before expanding it. Notice that you also lose the metadata from the original.

Captions Lost
Another consequence of losing the image’s metadata is that Live Captions will be lost. InDesign creates Live Captions on the fly by checking the metadata in an image and placing that metadata in a text frame. When the generated image replaces the original, the Live Caption will disappear. Previously created Static Captions will remain, but you will lose the ability to create new Static Captions. (Hat tip to Alan Gilbertson for pointing this out.)

File Format Changes, Unknown Quality
Generative Expand works on JPEGs and PNGs, but it will always return a JPEG. What compression settings are used to make that JPEG are a mystery. At least I haven’t seen them documented anywhere.
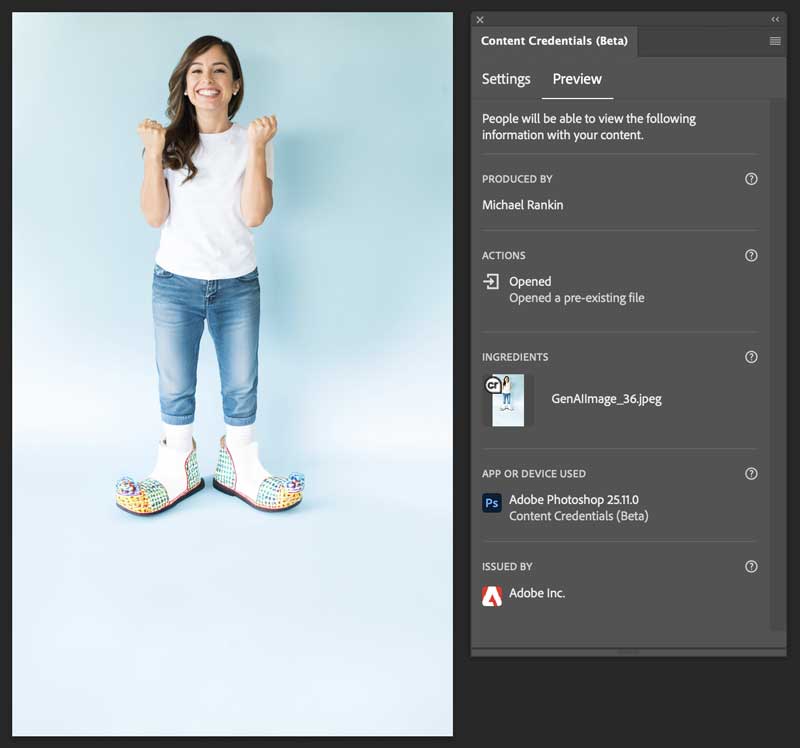
Content Credentials Unavailable
Many people (myself included) are very concerned about generative AI being used for disinformation, propaganda, etc. How do you trust anything you see when you have to assume everything might be fake? That’s one of the reasons Adobe came up with Content Credentials. If you enable Content Credentials in Photoshop and use Generative Expand, the image will include metadata revealing that it contains generated content.

Images generated in InDesign will not contain that metadata, even if you unembed the image using the Copy Links To feature and open it in Photoshop. It also seems to not understand the word “long.” Or, it has more of a sense of humor than I’m giving it credit for ;)
A Better Alternative: Using Generative Expand in Photoshop
Despite the fact that they’re named the same, the Generative Expand features in Photoshop and InDesign have very different consequences for workflows. Using the feature in Photoshop avoids the most significant problems mentioned above.
- You get to keep the link to the original file, with its location and file name intact.
- PNGs can remain PNGs.
- Metadata is retained.
- Captions are unaffected.
- Color profile, resolution, and scaling will be unchanged.
- Color space will be unchanged (CMYK files can remain CMYK).
- Content Credentials will reveal generated content.
- The change is nondestructive, so you can go back to the original image easily.
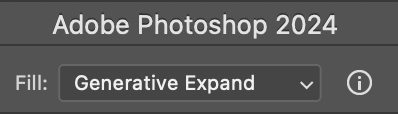
So, if any of those things matter to you, do your generative expanding in Photoshop. It’s easy. Just open the original image and drag the Crop tool to indicate where you’d like to add pixels.
In the Options bar, choose Fill: Generative Expand and press Enter/Return.
You’ll get a dialog box where you can enter a prompt or just click Generate.

Choose a variation from the Properties panel.

The generated content is added in a nondestructive manner, via a new layer. That’s a good thing, but it means you’ll have to perform an extra step to flatten the image. Or, you can save the layered file as a PSD and relink to it from the layout.
Stay Tuned
Obviously, the pace of change with Adobe’s generative AI tools is fast and furious. They may release an update that addresses some or all of these issues. But until that happens, I’d skip Generative Expand in InDesign and use it in Photoshop instead.
This article was last modified on October 3, 2024
This article was first published on August 5, 2024
Commenting is easier and faster when you're logged in!

Recommended for you


Extend Your Photos Right Inside InDesign
Learn how to extend your photos in InDesign without opening Photoshop!
Members-Only Video: Using Firefly Boards
Kat Kremser explores the features of Firefly Boards, a versatile tool from Adobe...