

Use Content Aware Scale with Skin Protect. Click the Skin Protect layer and choose Content Aware Scale again. Towards the right of the Options bar is a pop-up menu labeled Protect. Click it…and you have no choices. Just to the right of that is a human figure. That’s Content Aware’s Skin Protect function, and it tells Content Aware to exempt skin tones from scaling. Click it, and scale the image as before.
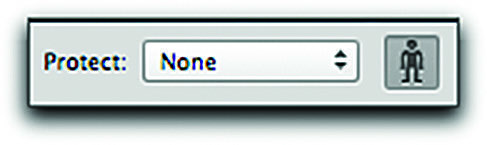
Click the human figure icon to protect skin tones from scaling.
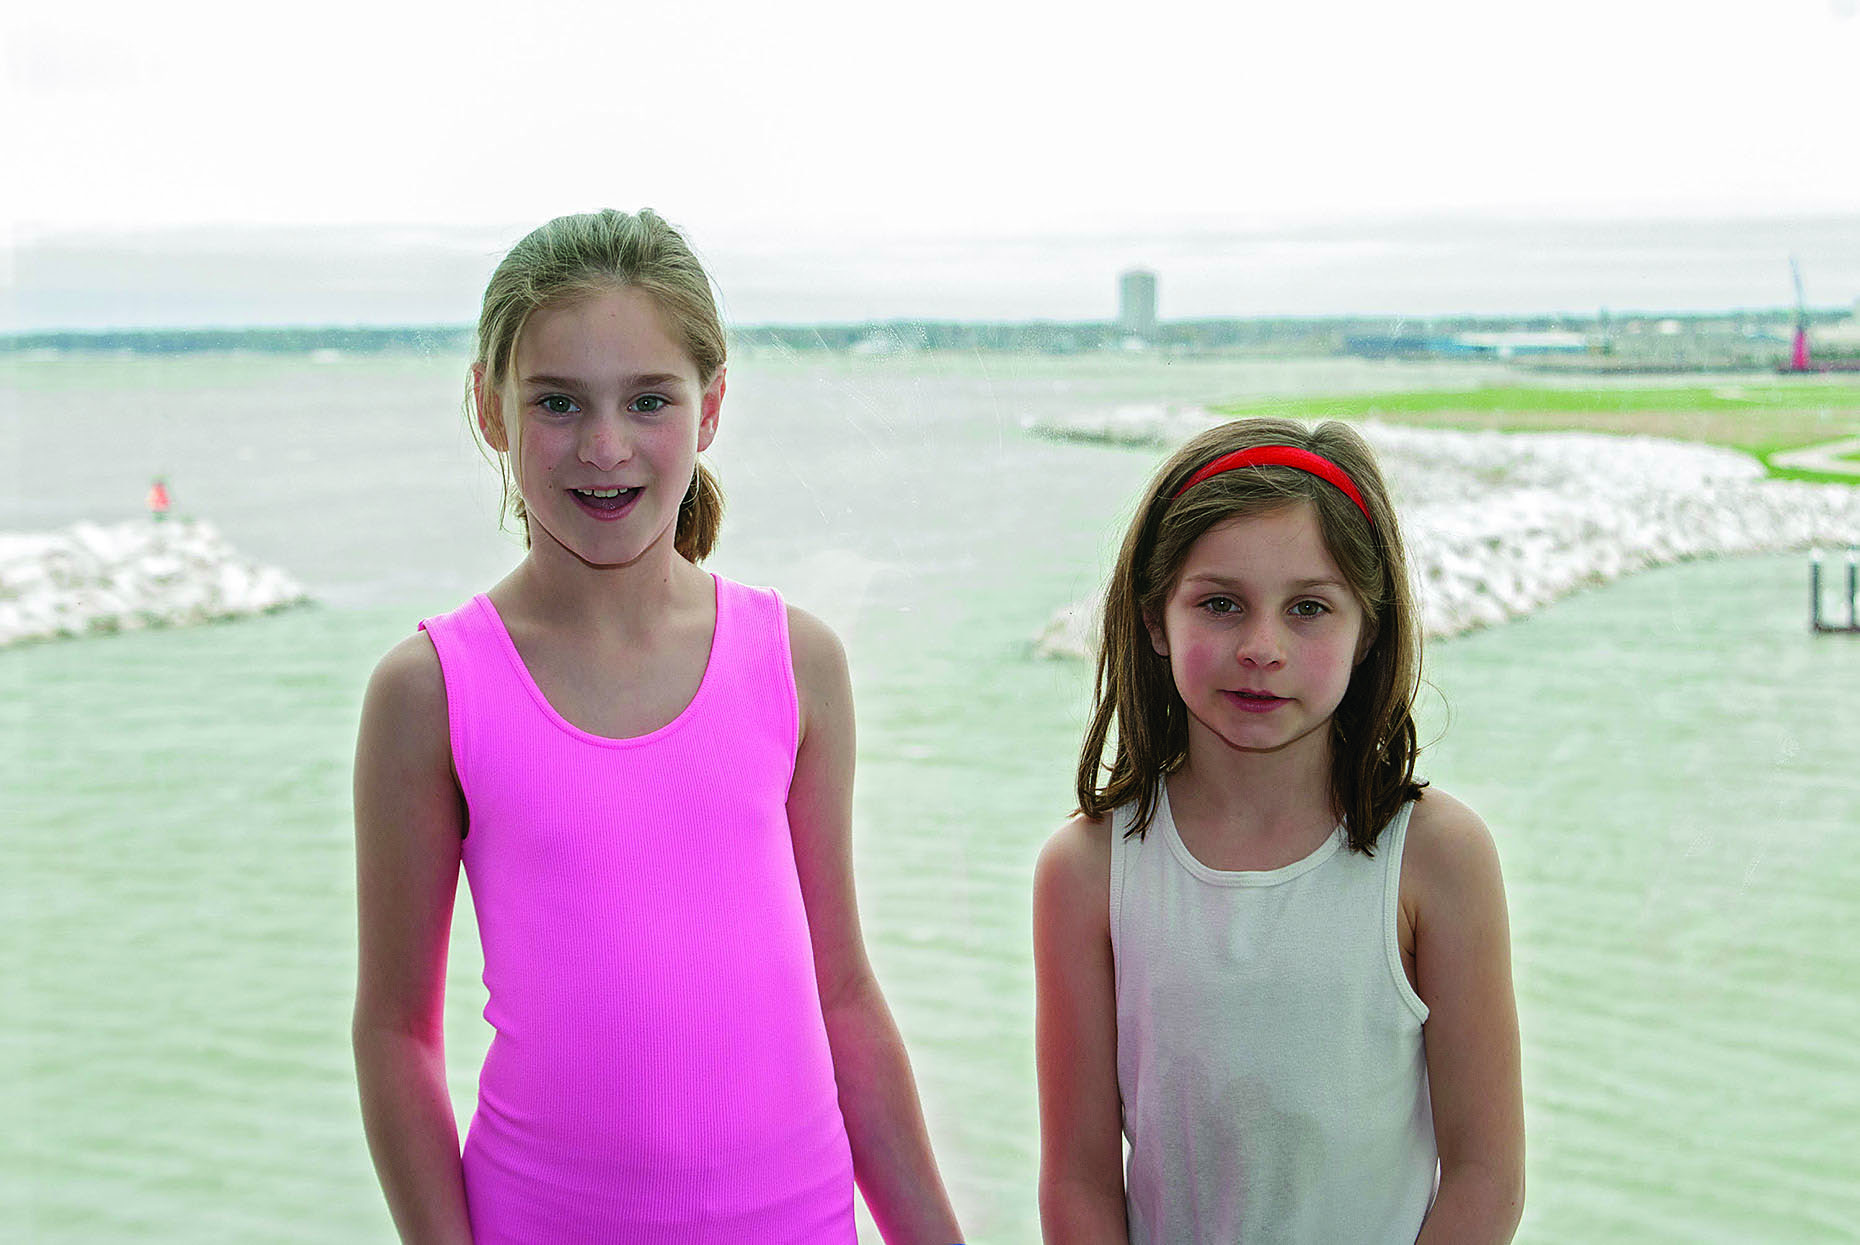
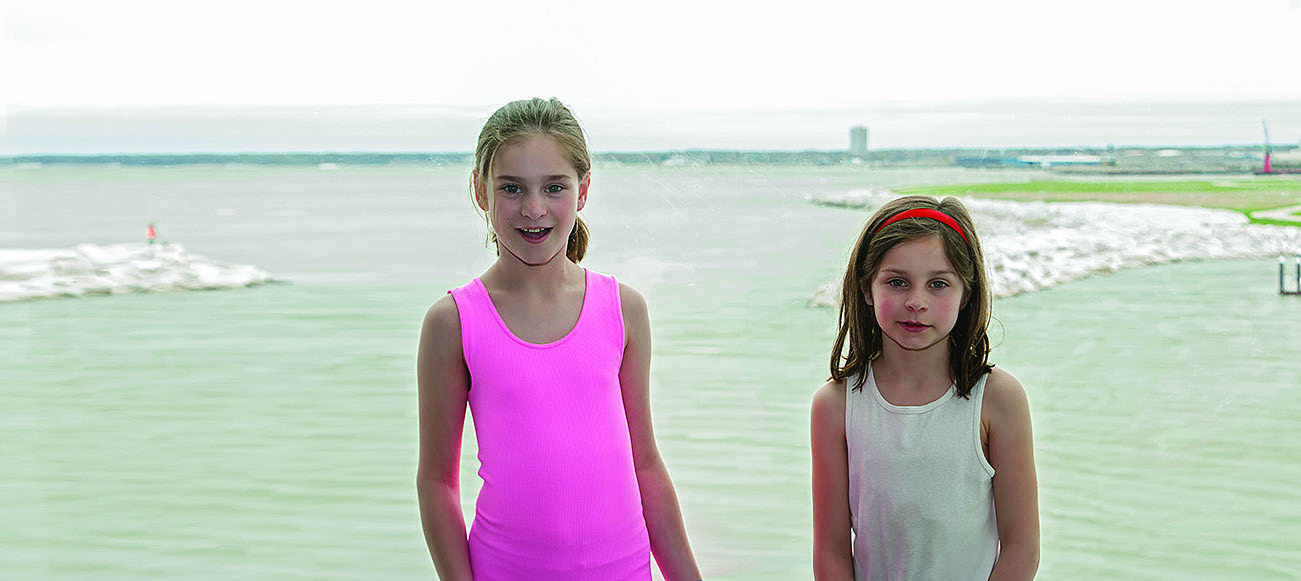
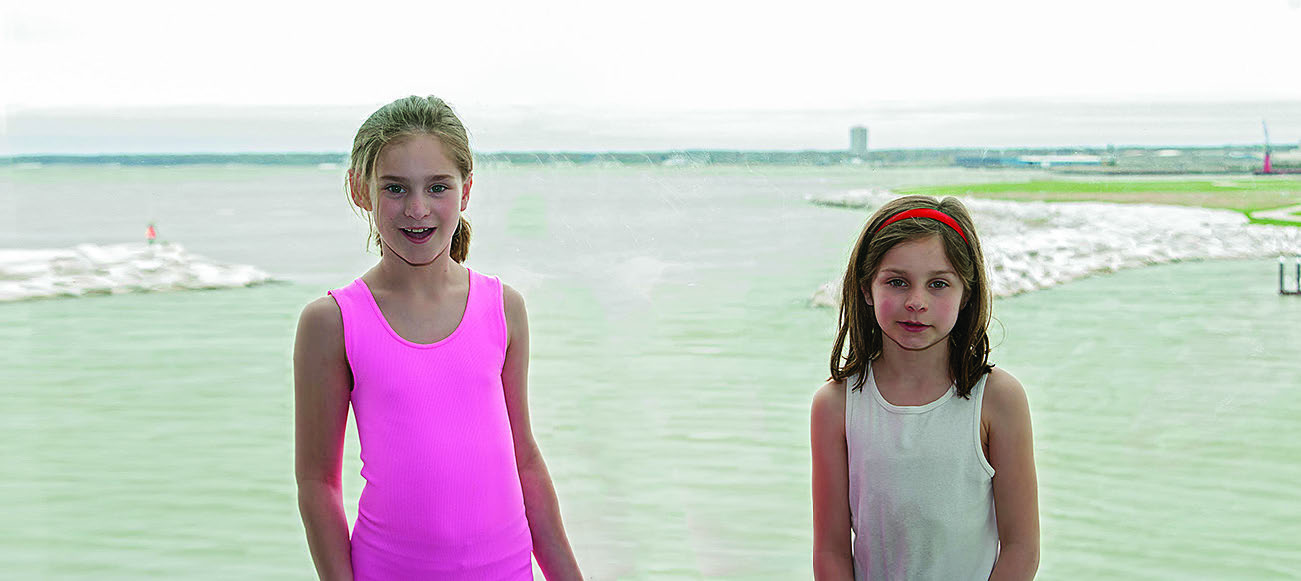
Now that’s pretty good. The girls look pretty much unchanged, because the scaling was applied almost entirely to the background. Skin Protect is ideal for a photo like this, because the girls are dressed for summer. If they had jackets on, this option would not have worked as well.

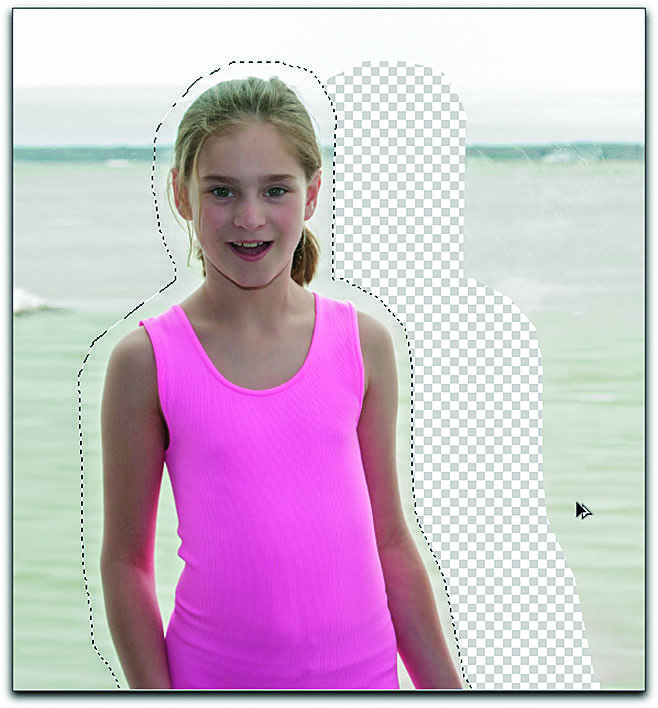
Use Content Aware Scale with Alpha Protect. We want to use that Protect pop?up menu—the one that offered no choices before—but we need to create an Alpha channel first. What’s that? An Alpha channel is basically like a saved selection.
The Girls Alpha channel will help prevent Content Aware Scale from distorting the girls.
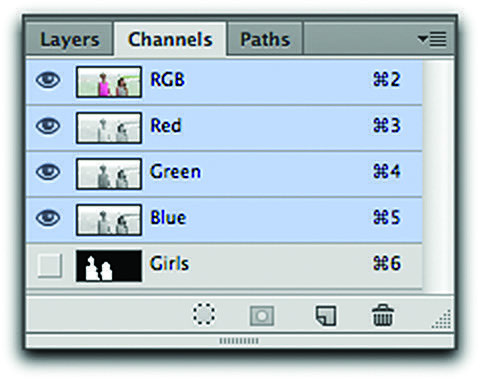
Use the Quick Selection tool to select the girls, including the area between their arms and bodies. With the selection active, choose Select>Save Selection from the Main menu and name it Girls . Look in the Channels panel, and you’ll see your Girls Alpha channel at the bottom. Alpha channels don’t print or alter an image, they are only used to store selections. Now we’re ready to proceed.
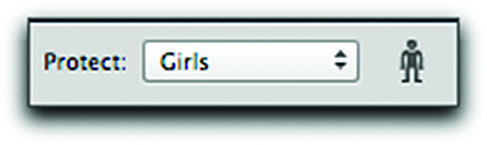
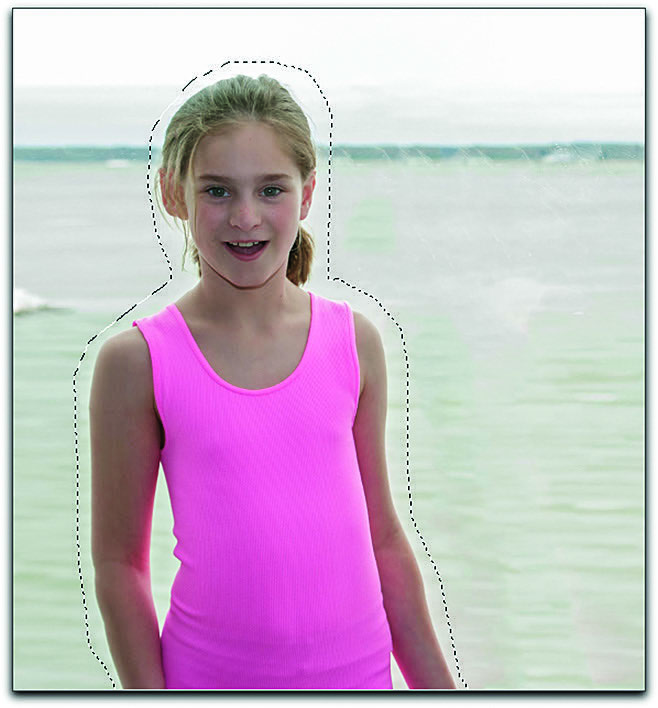
Deselect the marching ants, click the Alpha Protect layer and choose Content Aware Scale again. Make sure Skin Protect is turned off, select Girls from the Protect pop-up menu, then scale as before.
The Girls Alpha channel will prevent the girls from scaling.
That worked great, even a little better than Skin Protect. Compare the two, and you’ll see how Skin Protect enlarged the pink shirt just a little. Using the Alpha Protect option is your most powerful choice for Content Aware Scale, but there comes a point when even Alpha Protect falls short. There’s a limit to how far you can disproportionately scale an image, even with Content Aware Scale.
The Alpha Protect option left the girls at their original size.
Content Aware Move
Introduced with Photoshop CS6, the Content Aware Move tool is a combination of the Move tool followed by Content Aware Fill. As with other Content Aware applications, it’s not always perfect, but it’s worth a try.
Move a selection with the Move tool. To provide a frame of reference, we’re going to move a selection with the standard Move tool first. Duplicate the Alpha Protect layer of the Girls at Lake file and name it Content Aware Move. Turn off the eyeballs to all other layers, then use the Lasso tool to draw a loose selection around the girl on the left and drag her further to the left.
The problem we have should be immediately apparent. The area she used to occupy is now a gaping hole. If we were on the Background layer, that hole would have been filled with background color. Undo that move. We can do better with the Content Aware Move tool.
Move a selection with the Content Aware Move tool. Select the Content Aware Move tool. It’s hiding in the first slot of the retouching tools under the Spot Healing Brush. Take a quick look at the Options bar and make sure the settings are: Mode: Move and Adaptation: Medium.
If your selection is still active, you can use it. Otherwise draw a new selection using the Content Aware Move tool. It works just like the Lasso tool—drag it to make a freehand selection or Option+Click/Alt+Click to create a selection of straight line segments.
The Move tool (left) leaves a hole in its wake, but the Content Aware Move tool fills the hole.
With the selection active, drag the girl to the left and wait a second. Photoshop does some analyzing, then, presto, the hole fills with a manufactured background. In effect, the Content Aware Move tool did three things: move the girl, reselect the hole she vacated, and fill using Content Aware Fill.
Look at the Options bar and locate the feature called Adaptation. With the selection still active, try the various settings, from Very Strict to Very Loose. These are live settings, meaning that you can change and compare them as long as the selection remains active. If you don’t like the results that you got with Medium, run through the others and choose the best.
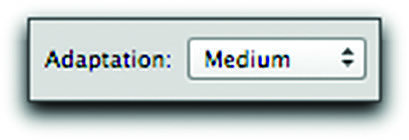
Try different Adaptation settings and choose the best result.
The final photo, expanded with Content Aware Scale and adjusted with Content Aware Move.
This article was last modified on September 20, 2013
This article was first published on September 20, 2013
Commenting is easier and faster when you're logged in!

Recommended for you

Stocksy United: a sustainable option for photographers
Stocksy United is a new co-operative stock photography site co-founded by Bruce...
Knowing Your Camera: The First Step for Getting Better Results in Photoshop
Understanding the abilities of your camera and Photoshop can help you produce be...
ShutterSnitch, the Wireless Photo Assistant for iOS
The iPad offers several advantages for photographers. Compared to a laptop, it t...