
The big news in the latest Photoshop CC update is 3D printing—at least, that’s the news that’s catching most of the headlines. But there are other key technologies in this upgrade, which are likely to be of more use to the everyday Photoshop user. One of them is Perspective Warp, which allows you to correct objects photographed at an angle to make them fit into an existing scene. It’s rather like working with two Free Transform planes at right angles to each other, and—given the right starting image—it’s capable of dramatic results. Here’s how it works.
1. The starting image
Here’s a London bus on a London street. Even when the lamp posts are cut out and moved to a new layer, it still doesn’t look integrated into the scene—the relative perspectives are all wrong:

2. Starting the warp
Choose Perspective Warp from the Edit menu, and drag a grid with one edge over the corner of the bus. An explanatory Help panel will pop up showing you what to do:

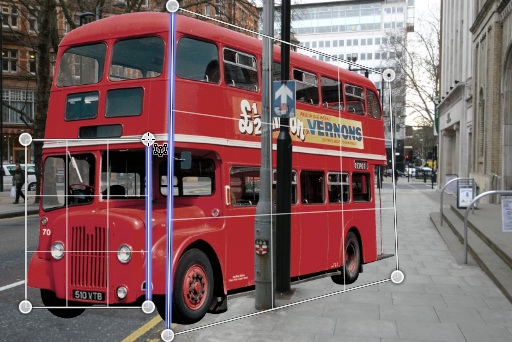
3. Adjust the grid
The four corner handles of the grid can each be adjusted individually, and you should drag it so that the grid matches the perspective of the bus. In particular, it’s important to get the vertical edges to align with the verticals on the bus:

4. Draw the second grid
Drag away from the first grid to create the second. As the two edges near each other, they’ll both turn blue; this is Photoshop’s cue that these two edges are going to be joined together:
5. The grids combined
Sure enough, when you release the mouse button, the edges snap together. From now on, these two grids are permanently joined along this edge:

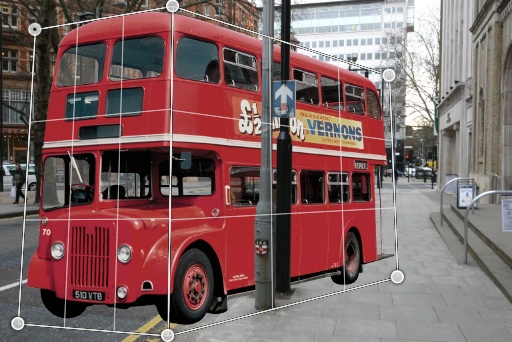
6. Adjust the second grid
Drag the corner handles of the second grid in exactly the same way, so that the corners define the perspective of the front of the bus. Once again, it’s important to get the angle of the vertical edge so it aligns with the vertical side of the bus:
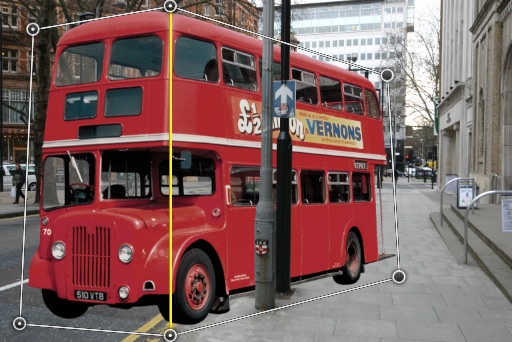
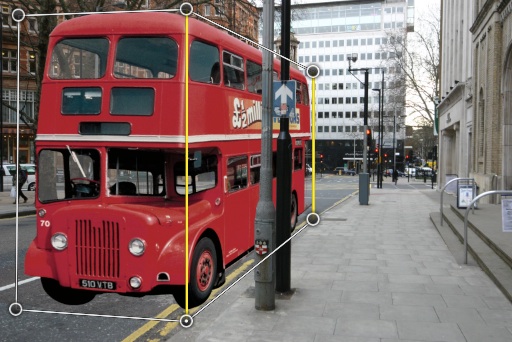
7. Straighten the vertical
With the grid in place, you can now press the Warp button on the Options bar to switch modes. Now, moving a corner handle will reshape the object it describes. If you hold the Shift key and click on a vertical edge, it will turn yellow and will then snap to be truly vertical:
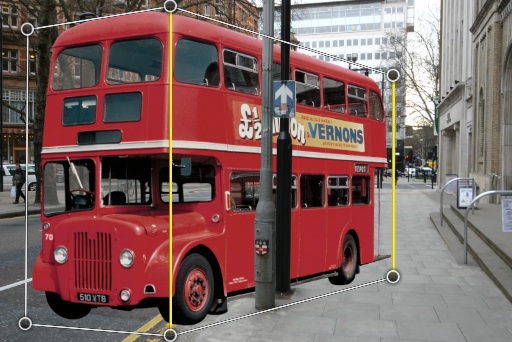
8. Straighten the back
Shift-clicking on the right hand vertical will constrain that to a pure vertical as well, and will also straighten the front of the bus. Now, the grid is in a condition that allows you to move the handles around:
9. Adjust the perspective
As you drag any of the handles, the other handle on that vertical plane will move with it. In this way, it’s easy to adjust the apparent viewing position of the bus, making it appear to have been photographed from a different angle:
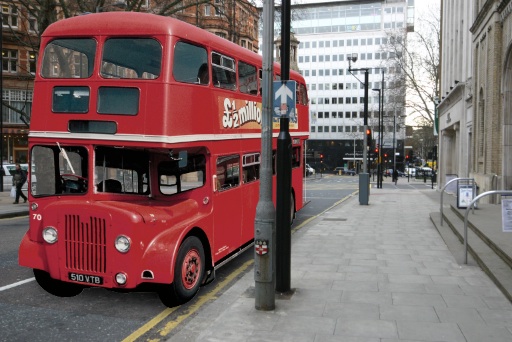
10. The finished image
It doesn’t take much effort to reshape the bus so it fits in well with the perspective of the street. Once you’ve got it where you want it, hit Enter to apply the transformation. Here, I’ve also added a drop shadow to complete the scene:
You can see a video of this process at howtocheatinphotoshop.net.
This article was last modified on July 20, 2021
This article was first published on January 31, 2014
Commenting is easier and faster when you're logged in!

Recommended for you

Free Photoshop Filters Webcast
It can be a lot of fun to experiment with Photoshop’s many filters to crea...
Photoshop Tip: Auto-Select a Layer
When you’re working in a Photoshop document containing multiple layers, it...

CreativePro Video: Fix Distorted Perspective in Lightroom
In this week’s CreativePro video, Nigel French shows a quick way to adjust issue...