
Using Lightroom Profiles
The latest updates to Lightroom CC (1.3), Lightroom Classic CC (7.3), and Adobe Camera Raw (ACR, 10.3) add profiles, an updated way to define colors in your photos. Profiles resemble presets in that you can apply a pre-made visual style, such as a monochrome look, but they work at a more fundamental level. In fact, you can combine profiles and presets.
Profiles, and Where to Find Them
The job of a profile is to translate the unprocessed image data in a raw file into the colored pixels we view onscreen as a photograph. Manufacturers build profiles into their camera models to process photos in specific ways. For example, some profiles simulate film stocks, such as Fujifilm’s Astia or Classic Chrome, or you can choose settings tailored to landscapes or portraits. As you shoot, the preview you see on the LCD has that specified look.
However, when you bring that raw file to the computer, your desktop software usually translates the raw image data according to its own formulas. The software sees only the raw data, not the profile, so you end up with a default processed version; a raw file shot using a monochrome filter, for instance, appears in color when imported into Lightroom.
Adobe explains on its blog: “Our profiles incorporate deep imaging science and take into consideration the colors of the filters used on top of the sensors (the array of red, green, and blue filters that help an otherwise colorblind sensor ‘see’ the colorful world around us), the specific sensitivity of the sensor used, the sensor’s characteristics in different lighting conditions and with different ISO values to interpret the digital 1s and 0s into images inside Adobe photography products.”
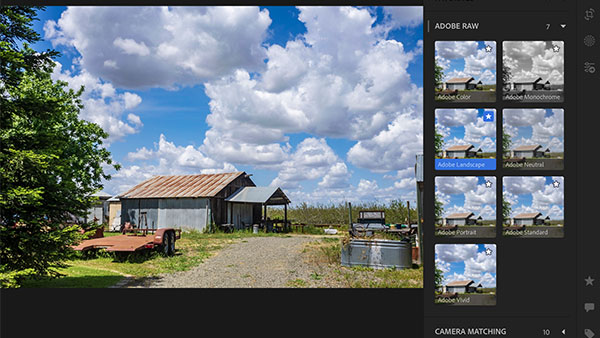
If you used a camera-specific style, applying the corresponding profile gives the photo the same look you intended when shooting; or, of course, you can choose another. In addition to camera-specific profiles, when available, Adobe has included a set of general raw profiles for certain image types, such as Adobe Color, Adobe Monochrome, Adobe Landscape, Adobe Vivid, and others, which join the stalwart Adobe Standard profile.
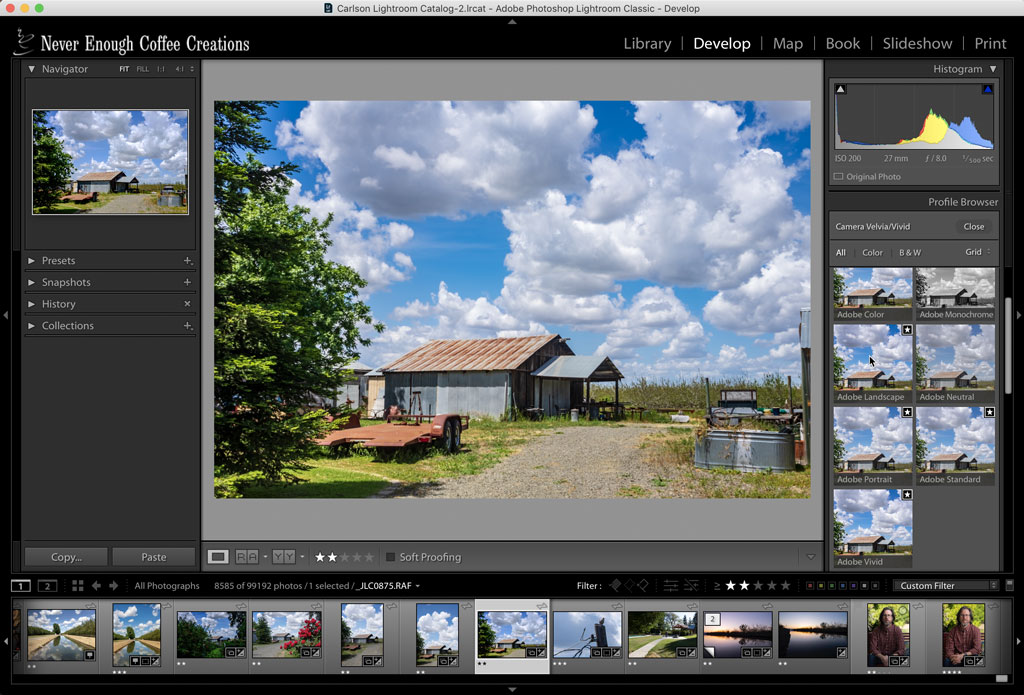
In Lightroom Classic and ACR versions prior to late-April 2018, profiles for scenes and camera simulations could be found in the Camera Calibration panel. Now, they’re more prominent, appearing at the top of the Basic pane in the Develop module (Lightroom Classic); in a new Profile pane in the Edit panel (Lightroom CC); and at the top of the Basic pane in ACR.

Profiles location in Adobe Camera Raw

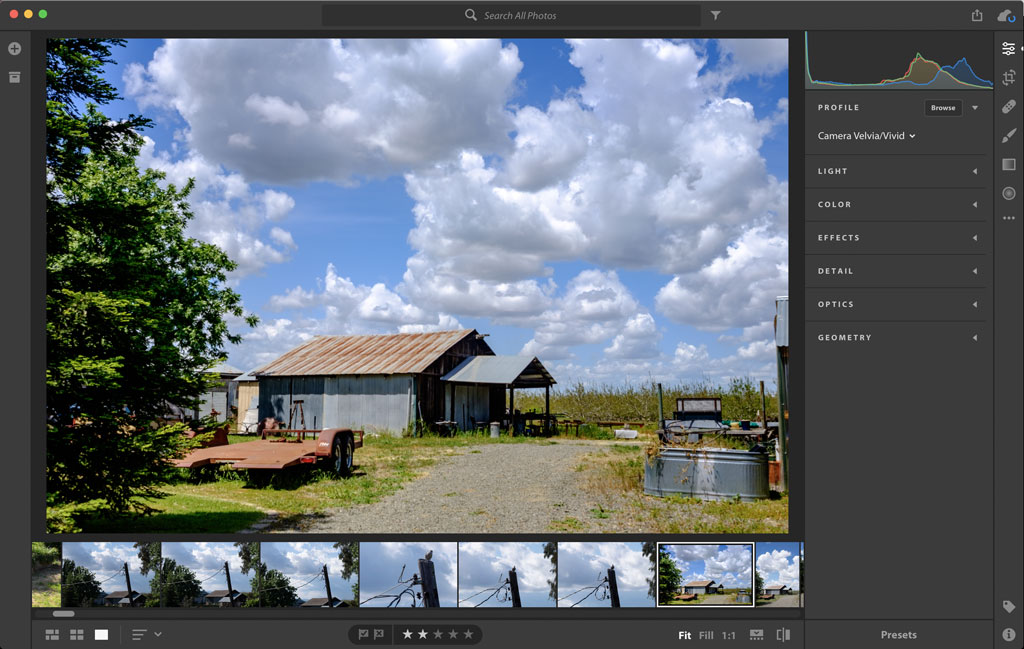
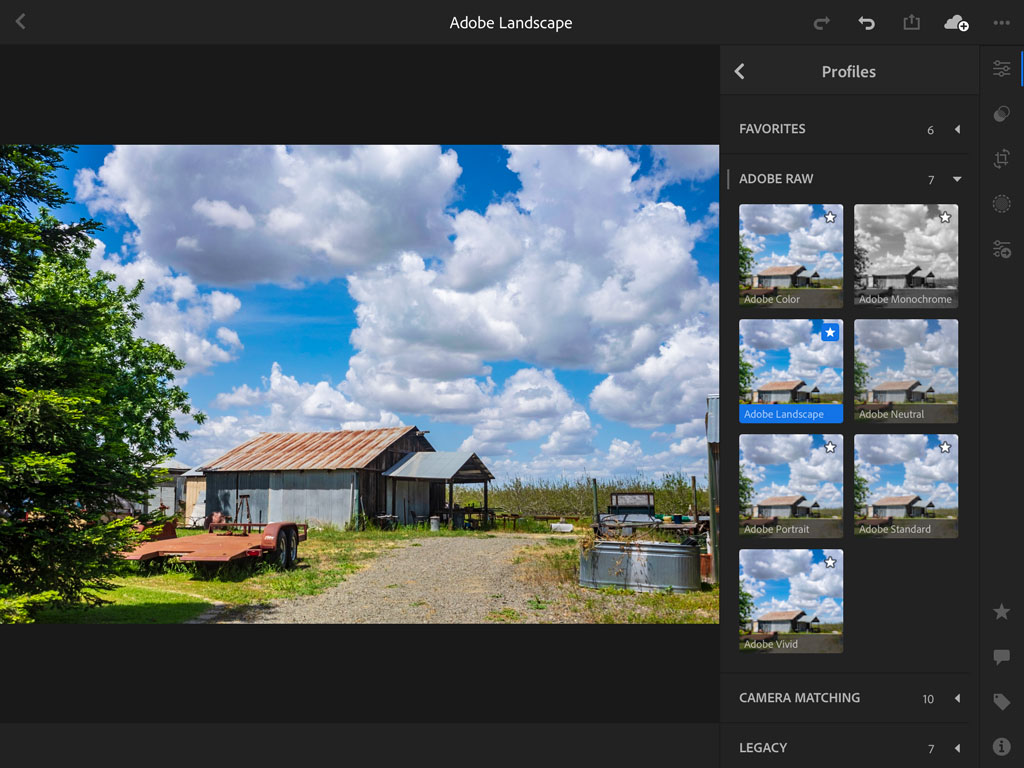
Profiles location in Lightroom CC
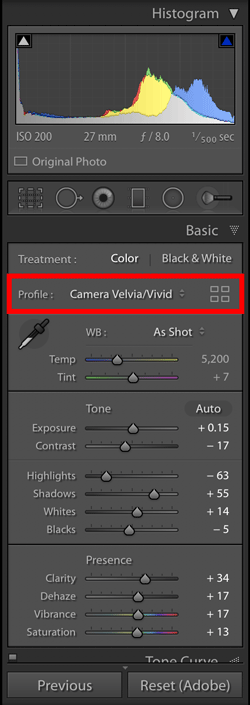
Profiles location Lightroom Classic
The main profiles work only with raw files, though a set of creative profiles can be applied to other formats such as JPEG or TIFF. For those, you’ll see generic Color or Monochrome profiles available.
Profiles are also available in Adobe’s Lightroom Mobile apps. Edits you make to photos that are synced through Creative Cloud are automatically updated on both desktop and mobile platforms. With profiles, you’re guaranteed to have the same raw processing applied in all locations, too.

Using Lightroom Profiles
After you import photos into either version of Lightroom, or open a raw image in ACR, the Adobe Color profile is applied by default. (That default is not applied retroactively; raw images already in your library retain their previous raw processing.) Here’s how to change the profile in each application.
Lightroom CC:
- Open a photo in the Detail view and then click the Edit button (or press E).
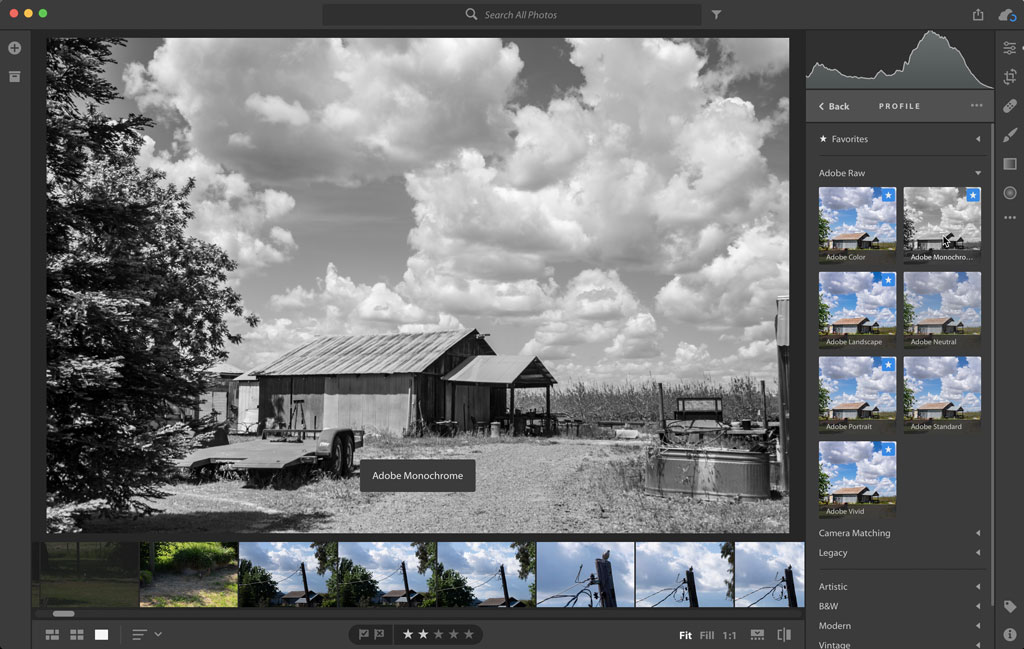
- In the Profile pane, click the Browse button to view all available profiles. (You can also choose a profile from the drop-down menu, which includes ones marked as favorites.)
- Expand a category (such as Adobe Raw or Camera Matching). To preview a profile, hover the mouse pointer over its thumbnail.
- Click a profile’s thumbnail to apply it.
- Click the Back button to exit the Profile pane.
Lightroom Classic and Adobe Camera Raw:
- In Lightroom Classic, switch to the Develop module and expand the Basic pane. In Photoshop, open a raw file, which brings up ACR.
- In the Profile area of the Basic pane, click the Browse icon to reveal the profiles and their thumbnail previews in the Profile Browser. Or, if you want to pick a favorite profile, click the drop-down menu and choose one.
- Expand a category (such as Adobe Raw or Camera Matching). Hover the mouse pointer over its thumbnail to preview its appearance. You can also choose to view the profiles in a grid or list view; Lightroom Classic also offers a large-icon view.
- Click a profile to apply it.
- Click the Close button at the top of the Profile Browser.
Lightroom CC for iOS and Android
- Tap a photo in the image browser and tap the Edit button.
- In the Profile pane, tap the Browse button.
- Tap a profile thumbnail to apply it.
- Tap the Back (<) button at the top of the Profiles browser to exit it.
To mark a profile as a favorite for faster access, click the star icon in the corner of a profile’s thumbnail. On Lightroom CC for mobile devices, touch and hold a thumbnail to add or remove a profile from the list of favorites.
After you’ve applied a profile, you’ll notice that none of the editing sliders change—that’s because a profile is only changing how the image data is interpreted, not making edits to the image. Profiles are non-destructive starting points upon which you build your other edits. You can also have just one profile assigned to an image.
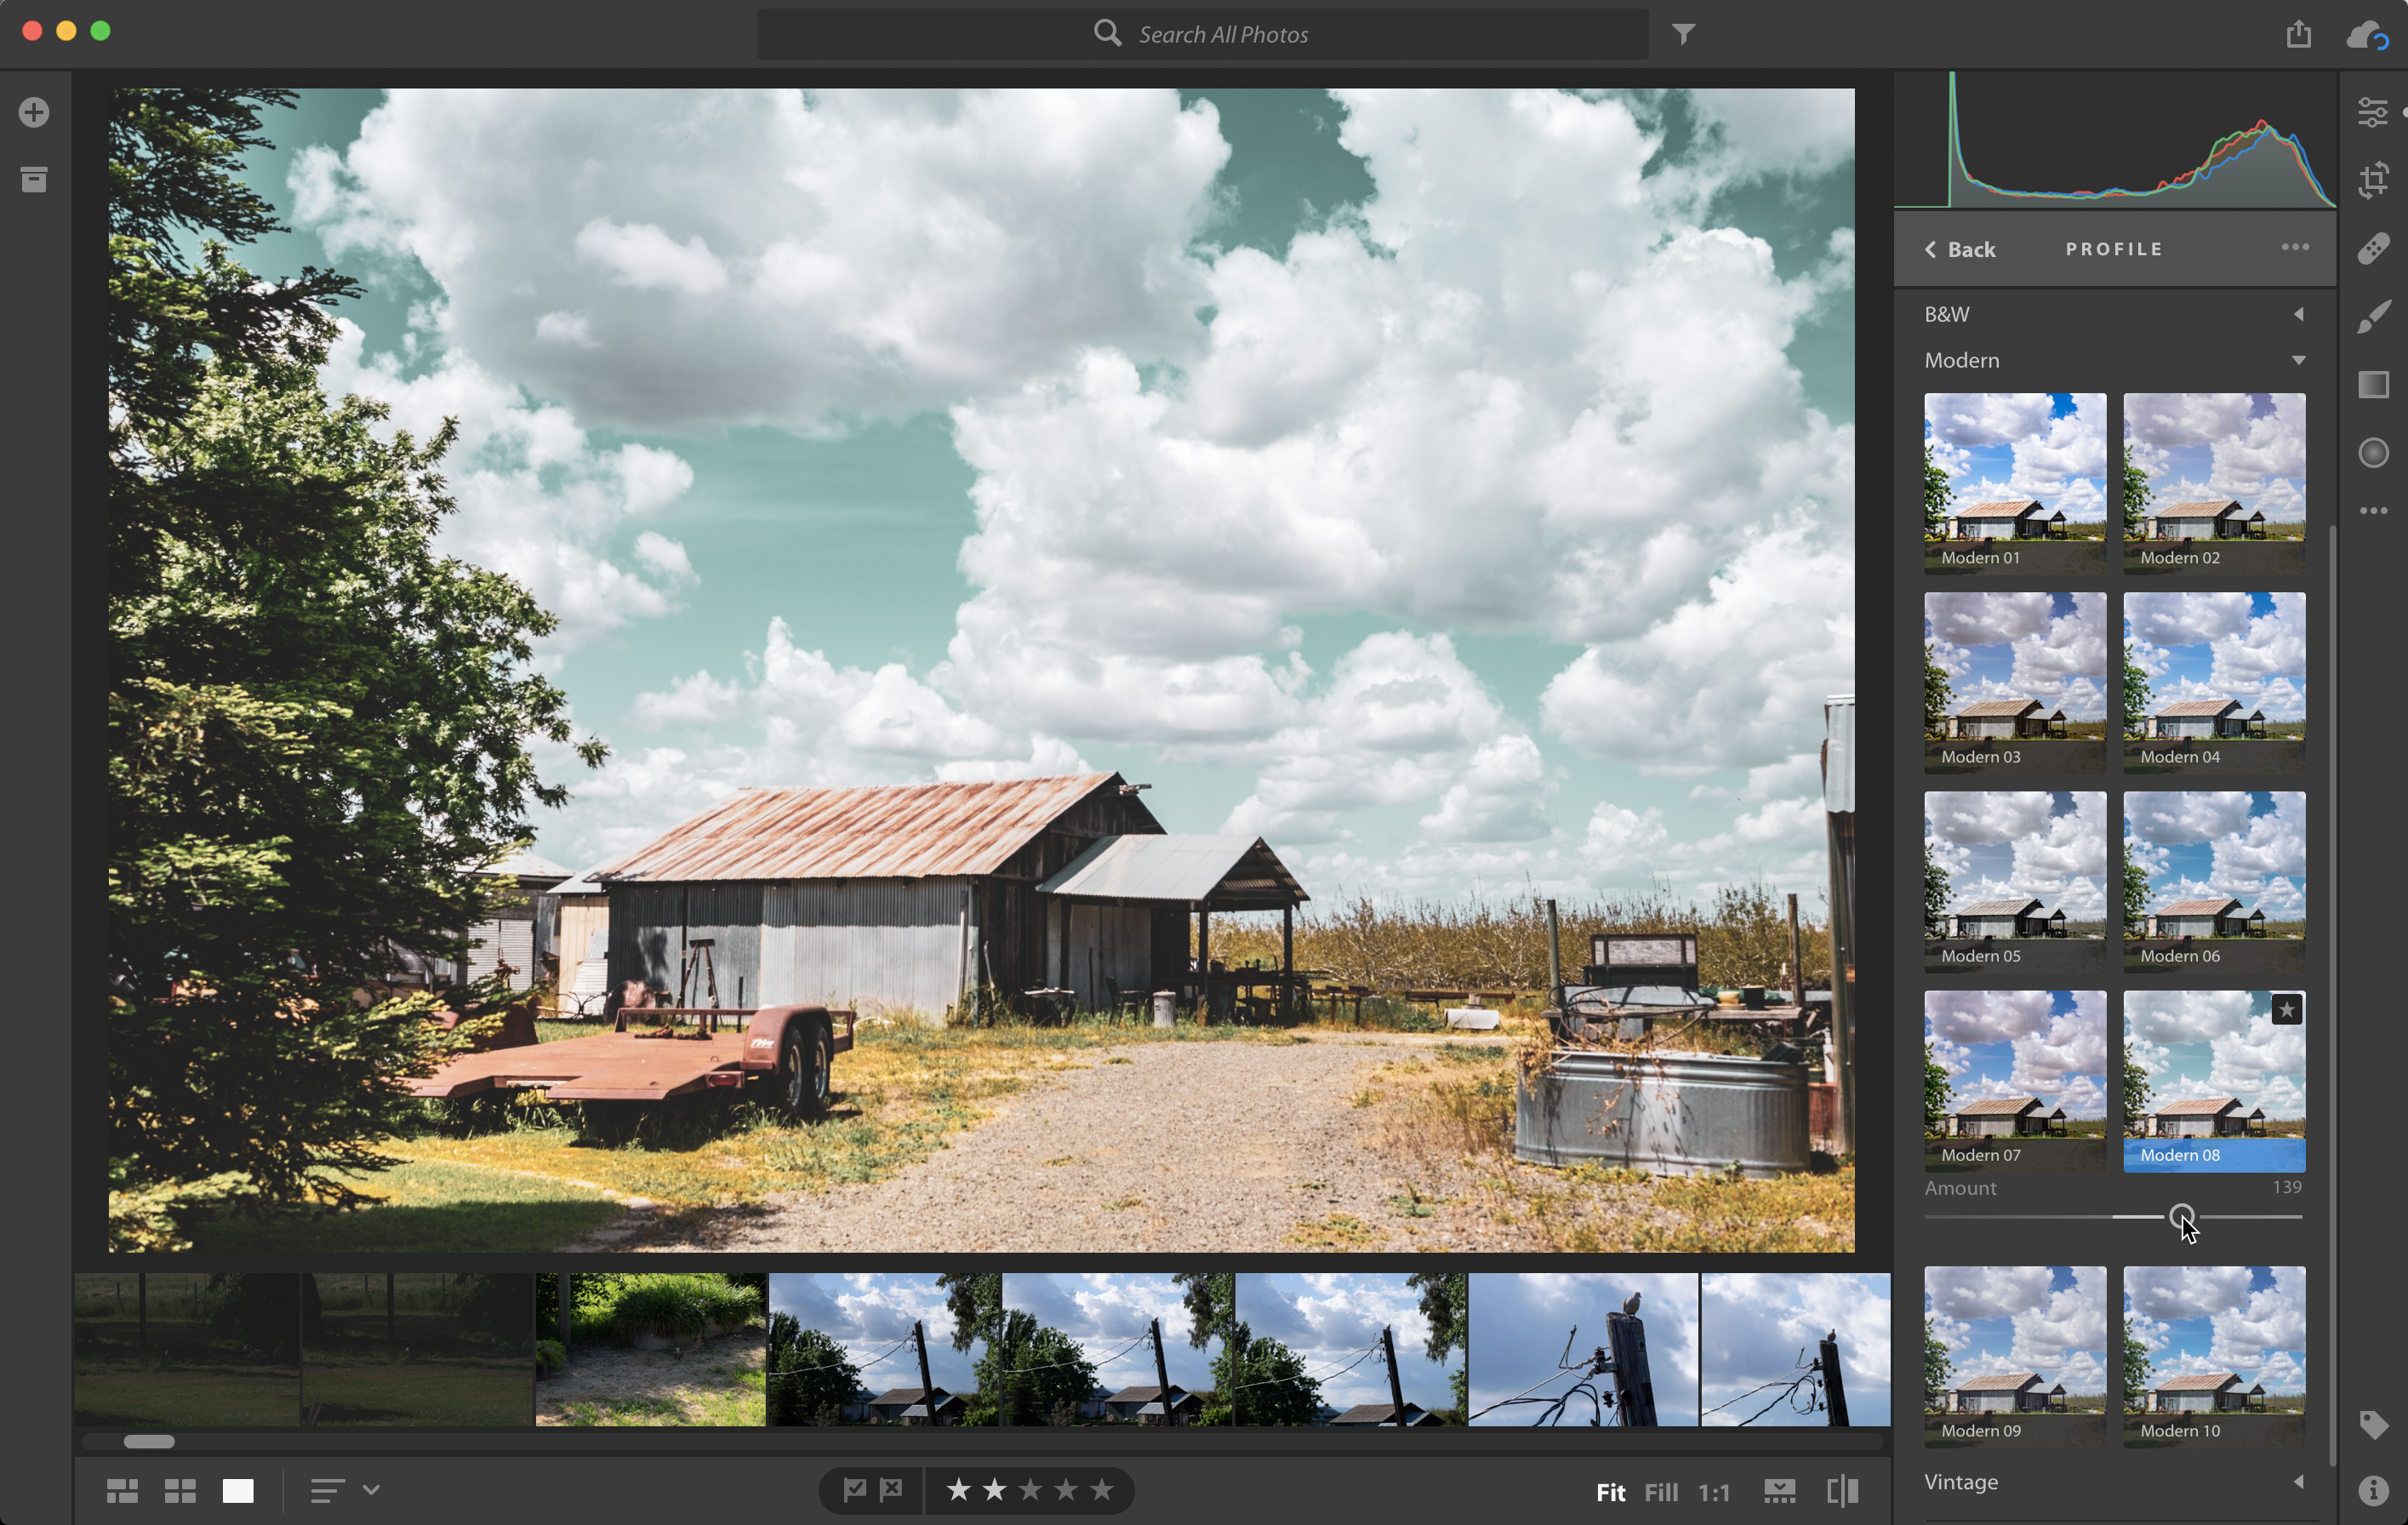
Creative Profiles
The creative profiles—categorized in Artistic, B&W, Modern, and Vintage sets—can be applied to any image, not just raw-formatted ones. You have some degree of control over the profile’s appearance by using the Amount slider that appears. But like the other profiles, these are also starting points that don’t affect any of the editing sliders.
Creative profiles sound a lot like presets, and to an extent that’s true. Some third parties have released profile sets that you can download and install; Adobe detailed how you can create your own camera-specific profiles (DNG Camera Profiles, or DCPs) in a video.
Unlike presets, though, profiles are a foundation on which to build edits. They can incorporate lookup tables (LUTs) that define values for each color (such as what exact shade of blue to use for a “blue” pixel). You can apply a profile to an image that’s already edited, and it won’t change any of the edit sliders.
Similarly, you can create a custom preset (or load an existing one) that includes a profile as part of the recipe for the preset’s look.
Be a Profiler
Although on the surface they seem like just another type of preset, profiles in Lightroom and ACR are powerful ways to define colors and styles that still allow you to perform other edits on top—and changing a profile doesn’t wipe out any edits you’ve made. And if you’re viewing and editing photos on multiple computers and devices, profiles will help ensure that color is consistent on all of them.
This article was last modified on May 7, 2018
This article was first published on May 7, 2018
Commenting is easier and faster when you're logged in!

Recommended for you
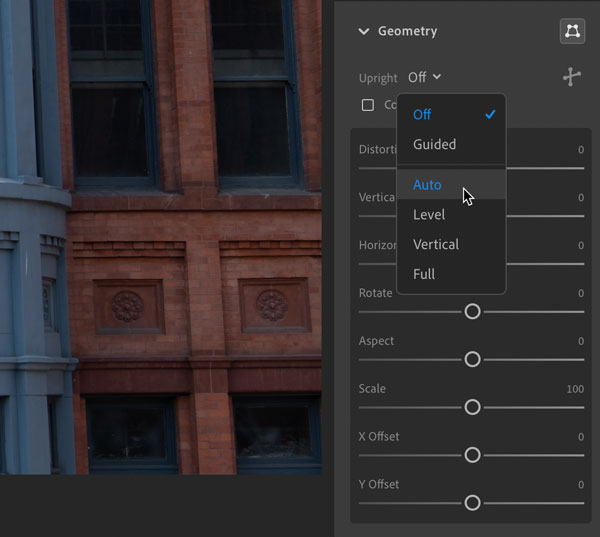
Straighten Up Photos with Lightroom’s Geometry Tools
Have people ever told you to “straighten up”? Maybe they think it’s your attitud...

Create Reflections in Photoshop with Smart Objects
With Photoshop’s Smart Objects you can combine multiple layers into one, distort...

Scanning Around With Gene: When Chemicals Plus Electricity Equaled Beautiful Art
You could certainly argue that the graphic arts industry, even in its present co...