
Using Lightroom and Photoshop Together on the iPad
Sophisticated photo editing techniques using the iPad versions of Lightroom and Photoshop.
This article appears in Issue 10 of CreativePro Magazine.
Lightroom or Lightroom Classic on the desktop is often all you need to edit photos, but occasionally you may run into a situation that demands a little more. That’s when you turn to the handy Edit in Photoshop command, which spirits the image off for more advanced processing, then returns the results to your Lightroom library.
But what about the iPad? With the Lightroom for iPad and Photoshop for iPad apps, you get many of the same advantages when you’re away from the computer, turning to Photoshop for some edits that need more than what Lightroom can handle, like making repairs, removing backgrounds, taking advantage of layers, and adding text. Here’s how to make the two apps work well together.
How to Do It
Before we get to a few specific examples, let’s go over the mechanics. First, make sure both Lightroom for iPad and Photoshop on the iPad are installed on your device. (As of this writing, the mobile version of Photoshop is available only for iPadOS, not Android devices.) The basic workflow is:
- In Lightroom, tap a photo you want to work on and then tap the Edit button to reveal the adjustment controls.
- Make the edits you want.
- When it’s time to hand off the image to Photoshop, tap the Share button and choose Edit in Photoshop (Figure 1). Lightroom creates a PSD file and opens it in the Photoshop app. Unlike when you open a standalone file in the Photoshop app, a prominent Send to Lightroom button appears at the top of the screen (Figure 2).
- Make your edits in Photoshop.
- When finished, tap that Send to Lightroom button, which saves the PSD file and imports it into the Lightroom library as a separate image.
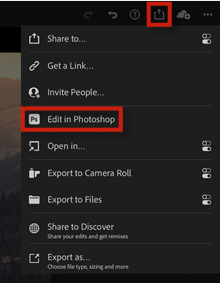
Figure 1. The Edit in Photoshop command under the Share options
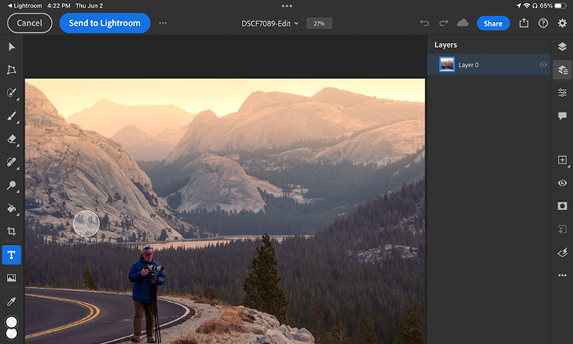
Figure 2. The Send to Lightroom button in Photoshop indicates the image is linked to Lightroom.
Because it’s a PSD file, if you were to choose Edit in Photoshop again, you’d still be able to access any layers and masks that you created before. The exception is if you apply Lightroom adjustments on the PSD file. For instance, if you decide to make the image black and white, Lightroom creates a new flattened PSD file and sends that to Photoshop for further processing.
An Important Caveat
Lightroom on the iPad relies on syncing your library via Creative Cloud, but if you use Lightroom Classic on the desktop, you could run into an issue. Unlike the Lightroom for desktop app, Classic does not upload full-size originals to the cloud. Instead, it generates Smart Previews for images in collections that you choose to sync.
When dealing with just Lightroom on the iPad and Lightroom Classic, this usually isn’t a problem. Any edits you make on the iPad are noted and reflected in Lightroom Classic, so when you return to the desktop the adjustments are magically updated to the originals in Classic.
However, a Smart Preview file itself is a lower resolution proxy for the original. Lightroom on the iPad shows the image at its original dimensions, but in reality the file is smaller, typically around 2,560 pixels on the long edge. This becomes important when sending the image from Lightroom on the iPad to Photoshop on the iPad. Photoshop receives the Smart Preview, and after you make your edits, sends the PSD file back to Lightroom—but that file is now at the Smart Preview resolution. When Creative Cloud syncs that edited version back to Lightroom Classic, or if you export it from Photoshop on the iPad, it’s stuck at that lower resolution.
That might not be a deal killer, but you need to keep it in mind if you use Lightroom Classic.
Better Repairs
The top reason I summon Photoshop for assistance is usually to make repairs that Lightroom can’t handle well. Lightroom’s Healing Brush tool is great for removing dust spots and small annoyances, but it lacks the Content-Aware capabilities of Photoshop (Figure 3).

Figure 3. Lightroom’s Healing Brush… well, it tries.
Using the Healing Brush in Photoshop produces better results. It doesn’t always nail it on the first try, particularly if you’re repairing a large area, but subsequent swipes of the brush tend to clean it up (Figure 4).
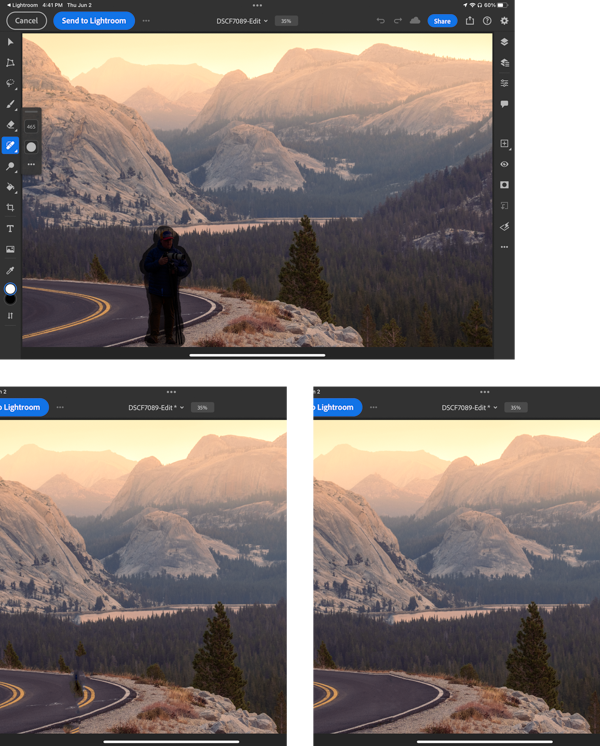
Figure 4. In Photoshop, using the Healing Brush over a few passes cleans up the area.
Remove Backgrounds
Lightroom was designed with “photographic” images in mind, meaning photos with more typical subject matter like landscapes and portraits. But photographers shoot all types of content (such as product shots that need more work than Lightroom is capable of) and store them in Lightroom libraries.
Now you don’t have to wait until you’re back at your desk to run an image through Photoshop. In Photoshop on the iPad, tap the Selection tools icon in the Toolbar and choose Remove Background. The app uses machine learning to determine the subject of the image and automatically creates a mask that hides the background. As with all automatic tools like this, your mileage may vary regarding what is selected (Figure 5). However, because it’s a mask, you can use other selection or brush tools to fill in areas that the feature missed (Figure 6).
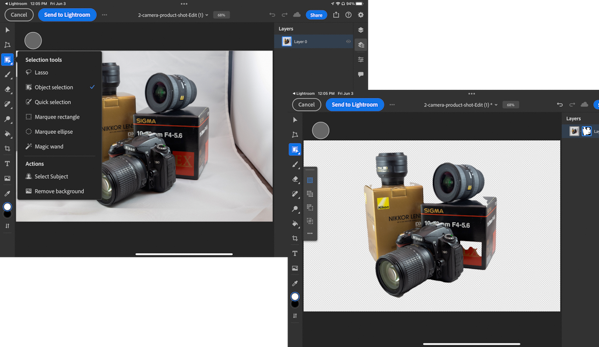
Figure 5. The Remove Background command has nixed the background but also some areas of the subjects.
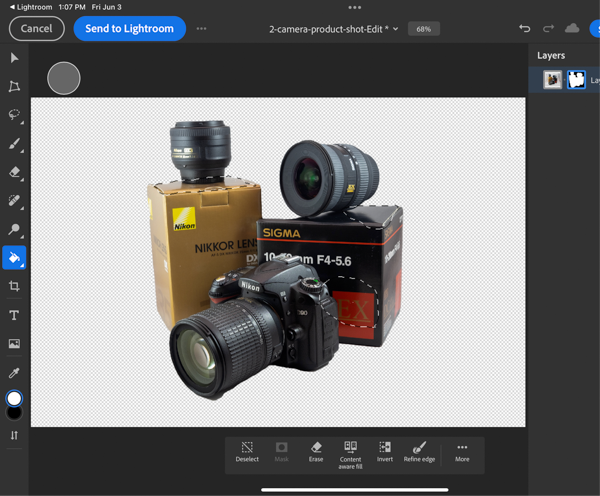
Figure 6. Filling the areas of the mask with white fixes the missed gaps.
Another method is to use the Object Selection tool, which enables you to drag a marquee around the object(s) you want to select, and then you can create your own mask. Looking at the example product shot, suppose you want to make the lens at right appear darker with more contrast. First, ensure that the image, not the mask, is active in the Layers panel, and then drag over the lens to select it (Figure 7).
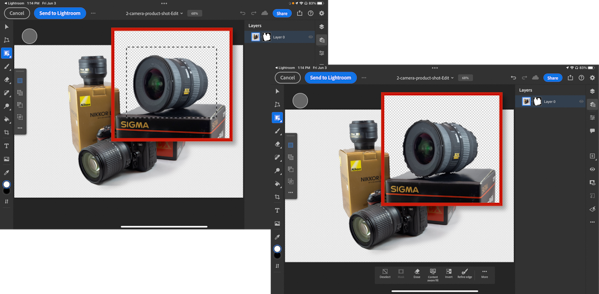
Figure 7. Drag around the object you want to select.
Next, create a clipped adjustment from your selection: Tap the Properties button to reveal its panel, tap the Add Clipped Adjustment button, and choose Brightness/Contrast. That creates a new adjustment layer above the image layer, and the Layer Properties panel includes controls tweaking the brightness and contrast. Because it was created with the Object Selection tool, the adjustment’s mask applies only to the area of the lens (Figure 8).
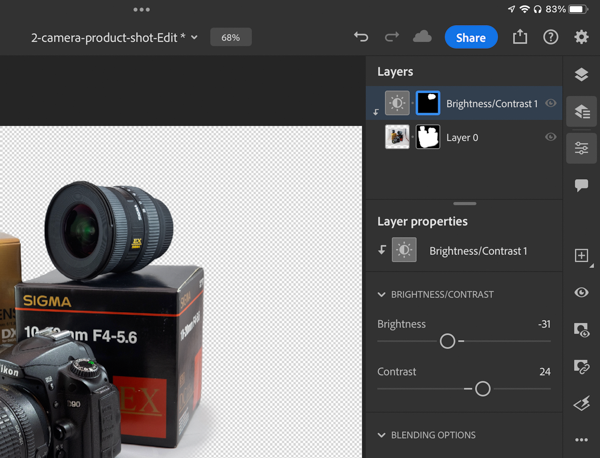
Figure 8. The adjustment layer affects only the selection previously made.
Work with Layers
Now let’s move to more of what most people tend to think of when Photoshop comes up: layers. Lightroom has always been the “layerless” way to edit photos, sacrificing some capabilities in order to maintain a less complicated experience. But sometimes you need the power of layers.
In the example, for instance, now that you’ve gotten rid of the studio background, suppose you want to replace it with a solid color. Here’s how you’d accomplish it:
- Tap the Add New button, and choose New Layer.
- In the Layers panel, drag the new layer down so it appears below the image layer.
- Grab the Paint Bucket tool from the Toolbar, make sure the foreground color is what you want, and then tap anywhere on the image to fill the layer with the color (Figure 9).
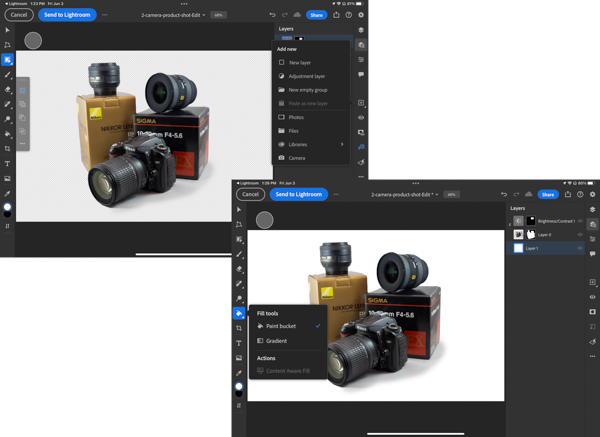
Figure 9. The new layer filled with white gives us a clean product shot.
Of course, you can do a lot more with layers. Photoshop on the iPad supports multiple layers, adjustment layers, and Smart Objects, which means you can composite other images into your Lightroom photos, change the blend mode, and more.
Let’s send the edited version of the first example photo from Lightroom to Photoshop and add a hot air balloon to the scene. You’ve already seen how to add an empty layer to the image, so in this case you’ll grab a photo stored in a Creative Cloud library (Figure 10).
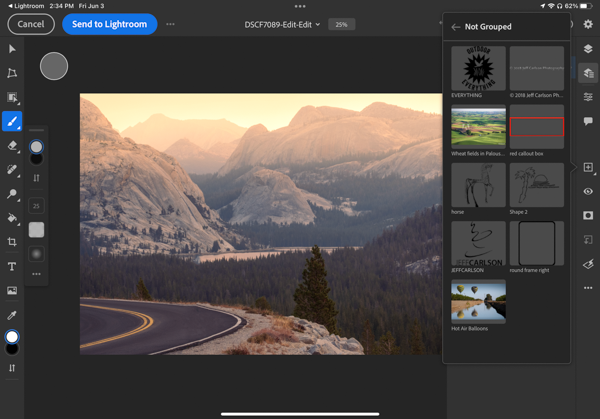
Figure 10. Grab assets from your Creative Cloud libraries.
Navigate to the photo, and tap it to add it to the scene. A current limitation in Photoshop for iPad is that, when placed, assets are not linked to their originals, so they’re placed flattened as a new layer. The image is added with the Transform tool active; resize and position it, and tap Done (Figure 11).
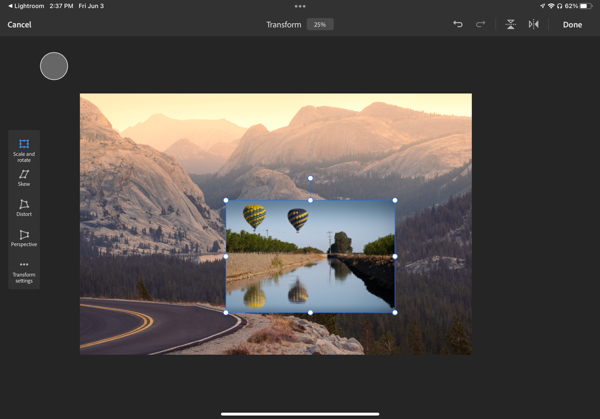
Figure 11. Transform the newly added asset.
Now you can use the Object Selection tool to isolate one of the balloons, and then tap the Mask button at right to hide the rest of the image (Figure 12).
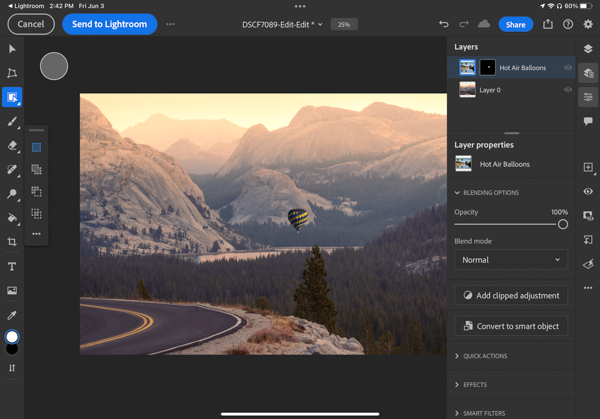
Figure 12. Mask the image to reveal only the balloon.
To go one step further, in the Layer Properties panel, you can tap Convert to Smart Object to make the balloon its own Smart Object. On the iPad, Smart Objects are still somewhat limited, but the capability is there if you’re accustomed to using them. (You’ll see more benefit if you open a Photoshop file created on the desktop that has Smart Objects, but we’re focusing here on the interaction between Lightroom and Photoshop on the iPad.)
Then it’s a matter of making the image fit within the scene, such as adding a clipped Hue/Saturation adjustment layer, flipping it on its vertical axis so the light is coming from the correct direction, and repositioning it in the frame (Figure 13).
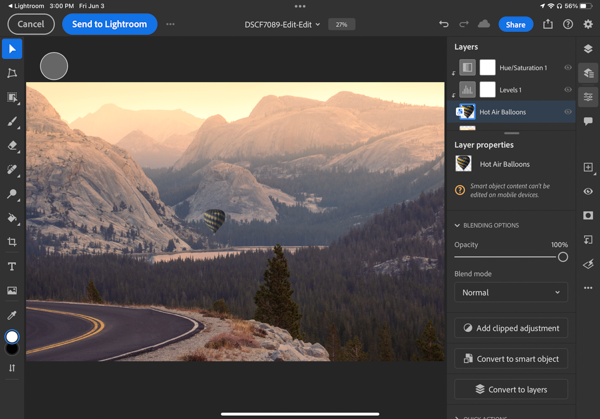
Figure 13. Adjust the appearance of the asset to make it blend with the scene.
Add Text
Another thing Lightroom can’t do is add text to a photo. Tap the Text tool in the Toolbar and tap anywhere on the image to create a new text layer. In the Layer Properties panel, choose the typeface, size, and other appearance attributes—oh, and type or paste in the text you want (Figure 14).
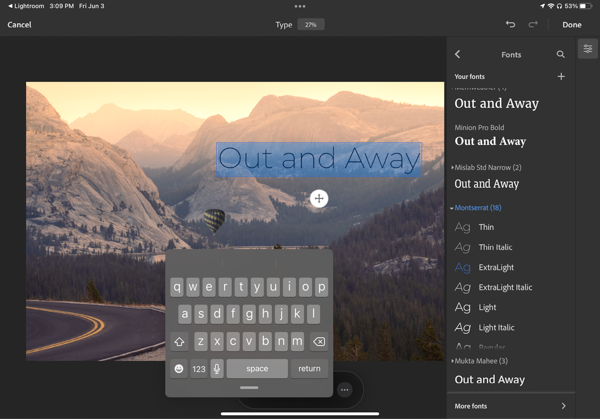
Figure 14. Add text to the composition on its own layer.
And, of course, the text remains editable as long as you’re in Photoshop; if you don’t make any additional adjustments in Lightroom, you can send it back to Photoshop and retain your layers and text options.
Lightroom and Photoshop Together Anywhere
The addition of mobile versions of Lightroom and Photoshop has been a gradual process, but finally we’re seeing the types of interaction we’ve grown accustomed to on the desktop. Adobe continues to beef up Photoshop for iPad, so I’m optimistic that at some point working on a tablet will give you everything you expect on your computer.
Commenting is easier and faster when you're logged in!

Recommended for you

Knowing Your Camera: The First Step for Getting Better Results in Photoshop
Understanding the abilities of your camera and Photoshop can help you produce be...

Compositing a Scene into a Head in Photoshop
However much you may toy with people’s expressions using the Liquify filte...

Lightroom 5 Round-up
Adobe’s Lightroom 5 was released this week with a number of new features includi...