

This InDesign tip on using the Ink Manager was sent to Tip of the Week email subscribers on February 22, 2018.

Sign up now and every week you’ll get a new tip, keyboard shortcut, and roundups of new articles, plus exclusive deals sent right to your Inbox!
Just scroll down to the bottom of this page, enter your email address, and click Go! We’ll take care of the rest. Now, on with the tip!
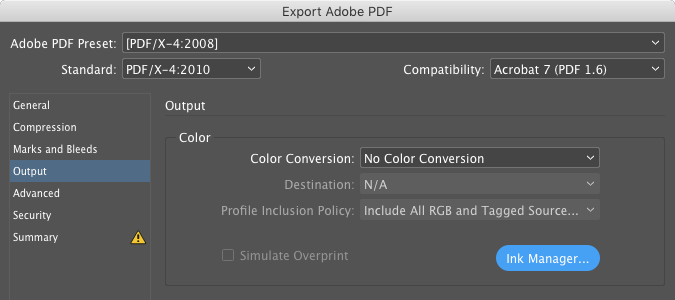
Before you export a PDF file for a commercial print job, you should click the Ink Manager button (in the Output pane of the PDF Export dialog box or the Separations Preview panel menu).
If you have spot colors in your document, they’ll show up here in the list of inks.

If you’re paying your printer extra to print special spot color plates, like varnishes or metallic inks, just leave those alone. But if you didn’t mean for them to be here, then turn on both the All Spots to Process and the Use Standard Lab Values for Spots checkboxes, so you’ll get the best possible conversion to CMYK.
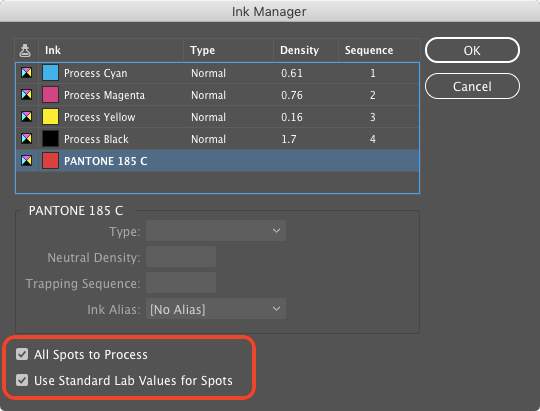
Lab is a color space that describes what colors look like to the human eye. So by choosing Lab here, you’re telling InDesign to keep the look of the color as close as possible to the original, even though you’re converting it to CMYK.
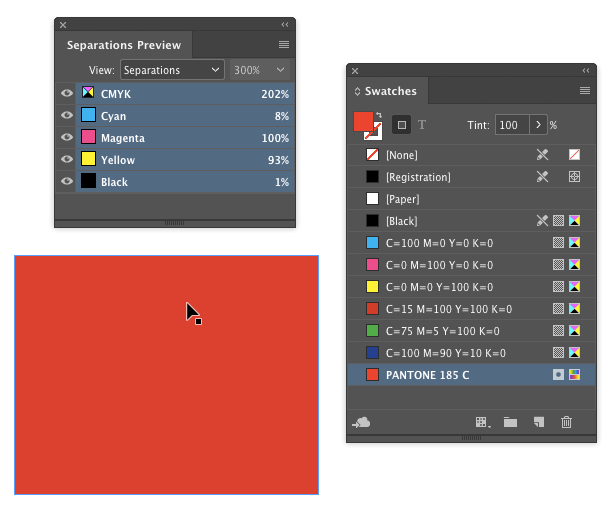
Also, if you ever come across a situation where you know a spot color was used in a document, but it’s not showing up in the Separations Preview panel, check the Ink Manager. The spot color was probably mapped to process there.
This article was last modified on August 8, 2019
This article was first published on February 27, 2018
Commenting is easier and faster when you're logged in!

Recommended for you

Reducing Total Ink with Selective Color Adjustments in Photoshop
Learn how to get better print results using a nondestructive layer adjustment.

Merging Separations into Composite CMYK plus Spot
Need to recombine pages that have been separated into individual color channels?...
How to Perceive Brightness More Accurately
Learn how to control the key factors that can affect how you perceive brightness...