


Illustrator’s Blend tool lets you combine shapes and colors between two or more objects to create a new object. The Blend tool blends colors as well as shapes and interpolates the intermediate steps to get from one object to the next. The ability to create blends is a fundamental skill for anyone using Illustrator. If you’re new to Illustrator, the following tips will get you on your way to a true blending buff.
To get started, set the Blend tool options by double-clicking on the tool or going to the Object menu and selecting Blend > Blend Options.
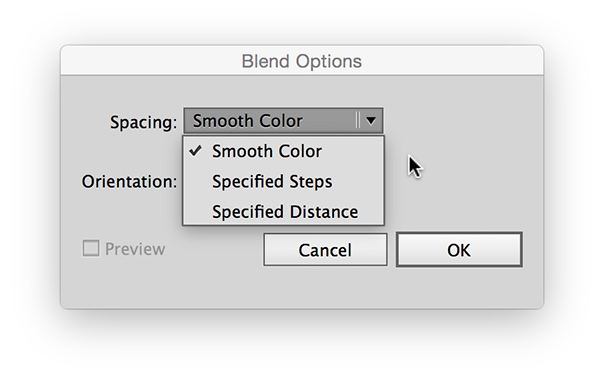
Set blend options that control the interim steps.
- Smooth Color estimates the number of steps needed to produce a smooth color transition between objects. Be aware that interim steps will be colored using process colors, even if you have a spot color assigned to an item or items.
- Specified Steps lets you control the number of interim items to get from one object to another.
- Specified Distance gives you control over the distance of each of the interim steps.
- Orientation sets whether the objects are oriented to the page, or the path (spine).
Once you have the options set, select the Blend tool and click on items you want to blend in the proper sequence. Or select the items with the Selection tool, then choose Object > Blend > Make from the menu bar.
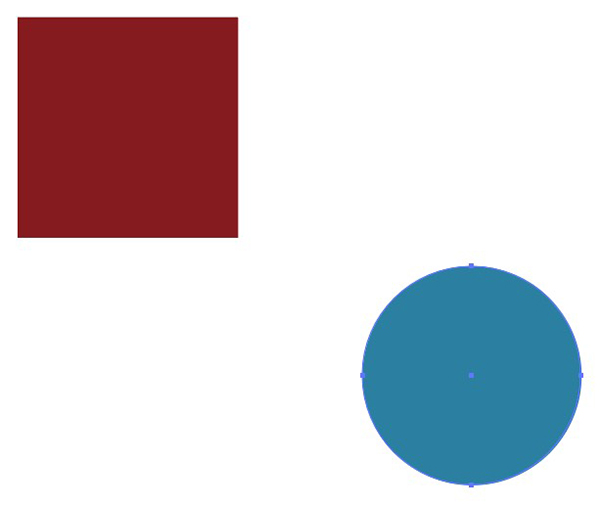
Select two or more objects to blend.

You can blend multiple objects.
The original objects can be manipulated and the interim steps will be updated to reflect these changes. To work with the original objects, double-click on one of them to enter Isolation Mode. Make your changes and hit Escape. The interim objects don’t have their own anchor points and therefore can’t be manipulated, unless you first expand the object (which breaks the blended object, so only do so once you’re satisfied with the blend).

Blend objects with a set number of steps to make the transition more distinct.

The two objects from above, with a smooth color blend applied.

The same three items from above, after a smooth color blend.
The original objects also cannot be moved around the stacking order—set the order before you create the blend—but you can reverse the blend direction. Under the Object menu, choose Blend, then choose Reverse Front to Back. The menu option just above is the Reverse Spine command, which will reverse the direction of path the blend occurs along. The spine is just a path that starts out as a straight line, but can be manipulated like any other path. You can even set a new path to be the spine by selecting that path and the blended object, then selecting Replace Spine from that same Blend menu. Finally, if you want to remove the blend and get your original objects back, choose Release from the Blend menu.

Reversing the blend from front to back.

Blend multiple objects that overlap.

This article was last modified on January 19, 2016
This article was first published on January 19, 2016
Commenting is easier and faster when you're logged in!

Recommended for you
How to Make a Spiral in Illustrator
Learn how to make spirals of all sizes and varying depths with Illustrator’s Spi...

Moving Text Styles from InDesign to Illustrator and Photoshop
Steve Werner dives into the details of getting your styles "to go."

Interview with Monika Gause, Print Designer and Illustrator Expert
Q&A with Monika Gause, who is presenting at the 2026 Design + AI Summit for Crea...