
Using Generative Recolor in Illustrator
Refresh your color workflow by pairing a time-honored technique with the latest AI technology.


This article appears in Issue 29 of CreativePro Magazine.
Of all the new AI tools in Adobe Illustrator, I’m getting the most out of Generative Recolor. At first, it can be perplexing: Prompt it for a tropical beach party, and it invariably returns an option with dull, gloomy hues instead of the vibrant palette you expected. However, two key advantages make Generative Recolor worth a second look:
- The surprise factor of generating color from text prompts is great for getting unstuck.
- Generative Recolor can create palettes from gray-toned artwork.
Colorizing Monochromatic Artwork
Fleshing out ideas in shades of gray or monochromatic values is a time-honored technique for designers who want to focus on composition and contrast before figuring out a color palette. This is where Generative Recolor shines, enabling you to start from tonal art and easily create a colorful combination (Figure 1).
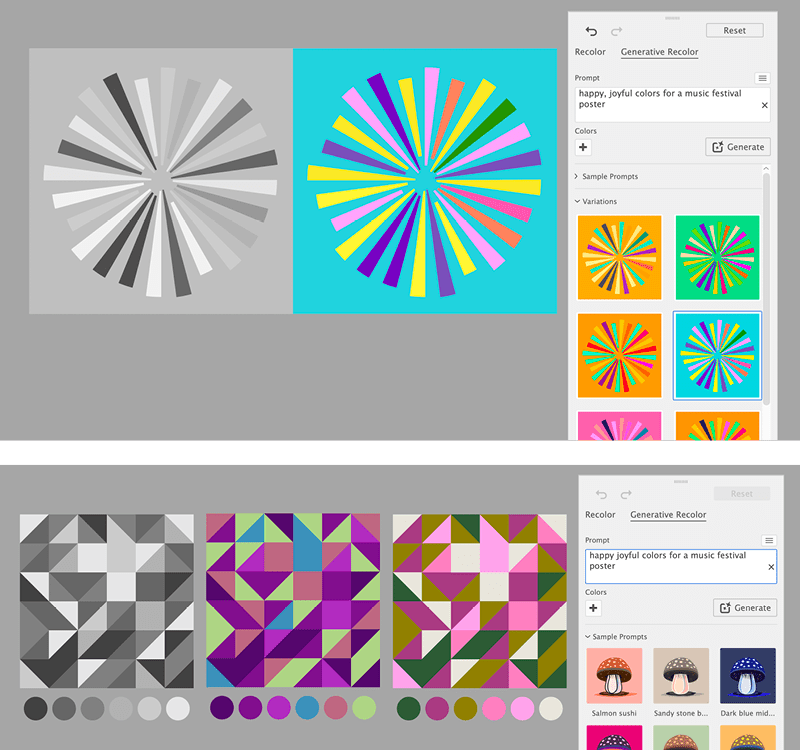
Figure 1. Generative Recolor presents colorful options from monochromatic art.
The variations it generates often become an inspirational starting point, and less-than-perfect results can quickly be improved using the other tools inside Recolor Artwork.
Tip: Avoid using the grayscale mode or slider in the Color panel to color your art. Generative Recolor can’t tell grayscale tones apart. Instead, use grays from RGB, CMYK, or HSB; Generative Recolor will treat these as individual colors, giving you the multicolor results you want.
Applying tonal swatches
The default document presets for CMYK and RGB include a ready-made color group of gray tones in the Swatches panel that you can apply to your artwork (Figure 2). Working from a limited set of values from dark to light will keep you from
creating excess colors in the final result. Recolor Artwork treats any color, no matter how close the numbers are, as an individual color. The more limited your starting palette, the easier it will be to edit later.

Figure 2. Illustrator’s RGB and CMYK document presets include a folder of dark- to light-gray swatches.
Getting started
Once you’ve applied the gray swatches, select your artwork (I like to work on a copy when recoloring) and choose Edit > Edit Colors > Generative Recolor. Start by clicking a sample prompt, then click Generate or press the Enter key. You can also enter Recolor Artwork by clicking the button on the Contextual Task Bar or the top Control bar.
Each time you generate, four new variations are added to the panel. Clicking a variation applies it to your design. The variation thumbnails are small; type may not be visible in the thumbnail, so click each variation to preview it on your artwork (Figure 3).
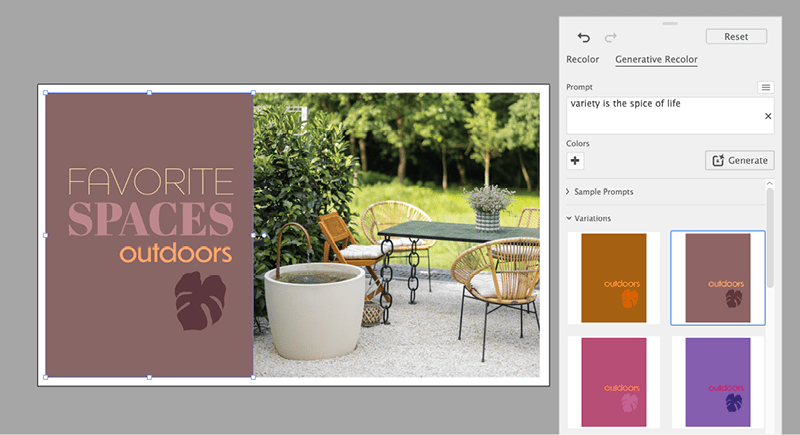
Figure 3. Click a variation to see a fresh color palette applied to text and artwork.
You can zoom in and pan while recoloring, but don’t click away from the Recolor panel or the artwork until you are ready to end your session and apply the final palette. This closes the panel, and you’ll lose the other variations you generated.
Managing the results
With tonal art, the first variation will stay monochromatic. You can remove any variations you don’t want to keep by opening the ••• menu on the thumbnail and selecting Delete. This can help you focus on the color options you want to revisit (Figure 4).

Figure 4. Deleting variations in Generative Recolor to tidy up the panel
The starting color palette of your artwork influences the resulting color every time you click Generate. Click the Reset button to reset your artwork to the original gray palette or click Generate from an applied color scheme to create different results.
Hidden yet important settings for recoloring
Because Recolor Artwork has been evolving since CS3, the feature now comprises three panels; only the Advanced Options panel contains the Color Reduction settings that govern every part of this feature, including Generative Recolor. These settings are easy to miss but crucial for recoloring.
Check the current settings by clicking Advanced Options at the bottom of the Recolor Artwork panel. There, you’ll find the button for Color Reduction Options (Figure 5).

Figure 5. Click this button to open the Color Reduction Options dialog box inside Advanced Options.
In the Color Reduction Options dialog box, under Preserve, uncheck Black, White, and Grays so they can be recolored (Figure 6). The Preserve setting will persist until you change it or quit Illustrator. After changing the settings, you can return to Generative Recolor by clicking its button at the bottom of the panel. Moving from the Advanced Options panel to the Generative Recolor panel will remove any variations you previously generated, so address the settings first.

Figure 6. Check your settings before recoloring. These settings apply everywhere inside the Recolor Artwork feature, but they are easy to miss.
Prompting Tips for Generative Recolor
You’ll get the most reliable results when you sprinkle the names of colors in your prompt, like crystal blue sky and emerald green forest. Adobe’s prompting guidance is to use color-related words and describe the mood you want to convey. Generative Recolor does not yet respond to negative prompting like avoid green to remove colors from the results. I’ve found that using color-descriptive words like faded, muted, or pastel will sometimes, but not always, work.
Prompt ideas
I try to embrace the unpredictability and even have fun creating prompts from song titles or imaginative scenes. A single prompt will generate fresh results with every click. Here are a few you can try:
- futuristic glowing lights across the evening sky
- tangled up in blue
- happy, vibrant colors for a music festival poster
- brand colors for a modern, sleek tech startup
- Mardi Gras parade jazz band
- siren song in Sicily
You can also prompt in over 100 languages. According to the User Guidelines from Adobe, you may not use the names of individuals, brands, or copyrighted content in your prompts.
Using color swatches to enhance a prompt
Click the plus button, then choose a swatch. Click the button again for each added swatch, up to five (Figure 7). Global swatches will not be applied to the finished art, but regular swatches may be applied in some variations.

Figure 7a. Adding color swatches can help guide the prompt to results that harmonize with your brand colors.
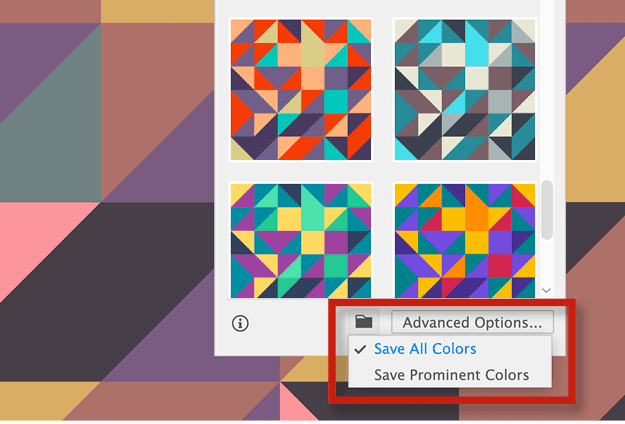
Figure 7b. Saving a swatch group for the selected color option
Saving color swatches from variations
You can exit recoloring with only one variation applied. If you’re torn between several palettes, save them as swatches to apply later. Select a variation and click the folder button at the bottom of the panel to save a color group. Then, click the final variation to apply it to your art, and click away from the panel to finish recoloring.
Limitations
Besides the only-one-variation-when-exiting rule, you need to keep a few other limitations in mind:
- Freeform gradients will appear solid black in the variation thumbnails but will be recolored as you click the variations.
- Blends are also tricky: Thumbnails will look like the blends will not be recolored, but once you click a variation, it will be applied.
- Adobe advises that you outline type before recoloring, but I’ve found that type (both live and outlined) will be recolored; it just doesn’t always show in the variation thumbnail.
- Images and other raster content will not be recolored.
Refining the Results
To refine your chosen variation, click the Recolor tab at the top left of the panel and use the color wheel interface. Click the Link icon to unlink and adjust individual colors; otherwise, all colors will move together. Drag a color circle (color stop) to another location on the wheel. To adjust the color further, double-click a stop to open the Color Theme Picker (Figure 8). If the color doesn’t appear in your art after changing it in the Color Theme Picker, click the color stop again to “wake up” Illustrator.

Figure 8. Unlink colors to adjust them individually, and double-click a color stop to open the Color Theme Picker.
Further adjustments
The left randomizing button above the color wheel shuffles the assignment of colors in the art. Use the right button to randomize the saturation and brightness of the individual colors.
Use the slider below the wheel to lighten/darken or change the saturation of all colors at once. By default, the slider controls brightness. Switch buttons to control saturation with the slider. I rely on the tool tip on the slider handle to remind me if I’m adjusting brightness or saturation.
Not happy with the results? Use the Undo button at the top of the panel to retrieve a recent combination. There are Undo/Redo buttons on Recolor and Generative Recolor, but not on the Advanced Options panel (Figure 9).

Figure 9. The randomize buttons, Brightness/Saturation slider, and Undo/Redo buttons.
A Jump-Start for Color Inspiration
The Recolor Artwork feature has always been somewhat mystifying, but with the new addition of Generative Recolor, it’s easier and faster to jump right in and, with a few clicks, discover inspiring color combinations for your work. When paired with tonal or monochromatic art, it can generate exciting surprises that refresh your color workflow in Adobe Illustrator.
Commenting is easier and faster when you're logged in!

Recommended for you

What’s New in Illustrator: The July 2022 Release (Version 26.4)
Numbered and Bulleted Lists, a History panel, and new 3D features have been adde...
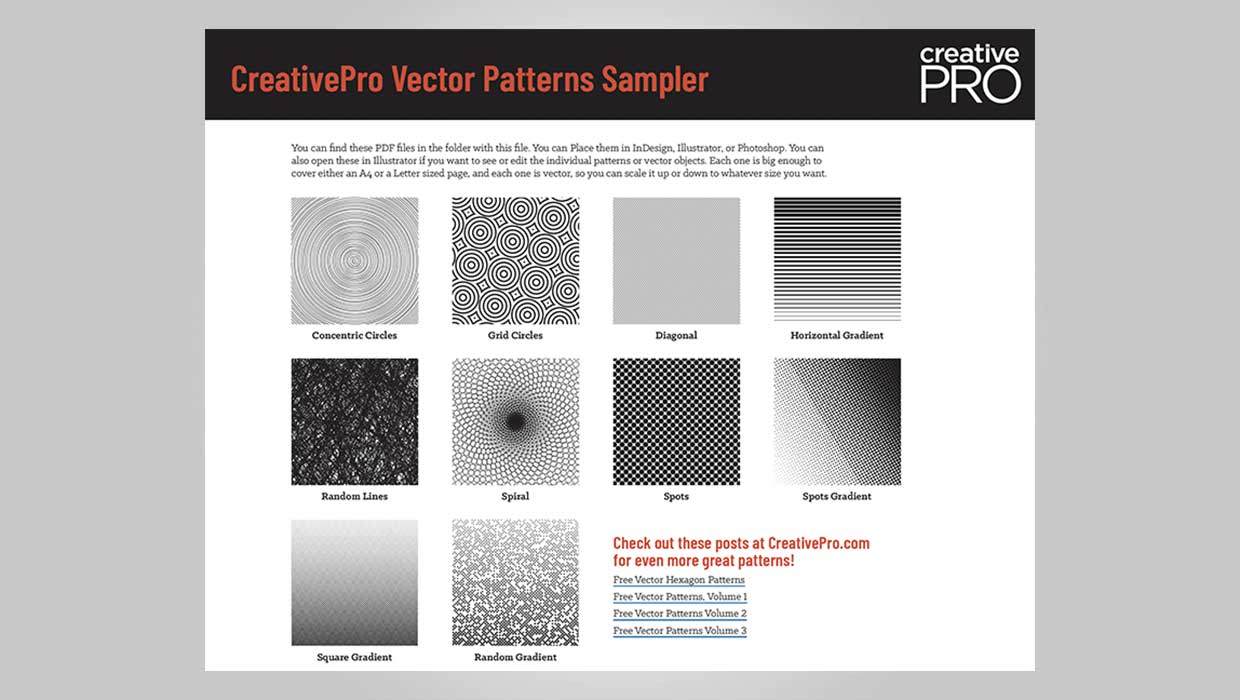
Downloadable: Vector Patterns
61 scalable patterns that you can use in InDesign, Illustrator, or Photoshop

Making a 3D Rainbow in Illustrator
Explore the amazing things you can do with Illustrator’s 3D and Materials panel