Transparency in Bitmap Images in InDesign
A comment on Sandee's recent post about using (or not using) EPS files inspired me to write up a quick comment about Bitmap images and InDesign. Note that Bitmap images...

 A comment on Sandee’s recent post about using (or not using) EPS files inspired me to write up a quick comment about Bitmap images and InDesign. Note that Bitmap images are different than “bitmapped images.” The latter is just any kind of raster (pixel) image. However, a “Bitmap” image is an image that is in Bitmap mode in Photoshop — one that has nothing but black and white pixels. We also call these bi-level or 1-bit images, because each pixel is described with a single bit of information (on/off, black/white).
You can save Bitmap images as TIFF, EPS, or PSD (Sandee will be happy to note that I virtually always would use TIFF or PSD). If you import a Bitmap image into InDesign, the white pixels are treated as transparent areas and the black pixels knock out any color behind them.
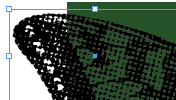
Here’s a Bitmap image that I created by taking a grayscale picture, choosing Image > Mode > Bitmap in Photoshop, then choosing Halftone Screen to fake the look of a low-lpi line screen. I saved it as a PSD and imported it into InDesign.

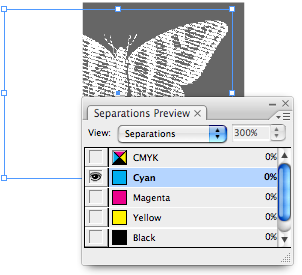
You can see that the white pixels are transparent. The Separations panel easily shows us that it is knocking out the green areas behind it.


Of course, when working with Bitmap images, you typically need them to be around 600-800 ppi for newsprint or low-end uncoated jobs, or 1,000-1,500 ppi for higher end jobs on coated stocks. Otherwise, you’ll see jaggy edges.
Bitmap images are great for special effects, especially when simulating low-frequency halftones!
This article was last modified on December 18, 2021
This article was first published on January 8, 2008
Commenting is easier and faster when you're logged in!
Recommended for you

Free Webinar: Creating Social Media Assets with InDesign
Join us Thursday, 6/22 at 10 am Pacific for our 75-minute free webinar that feat...

HELIOS Ships Server Solutions for Intel-based Macs
HELIOS Software GmbH, a leading provider of enterprise and prepress server solut...

Creative QR Codes
Want to enhance user engagement, improve brand recognition, and increase scan ra...


