
Track Changes in InDesign and InCopy
When more than one person can change or comment on your project’s text in InDesign, it’s handy to know who said what.

This article appears in Issue 39 of InDesign Magazine.
When teams collaborate on a document or review one another’s work, it’s important to have a system to track each person’s changes, to compare what was in a story and what is now in a story. Both InDesign and its editorial counterpart, InCopy, have long had change tracking. (Note that when I talk of “changes,” I mean changes to text—text formatting, images, or the position of objects on the page cannot be tracked.) Allow me to walk you through the steps of configuring, making, reviewing, and printing tracked changes in and between copies of InDesign and/or InCopy.
1. Define Your Identity
Before you can begin collaborating on a document, you have to identify yourself so that you and your collaborators know who made what change. Additionally, each person can choose a unique color to visually identify the changes. Go to File > User to reveal the User dialog box (Figure 1). In the User Name field, enter your full name or at least as much of a name as required to identify you to the rest of the team. As you can see by the user name I’ve chosen, if you work in both InDesign and InCopy, or multiple versions or platforms of either, it can also be helpful to identify the software, version, and operating system in your user name.
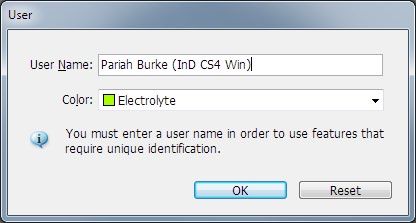
Figure 1. The User dialog box, which is identical in InDesign and InCopy.
the uniqueness of either user names or user colors. There is nothing to prevent two different people from using the same color or even the same user name. You can get third-party commercial systems to ensure user identi- ties, but those are usually pricey add-ons that come as part of larger publishing workflow sys- tems based on InDesign and InCopy. Within a small workflow, I recommend good old-fash- ioned communication with team members to assure that user names and colors are unique.
2. Enable Track Changes
Now that you’ve told InDesign and/or InCopy who you are, it’s time to configure individual stories to begin tracking changes. You do this only after the initial layout or writing. Changes are tracked per story in both InDesign and InCopy. Follow these steps to enable change tracking on one or more stories. InDesign: Place the Type tool cursor inside a text frame—or open the story contained within that frame in Story Editor—and choose Type > Track Changes > Track Changes in Current Story. In files with more than one story, you can initiate change tracking in all stories in one fell swoop by selecting Type > Track Changes > Enable Tracking in All Stories. These options are also in the Track Changes panel menu (Window > Editorial > Track Changes). InCopy: In any of InCopy’s views—Galley, Story, or Layout—place the text cursor inside a story (or text frame in Layout view). Then either choose Changes > Track Changes in Current Story, press the keyboard shortcut for that command—Cmd/Ctrl+Y—or click the Enable Track Changes in Current Story button on the Track Changes Toolbar (Figure 2). To track changes on all stories in the document, choose Changes > Enable Tracking in All Stories.
Figure 2. The InCopy Track Changes Toolbar
3. Make Changes
The applications changes are now tracking changes, so go ahead and make some! What types of changes are tracked? [Pariah grabs a ukulele and sings the following. Actual audio recording removed to prevent your dogs from howling and your ears from bleeding.] Oh… Track Changes tracks changes like… Additions and deletions: “Add this and remove that” Replacements and revisions: “Let’s change that to this” Notes and comments: “Did you see the game last night?” But what it doesn’t track is: Frame changes, page changes, font changes Size changes, image changes, style changes Alignment changes, inserting placed content (Yes, even placing documents within a tracked story), and… Any other type of change except typed changes and note insertions. Each change made by you or someone else will appear in the story in InDesign’s Story Editor and InCopy’s Story and Galley views. Additions appear highlighted in the reviewer’s color (Figure 3).

Figure 3. A passage of text showing different types of changes from multiple individuals
4. Add Notes
In addition to tracked text-content changes, both InDesign and InCopy can include notes within text. Notes aren’t technically tracked changes because you can insert and review notes even if change tracking isn’t enabled. Moreover, change tracking does not keep track of edits made to note content. Still, notes are an important part of document collaboration, so I’ll touch on them here. InDesign and InCopy have a Note tool, which you’ll find on the Tools panel. Clicking the Note tool somewhere within text—even in the layout—will create a note, a non-printing comment, in the text story. An alternative to using the Note tool is to choose Type > Notes > New Not e in InDesign and Notes > New Note in InCopy. Note: You can’t attach notes to objects, only inline within text. Once the note is begun, you can then type the content, which will be visible in InDesign’s Story Editor and InCopy’s Galley and Story views. Although the note content itself will be invisible in the layout view of a document, you will see a colored marker in the layout to indicate the presence of a note at that location (Figure 4).
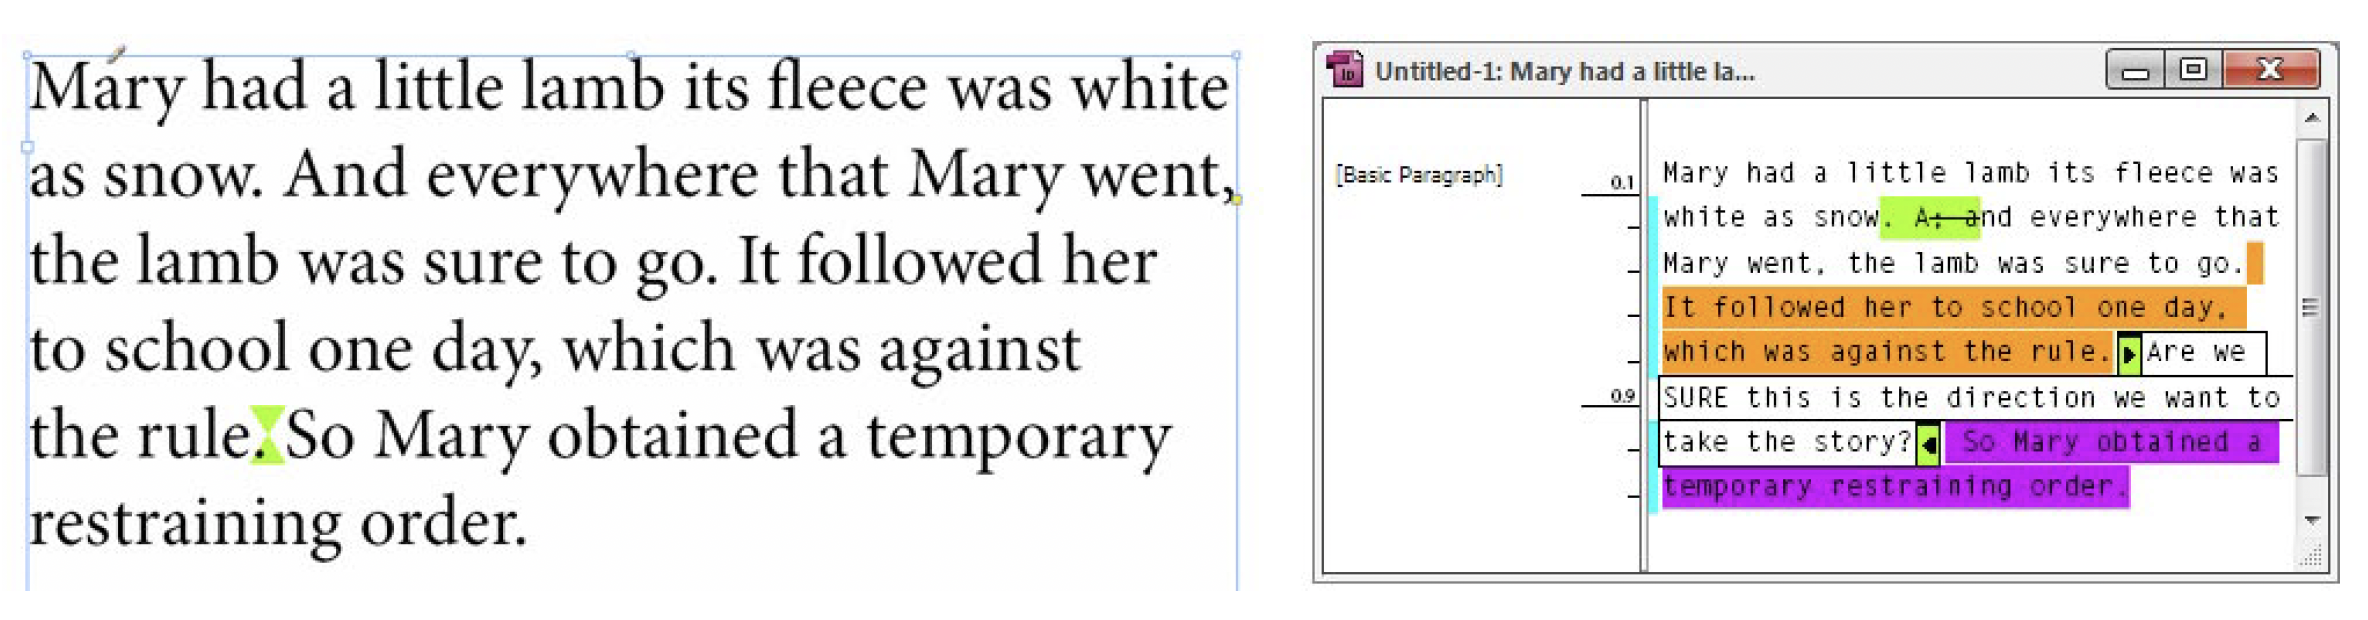
Figure 4. In the layout, a colored marker identifies the presence and location of a note (left) while the actual note is visible in InDesign’s Story Editor (right).
5. Review, Accept, and Reject Changes
Now that your document has made the rounds among the reviewers, it’s time to review all the changes and decide whether to accept or reject them. Each change to a story records within the document not only the change itself, but also who made the change and when. After inserting the text cursor inside a changed bit of text (remember that in InDesign, this appears inside the Story Editor only), that information can be viewed on the Track Changes panel in InDesign and the Change Info panel (or toolbar) in InCopy (Figure 5).
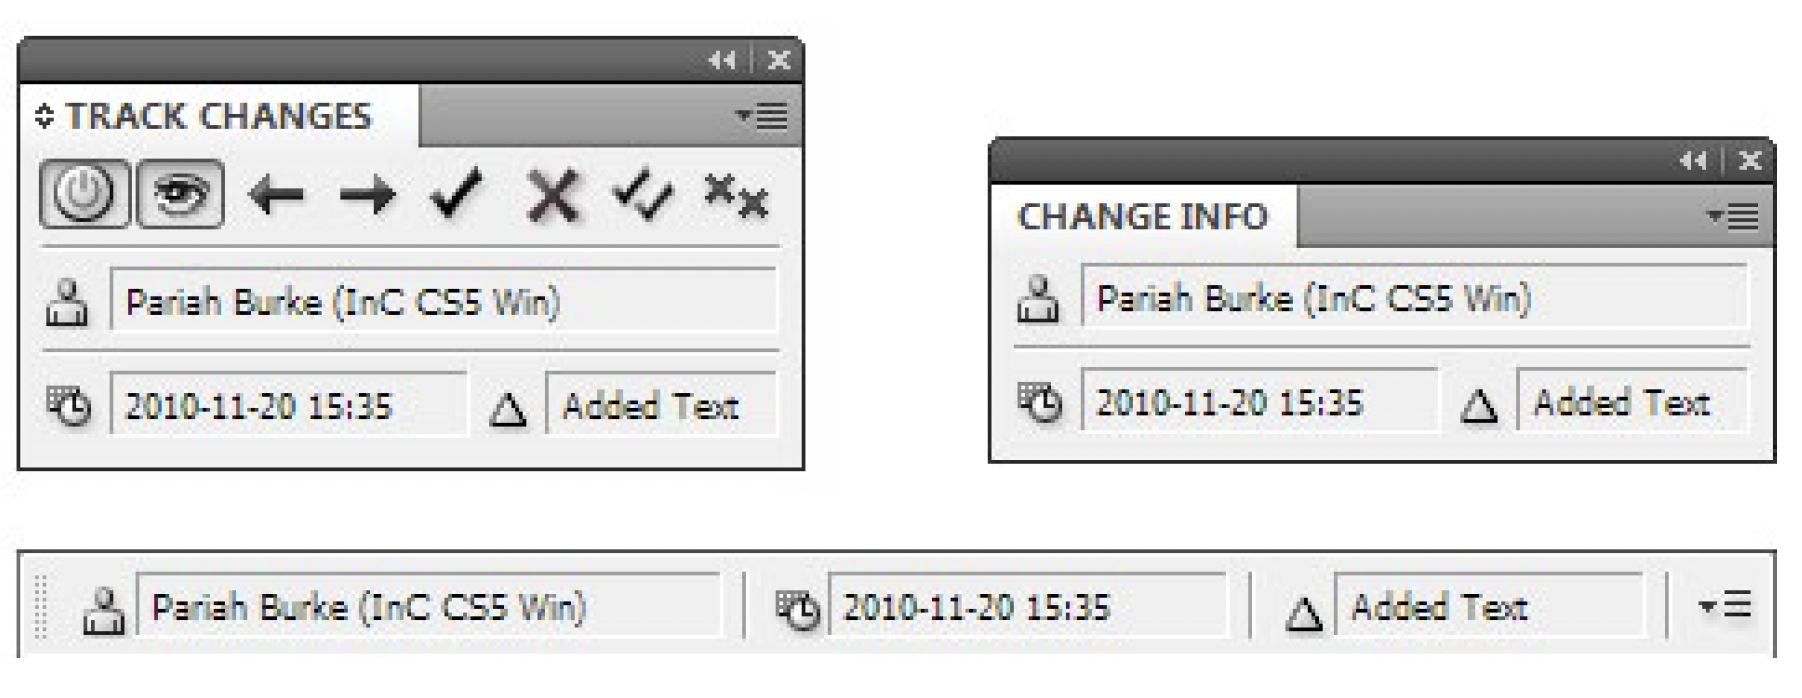
Figure 5. The Track Changes panel in InDesign (upper left), and InCopy’s Change Info panel in toolbar mode (upper right) and panel mode (bottom)
Figure 6. The Track Changes panel in InDesign (above) and the Track Changes toolbar in InCopy (below)
5. Printing Tracked Changes
You don’t have to accept changes. If you’re happy with the changes made by your collaborators, you can simply leave the changes as they are, including their highlights and tracking data, and print or export the document. The end result of the changes will output, but highlights won’t. Nor will struck-through text. Thus you can retain tracked changes within the InDesign (or InCopy) document itself without fear that those changes or even removed text will appear in your final output document. On the other hand, if you do want to print change tracking data, you can with a little extra effort—but only in InCopy. With a change-tracked story opened in InCopy, choose File > Print (Figure 7). In the Options section, select the radio button beside Override Current Galley Settings (which apply to Story view as well), and then check Print Tracked Changes. Set the dropdown field to its right to either Visible, which will print only those tracked changes are shown, or All, which will print even hidden changes. Also select Show Tracked Changes Backgrounds in Color if you’d like to output change highlighting matched to the reviewers’ user colors.
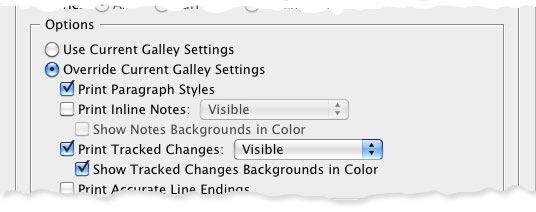
Figure 7. Enabling printing of tracked changes in InCopy
Commenting is easier and faster when you're logged in!

Recommended for you

FSI FontShop International Announces the Release of the Long-awaited Fourth Edition of FontBook
FontBook is the largest type reference in the world. Since 1991, “the big...

This Week in InDesign Articles, Number 20
The tablet is... almost here? here? Whatever the case, you need to check out the...

3D Graphics Made Easy with Adobe Dimension CC
The release of InDesign CC 2018 wasn’t the only great news coming out of the Ado...