
Top Tips From CreativePro Week 2019
Erica Gamet shares a dozen of the coolest tips and tricks she learned at CreativePro Week.


This article appears in Issue 123 of InDesign Magazine.
One of my favorite things about CreativePro Week (of which The InDesign Conference is a part) is squirreling away so many new nuggets of knowledge over the course of the event. I always come away with a new keyboard shortcut, a novel approach to a problem, or a different workflow option. Sometimes those gems get delivered from the stage in one of the sessions, but often I pick up new (or new-to-me) features from chatting with the attendees. It’s a great reminder that we’re all there to share the love of InDesign and the other great design tools, and that knowledge flows in all directions when you bring together so many creative minds. To keep the knowledge flowing, here are a dozen of the best tips I learned.
1. Adding Captions to All Placed Images
David Blatner and Anne-Marie Concepción shared a quick and easy way to add automatic photo captions in their “Best of InDesign Secrets” tips-a-palooza. Setting up automatic caption options is easy, involving a visit to the Object menu, then the Captions submenu where you choose Caption Setup. But to actually apply those options, you need to select individual image frames… and we all know you can’t select frames on different spreads. Or can you? The secret is to use the Links panel. Select the images you want to add captions to, then choose Captions from the Links panel menu and generate either live or static captions (Figure 1).
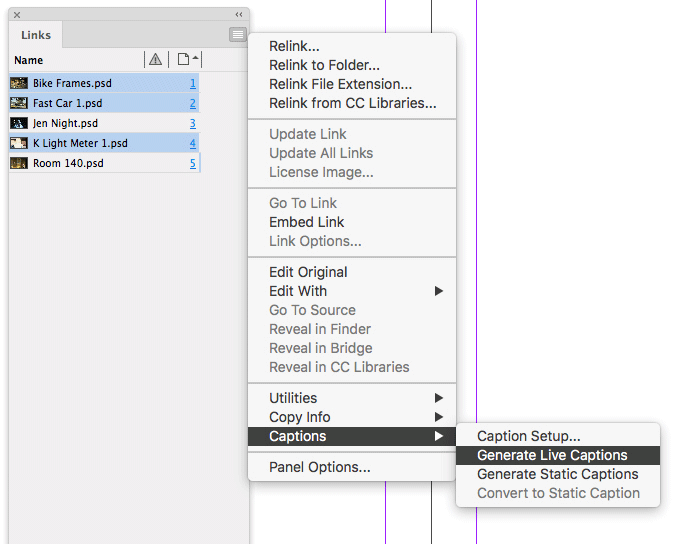
Figure 1. Apply captions to images across spreads using the Links panel.
2. Flexible Object Styles
Laurie Ruhlin’s deep dive into object styles covered all aspects of automating elements on your InDesign page. Object styles offer the ability to ignore traits entirely. Whereas paragraph styles have options that are set or not—and any deviations become overrides—object styles give you the option of ignoring an attribute. For instance, if you define a text frame with a stroke and fill, but leave the Text Frame General Options unselected, you could have a frame with two columns or three and neither would be seen as an override (Figure 2).
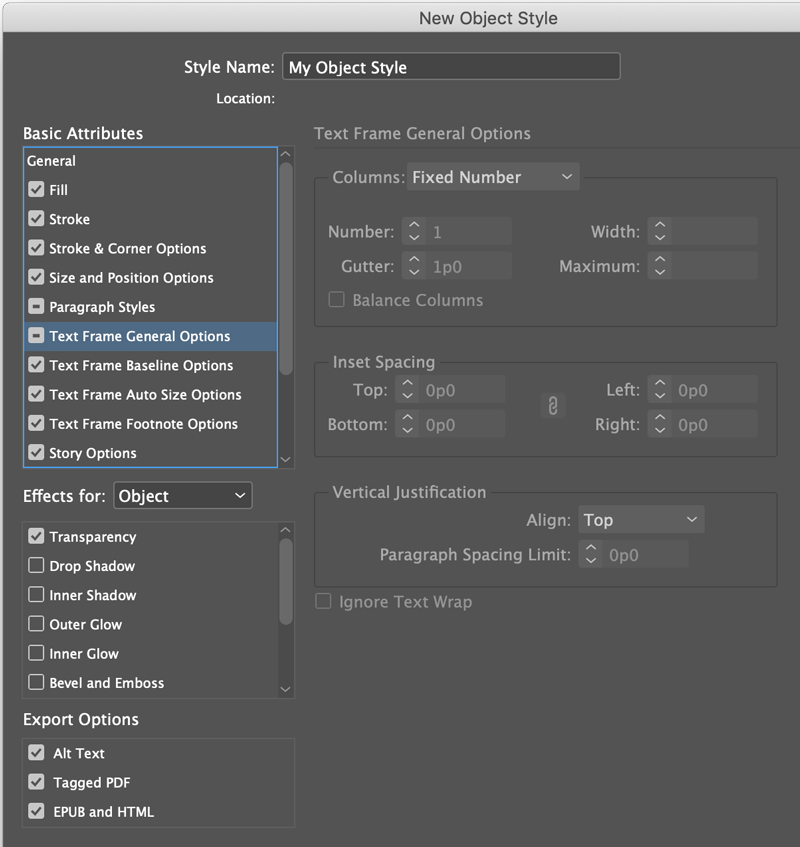
Figure 2. Leaving Text Frame General Options unselected allows you to use one style to format frames with different numbers of columns.
3. Placing Multiple Images
Mike Rankin covered some of the essential techniques for working with images in InDesign. Although the session was filled with juicy information, the more basic tips ended up making the biggest impact on attendees. Two of them dealt with placing files into an InDesign layout.
First, when you have multiple images loaded into your Place cursor, you can use the arrow keys to rotate through the images to find the one you want to place, and then click or drag to place the image onto the page. To replace an existing image in your layout, hold down the Option or Alt key while hovering over the existing image and click.
Need to add more images to a loaded Place cursor? Just choose the Place command again (or use the Command/Ctrl+D shortcut). This second tip is handy if you forgot to grab an image, and it’s essential if you need to select images that live in different folders on your computer.
4. Synchronizing Master Pages
In Brian Wood’s session on pages and master pages, he pointed out that using the Book feature is a great way to share settings and attributes across documents. You can synchronize styles and swatches from a common style source document with all other documents contained in that unified book. When choosing which items to sync (Book panel menu > Synchronize Options), select only Master Pages—which is off by default—and then synchronize to ensure that the masters are the same throughout all of those documents.
5. A Streamlined Scripts Panel
David Blatner talked about scripts and pointed out the importance of keeping your script collection organized. Scripts mainly live in the Scripts Panel folder (InDesign application folder > Scripts > Scripts Panel). Inside that folder, you can create subfolders and put them in any order that makes sense for you. They will appear in the same order inside the Application folder in the Scripts panel. For example, I arrange my scripts in folders named by client or by presentation when I’m training and teaching.
6. A Shortcut for Building Bulleted Lists
You never know where you’ll find the next great tip. I got a cool one for speeding up the production of bulleted lists from an attendee during lunch. To make my lists, I often choose Apply Bullets in the Bullets and Numbering pull-down menu, set the hanging bullets and tabs using the Tab panel, and then I create my style. But it’s much faster to start by simply clicking the Bulleted List button in the Control Panel. This gives you hanging bullets, and from there you can make quick adjustments by Option/Alt-clicking the button again and tweaking the values. Just remember to redefine your styles as needed after each adjustment (Figure 3).
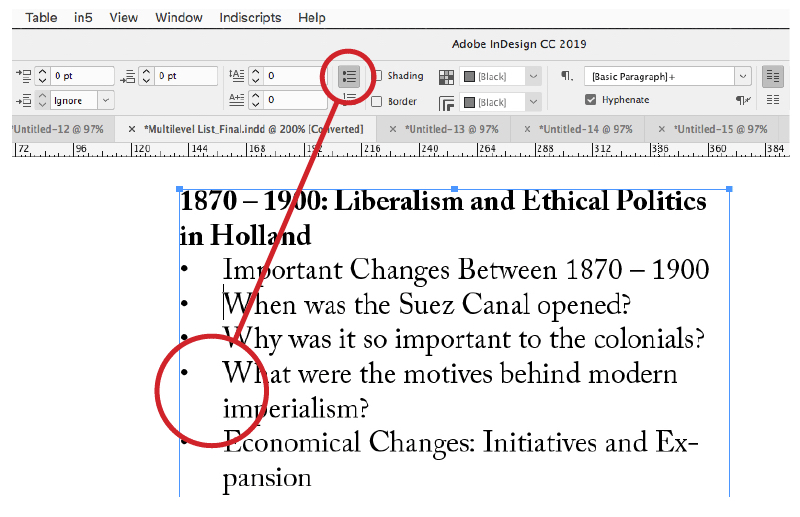
Figure 3. Use the Bulleted List button in the Control panel for quick hanging bullets.
7. Faster Masters
Sometimes learning something as simple as a new keyboard shortcut sparks joy, and one attendee I met was excited to learn some new shortcuts in the Pages panel. If you’re currently on a master page, clicking the Create New Page icon in the Pages panel will create a new master page, rather than a document page. If you’re on a document page and you want a new master, Command/Ctrl-click to create that master. Command+Option-click (Ctrl+Alt-click) to open the New Master options dialog box where you can assign a name and whether or not to base your new master on another master page.
8. Animated Pie Charts
Diane Burns showed a few methods for animating graphs and charts within an InDesign document. One involved creating bar charts where the bars grow to their full value. She also showed a nifty technique for making pie charts that involved using Illustrator’s Graph tool. After you’ve baked the perfect pie chart in Illustrator, copy it and paste it into InDesign. Each wedge of that tasty graph is a separate object that you can pull part and manipulate. That makes it super easy to spin the pie around, then slide a wedge out to highlight its values. For an example, click here.
9. Breaking Images Out of Table Cells
Jason Hoppe went deep on designing with tables and showed off more than a few really cool tips. One of my favorites was moving images contained in the table out of the boundaries of their cells. You may have noticed how images can grow past the right edge of a cell (which you can fix by choosing Clip Contents to Cell). But Jason showed how to use baseline shift to let images break free of the upper and lower cell boundaries. Simply select a cell (or an entire row), and then choose Shift+Option/Alt+Up Arrow. Keep in mind that each successive row is actually at the top of the stacking order, so the items in the lower rows will overlap any objects they encounter in the cells above (Figure 4).
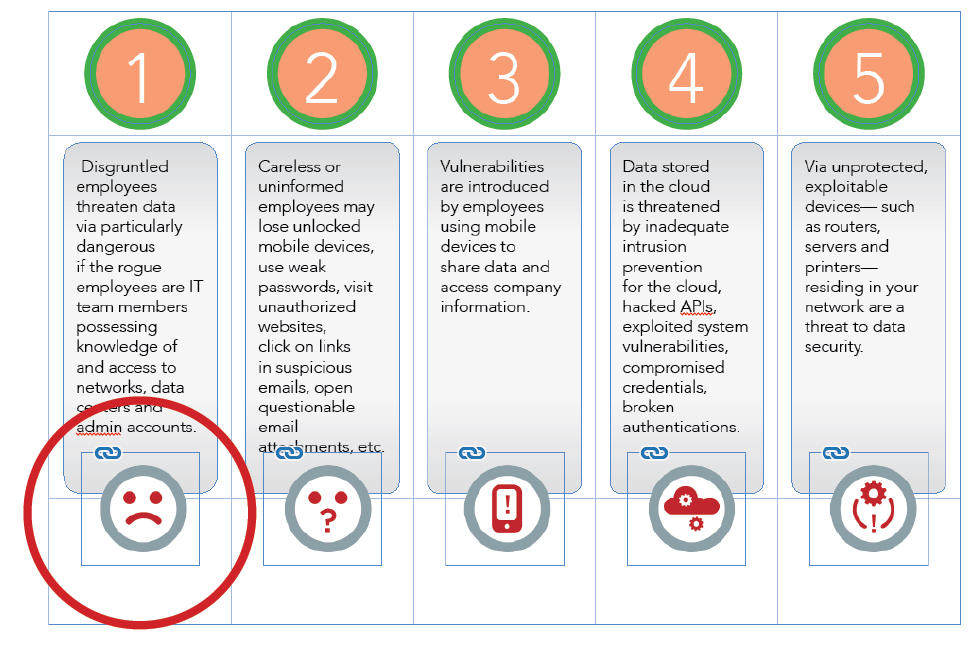
Figure 4. Use baseline shift to push images in cells outside the upper and lower boundaries.
Note that this doesn’t work with table cells that are graphic cells. That is, you need to place a graphic frame inside a table cell as an inline anchored object. That way you can actually select the frame as a “character” to adjust its baseline shift.
10. Spacing Text with Invisible Rules
David and Anne-Marie combined two tricks that give paragraphs a little breathing room between the first line and the top of the text frame. Because the first paragraph in a frame won’t honor any Space Before settings, you can cheat and use an invisible paragraph rule. From the Paragraph panel menu, choose Paragraph Rules. Turn on a rule above, assign a color of None, set an offset amount, and be sure to select Keep in Frame. To add shading behind the paragraph that fills the same space—but doesn’t spill out of the frame—tick the Shading box. You’ll need to adjust the settings from the panel menu so that the offset value is the same amount as that of the paragraph rule and also is set to Clip to Frame. I had never seen this done before and was reminded how much I love discovering how to do something I never even thought of doing (Figure 5)!
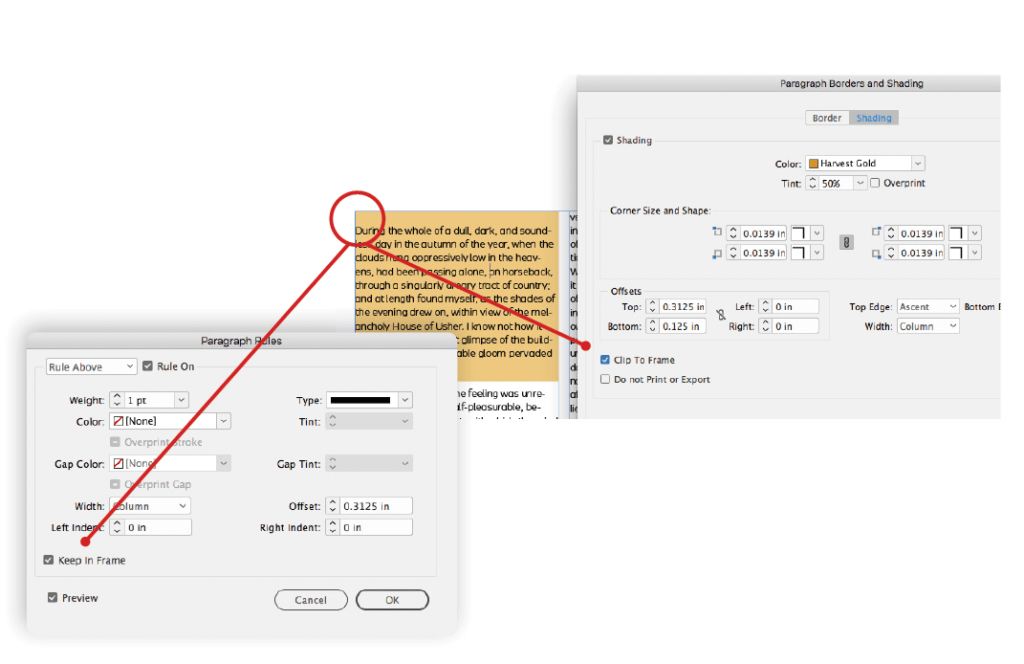
Figure 5. Using paragraph rules and shading to give the first paragraph a little breathing room.
11. Edit Original Shortcut
One attendee told me that a tip from Mark Heaps at the Ask the Experts table made her day because it was going to save her so much time when she got back to work. Mark showed how Option/Alt-double-clicking on a placed image opens the file in the default application on your computer, which makes for easy round-trip editing. Keep in mind this does the same thing as selecting Edit Original from the Links panel menu. If you want to use a different application to edit the image, you need to use the Edit With command.
12. Assigning the Right Language (or No Language) to Text
This final tip comes from my very own “cavalcade of tips” that kicked off The InDesign Conference portion of CreativePro Week. At the bottom of the Character panel, you can select a language for your text. This tells InDesign which dictionary to use when running a spellcheck, which can prevent snafus like trying to check Spanish text using the US English dictionary. You can also set the language to No Language, which will prevent text from being spellchecked altogether. This also comes in handy when you have technical jargon or code. You can even build the No Language attribute into your hyperlinks character style, so it never spellchecks URLs.
These are just a tiny handful of the bevy of tips you’ll pick up at The InDesign Conference, from speakers and attendees alike. You never know what you’ll learn or where that knowledge will come from. We hope you’ll join us in 2020 in Austin, Texas… and come ready to learn!
This article was last modified on January 19, 2026
This article was first published on July 4, 2019
Commenting is easier and faster when you're logged in!

Recommended for you

Tip of the Week: Starting a Document on a Left-Hand Page
David Blatner shows the easy way to change a document so it starts on a left-han...
InReview: ID-Extras Translate
Guy van der Kolk reviews an impressive solution for translating InDesign documen...

Setting Reversed Out Headline Text (White on a Black Bar)
Reversing a line of text out of a black or colored bar is not hard, though it ca...