
It’s time to talk T-shirts again! My name is Sebastian bleak and for over 7 years, I was a Production Manager for the best custom T-shirt shop in Los Angeles. And I’m excited to share what I learned there in a series of articles here at CreativePro, called T-Shirt Design and Production. In this article, we’re talking about how to use graphic styles in Adobe Illustrator speed up the production of cut contour lines (the lines used to guide a plotter as it cuts out the shape of your design).
What are graphic styles?
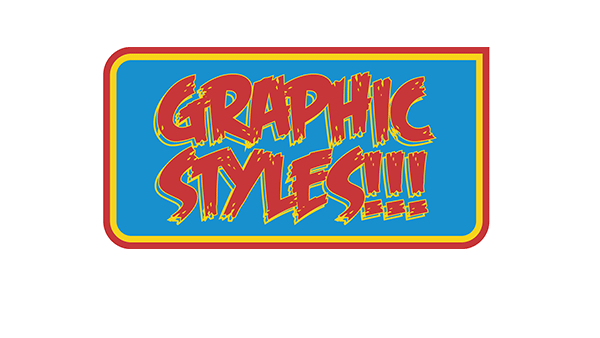
Simply put, graphic styles offer you the ability to save an appearance that you can apply to objects in Illustrator. That makes graphic styles a very important tool in the process of creating T-shirts stickers and other promotional items.
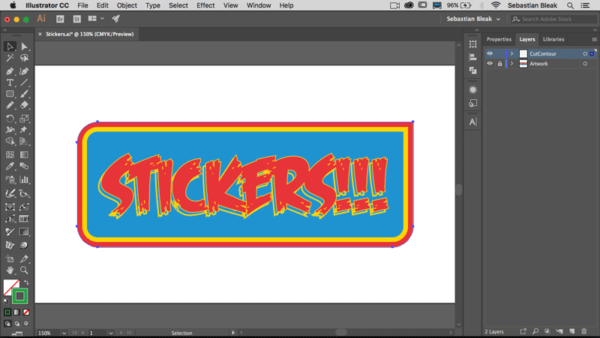
In the figure below, I have a basic shape that I’m going to use as my CutContour for the sticker artwork that is hidden in the layer below. Once I turn this fill into a stroke you’ll be able to see the artwork we’re intending to print. I just wanted to show you the shape we’re creating for the plotter to follow along.

Once I have built the shape for the CutContour, I need to go to the Stroke panel and make changes to the settings so the plotter will read this path as a cut line. The exact settings will vary depending on your plotter. I’m going to use settings for a Roland Versacamm.

CutContour Settings:
- Stroke weight set to “0 pt” by typing in “.0001”. This is the only way you can get a stroke weight of zero and still retain the stroke color.
- Butt Cap
- Miter Join
- Limit set to 1
- Align Stroke to center
- The stroke color is spot color swatch named “CutContour” spelled exactly as you see it. The color itself can be any color but it must be a spot color named CutContour.
Keep in mind that the settings are kind of like a magic spell. If you get one ingredient wrong, the magical spell won’t work correctly. In this case that means the blade of the plotter will not cut along that path to create your awesome stickers.

Now imagine having to repeat that process every single time you want to produce a new design! That ends up being a bottleneck in the production workflow. The way to speed that up is to simply record those appearance attributes as a graphic style.
Creating a Graphic Style
Once you have created an appearance that you would like to use again, just bring up the Graphic Styles panel (Window > graphic Styles) and click on the new Graphic Style icon at the bottom right corner of the panel.
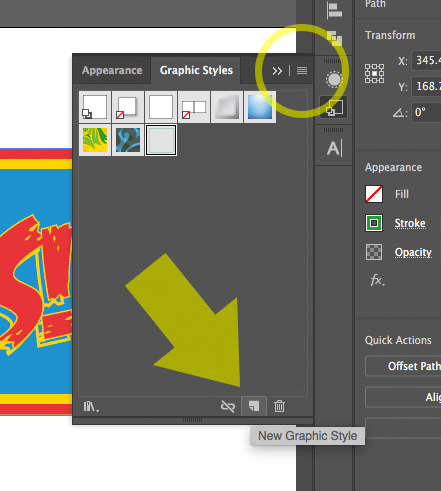
You should also name your graphic style by going into the fly-out menu in the top-right of the panel (3 lines that look like a burger) and then choosing Graphic Style Options. Next time you want to use this appearance, just select the object and click on the thumbnail of the graphic style you just saved. Naming your graphic style you will make it much easier to find and apply.
This is what the final image will look like. The CutContour (selected in the image below) can be difficult to see because it’s so small.
Tips for working with Graphic Styles
- Before creating a graphic style, have the cut contour object selected and double check the settings in the Appearance panel before clicking the button to create the graphic style.
- To name your style when you create it, hold the Option/Alt key when you click the New Graphic Style icon.
- To use the CutContour style in other documents, apply it to a basic shape (like square or circle) and bring that shape into your new document via copy and paste or a CC library. The style will come along with the object and you’ll be able to apply it to any cut contour line.
If you’d like me to go deeper into this or other production processes, just leave a comment below or hit me up on Twitter @SebastianBleak
This article was last modified on November 13, 2018
This article was first published on November 13, 2018
Commenting is easier and faster when you're logged in!

Recommended for you
How Do P3 Displays Affect Your Workflow?
A P3 display is an upgrade from sRGB, but there are potential complications.

How to Apply Custom Graph Marker Designs in Illustrator
Adding attractive (and legible) custom markers to graphs in Illustrator isn’t ha...
CreativePro Tip of the Week: Resetting the Bounding Box of Objects in Illustrator
This CreativePro Tip of the Week on resetting the bounding box in Illustrator wa...