
Straighten Up Photos with Lightroom’s Geometry Tools

Have people ever told you to “straighten up”? Maybe they think it’s your attitude… or maybe it’s your photos.
When we’re photographing scenes with clearly defined straight lines, like architecture, it can sometimes be hard to keep them straight. Lenses collect light through round pieces of glass, leading to distortion that can make any building look wobbly.
Before you consider renting a crane to get you and your camera at just the right angle, take advantage of the geometry adjustments in Lightroom CC and Lightroom Classic CC. Here’s how to take the straight and narrow path.
Level Up
An extremely common edit in Lightroom is to straighten a scene, which you can accomplish by selecting the Crop tool and dragging outside the frame to rotate the image around the center point. For horizons and obvious tilts, this approach works just fine.
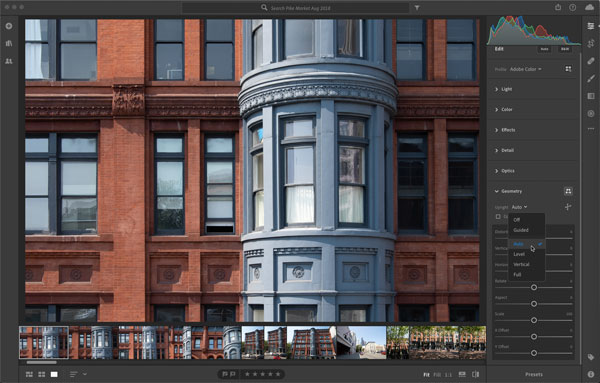
For photos that need more work, turn to the Geometry controls in the Edit panel in Lightroom CC, or the Transform panel in Lightroom Classic. The heart of these tools is the Upright feature, which can automatically, or with manual assistance, adjust the image in more ways than just rotation.
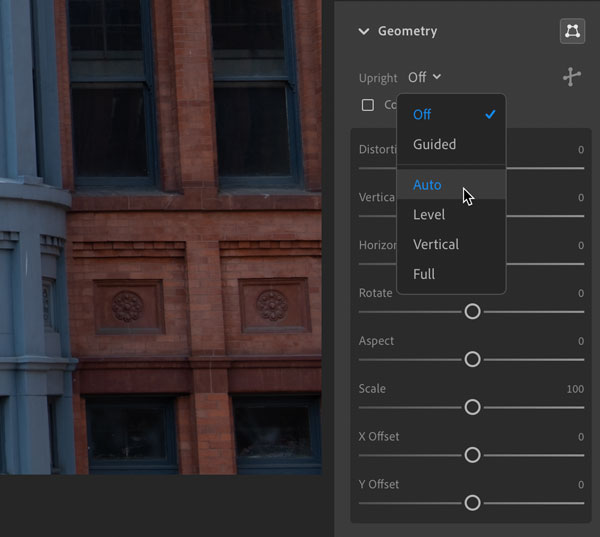
In either program, locate the Upright control and choose or select Auto. Often this may be all the correction you need; Lightroom looks for horizontal and vertical lines, and distorts the image to align those to level horizontal and straight vertical dimensions.
The Geometry controls in the Edit panel in Lightroom CC

The Transform panel in Lightroom Classic

Before applying Auto Upright correction in Lightroom CC

After applying Auto Upright correction in Lightroom CC
You can also opt to align the image just vertically or just horizontally (level), or choose Full, which sometimes works better than Auto depending on the content of the photo.
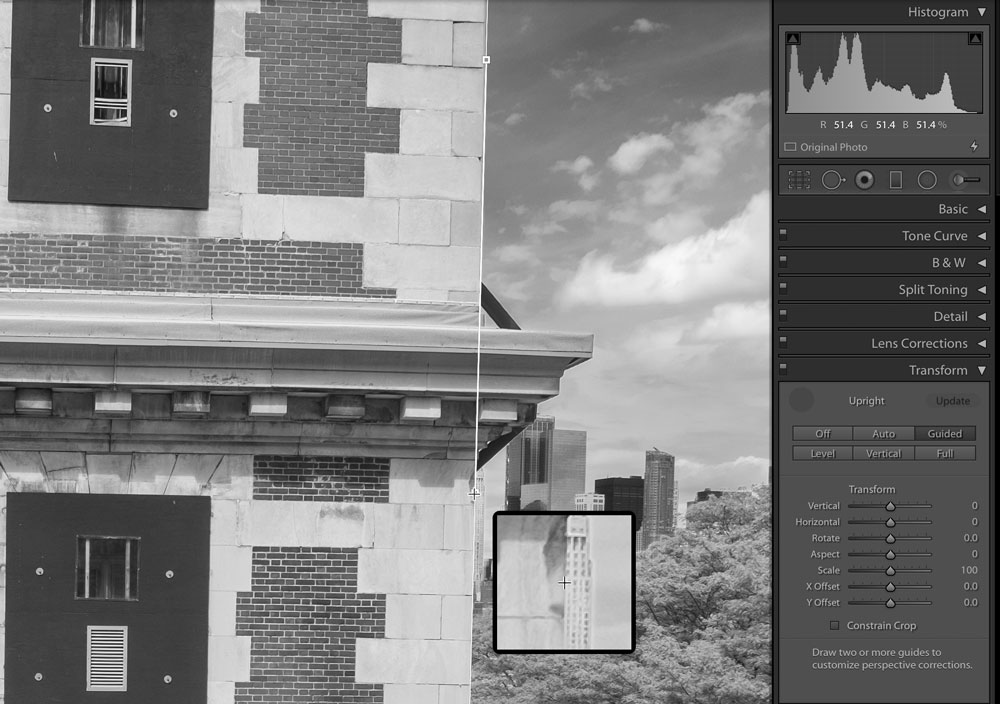
Be Your Guide
Although the software usually does a good job of identifying lines, it’s not as good as your eyes in some cases. In that case, the Guided option gives you more control. Here’s how:
- In either version of Lightroom, select the Guided option; the Guided tool is selected.
- Drag along a line that should be vertical, and then release.
- Next, drag along a line that’s horizontal.
When you release the mouse button, Lightroom transforms the image to align those guides to the horizontal and vertical axes.
If you need to adjust the guided lines, drag the anchor points that were created where you started and stopped the lines.

Manual Transformations
The Upright controls are the easiest methods of correcting geometry, but they don’t cover all instances. That’s where the manual transformation sliders can be helpful. Here’s a breakdown of what they do:
- Distortion: Affects how pinched or bulging the image appears. Some lenses introduce distortion, especially at the edges of wide lenses. Dragging this slider enhances or minimizes the distorted effect.
- Vertical: Imagine the photo is on a piece of cardboard; the Vertical control turns the board along the horizontal axis, as if you’d put a wooden rod through the middle from left to right. When you manipulate this control, you’ll probably see white areas outside the captured image; those can be cropped later.
- Horizontal: As with Vertical, imagine the cardboard with a wooden rod, only this time the rod runs from the top to the bottom of the image. Adjusting this slider swings the image left and right like a door, but with the hinge in the middle.
- Rotate: This control turns the image clockwise or counter-clockwise on the center point, the same as you do when straightening in the Crop tool.
- Aspect: Use this slider to compensate for stretching that occurs when you adjust the Vertical and Horizontal controls. Aspect compresses or expands the image.
- Scale: Did some extra white space appear when you adjusted any of the controls above? Use Scale to zoom in or out to crop the image.
- X Offset and Y Offset: Drag these sliders to nudge the position of the image within the visible frame, left-to-right (X) or top-to-bottom (Y).
To avoid exposing any white area as you make these adjustments, select the Constrain Crop checkbox.
Before
After
![]()
Straighten Up and Fly Right
It used to be the case that these types of transformations required a trip to Photoshop, but now you can do them all in Lightroom CC or Lightroom Classic. In most cases, you may not need drastic applications of the Geometry or Transform controls, but they can definitely bring some alignment to slightly-off photos.
This article was last modified on January 6, 2019
This article was first published on January 6, 2019
Commenting is easier and faster when you're logged in!

Recommended for you

Take Your Shot in Lightroom
With a handle on the fundamentals of Lightroom—in its multiple forms—you can wor...

Secrets of Lightroom for Mobile
Learn about the many hidden but powerful features in the phone and tablet versio...

Speed Up Lightroom Editing with Macro and Micro Presets
From radical changes to tiny tweaks, Lightroom Presets can give your images a sp...