
Setting Up a Design Grid in PowerPoint
How to use of a grid system in PowerPoint to add consistency and visual structure to your designs


This article appears in Issue 14 of CreativePro Magazine.
Most designers wouldn’t dream of embarking on a design project without the use of a grid system. And yet, when it comes to presentation, we often completely forget about grids and how much easier they can make our lives while adding consistency and visual structure to our designs. Here’s how I set up and use design grids in PowerPoint. The first thing to mention is that you do not want to use PowerPoint Gridlines. I know, this sounds like exactly what you would want, but PowerPoint’s Gridlines feature only allows you to set up an evenly spaced framework of squares that is going to be far too limiting. We want more control of our design grid, and to do that, we’re going to add a series of PowerPoint Guides.
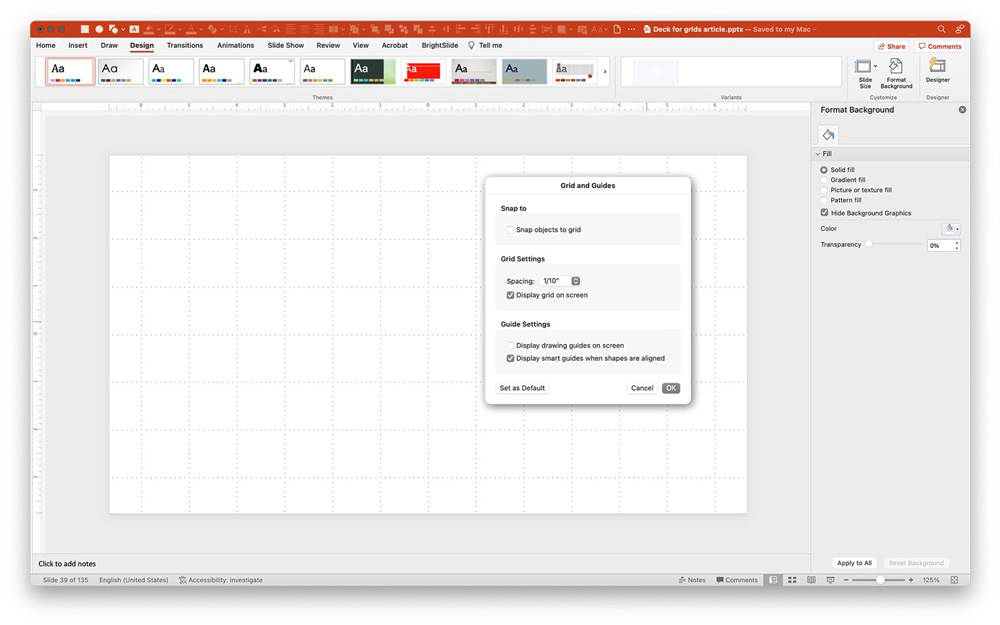
Figure 1. Avoid using PowerPoint’s Gridlines feature which only gives you a grid of squares.
- Right-clicking on the slide and going to Grid and Guides…
- Right-clicking an existing guide
- Option/Ctrl-clicking a guide and dragging it to create a duplicate

Figure 2. Right-click any existing guide to change its color.
and even change their color. You move guides by selecting them with your mouse, whereupon you will see a live measurement location.
BrightSlide to the Rescue
I know what you’re thinking—this all sounds very tedious and time-consuming. It is. And it’s probably why so few people use guides to create a grid system. But you can actually set up a mathematically perfect grid in seconds with the totally free and cross-platform BrightSlide add-in. It’s what I use on each and every project, and it couldn’t be easier. From the BrightSlide tab, select Guides and you’ll see options for creating guides on the master, layout, or normal view, deleting and changing color, and even making guides from a selection (for example, if you wanted to import a series of lines from Illustrator) or reverse engineer a grid from already placed objects. Generally, I start by deleting guides from everywhere and then adding my new ones only to the master. When you add guides, BrightSlide gives you a straightforward dialog box to set margins, add columns and rows, and even gutters. As you dial in values, you’ll see guides appear in real time, so you can easily play around and adjust things to your liking. If at any time in your design process you want to make a change, just go back to the BrightSlide tool and edit your values.
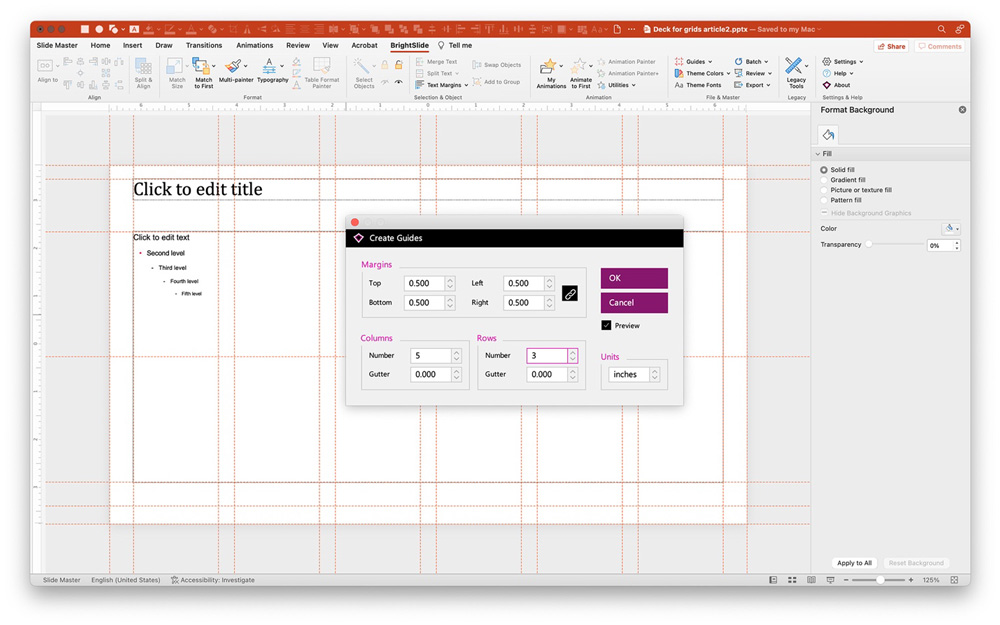
Figure 3. The free BrightSlide add-in allows you to set a perfect grid in seconds by batch inserting guides.

Figure 4. When you’re in a rut, use your grid to inspire your layouts and break away from bullet points.
Commenting is easier and faster when you're logged in!

Recommended for you

Hiding Page Numbers in PowerPoint’s Slideshow Mode
With a simple animation trick you can de-clutter your slides and present a more...

Introducing Click: The Presentation Design Conference
If you’re like most designers or layout artists, the last thing you want to hear...

The Six Keys to Avoiding a PowerPoint Disaster
Learn the causes of bad presentation design and the solutions