

A while ago I had a client who was automating his InDesign projects using an XML-based workflow. He was extremely happy with the speed and ease his text stories were flowing into InDesign. But after a while he realized he actually needed to give those stories a proper layout. And the design he had in mind seemed to give him problems.
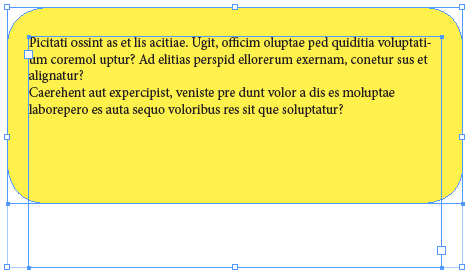
This is what he was trying to achieve:
So he created a separate text frame and coloured frame for every story. The frame has a background colour and rounded corners.
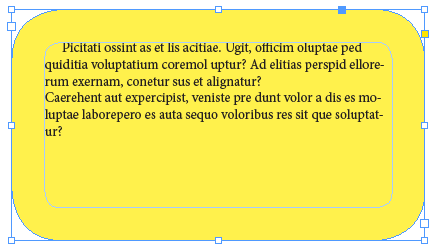
Of course he would have been a lot more productive if he’d combined the background frame with the text frame. But when he tried that option he needed to keep the text away from the edges so he used the inset spacing option (found under Object > Text Frame Options) to keep the text away from the edges. Unfortunately this didn’t give him the desired result. As you can see in the image, combining high value rounded corners with inset spacing doesn’t really work as planned:
So because of this he needed a different plan of action. So how do we solve something like this? What we need is a text frame with a background colour, rounded corners, proper inset spacing, and it needs to resize automatically depending on the length of the story.
An Alternative Method
Step1: create a regular text frame by using the Type tool.
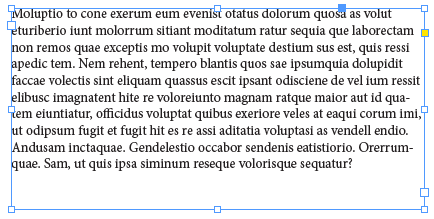
Step2: fill it up with placeholder text.
PS: Are you tired of the regular lorem ipsum placeholder text? Why not try Gangsta ipsum, Bacon ipsum or Riker ipsum? I’ll choose Bacon ipsum this time.
Step3: give your text frame a fill colour by either using the Swatches or Color panel. Personally, I’m a Swatches panel guy.
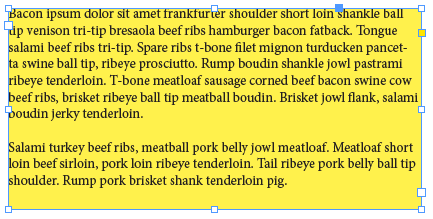
Step4: give the object a thick stroke by using the Stroke panel, say 30pts. Then change the Join option to Round Join which will give you a rounded corner effect. Now align the stroke to the outside of the object which will expand the rounded join effect even more. This way the stroke effect is actually acting as both inset spacing and rounded corners.
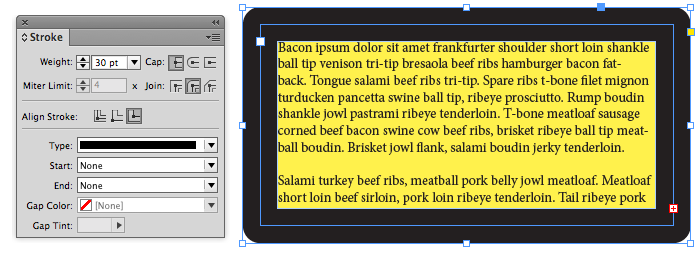
Of course, you then want to give the stroke the same colour as the fill colour.
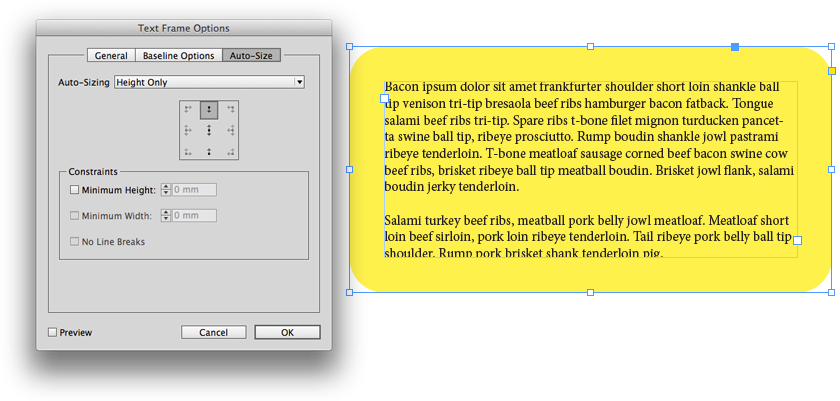
Step5: To give the text frame a variable height you can use the Auto-Size function (in CS6 and later). First select the text frame using the Selection tool and then choose Object > Text Frame Options. (Tip: you can get there faster by pressing Command/Ctrl-B, or by Option/ALT+double-clicking on the frame with the Selection tool!). Now click the Auto-Size tab and choose an option from the Auto-Sizing list. Here I’ll choose Height only and click the topmost icon in the options that become active. Now your text frame will have a variable height and will expand/contract automatically depending on the amount of text:
And there you have it, just the way the client wanted it! Remember that you can now save these options as an Object Style in case you need future updates of this object.
This article was last modified on December 30, 2021
This article was first published on July 16, 2013
Commenting is easier and faster when you're logged in!

Recommended for you

Make One (or more) Round Corners on an InDesign Frame
James wrote: Is it possible to create a box (with a rule) and only round one of...

Building an Org Chart or Flowchart in InDesign, Part 1
You can make a great-looking flowchart in InDesign if you know what features to...