

This article appears in Issue 44 of CreativePro Magazine.
Creating documents that print smoothly and that look as good in print as they do on screen requires more than blithely clicking Export or Package. Printing is often halted because the document creator neglected their due diligence at the file-preparation stage.
You can avoid that time-consuming and often-expensive headache with the help of the robust tools built directly into InDesign and Acrobat to preflight your documents—that is, to check your work and process methodically—much as pilots and flight crews meticulously run down checklists to make sure each detail is addressed.
Adobe’s preflighting tools are easy to use and will ensure your files arrive at press almost, if not actually, perfect.
Preflight in InDesign
Once upon a time, preflight involved specialized software definitely not built for right-brained creative folk. Thankfully for us, Adobe long ago flipped that script. Now, InDesign automatically checks your work. You can save custom preflight settings (profiles) for specific document types. And you can share these standards with colleagues to ease creation and collaboration.
Live Preflight
By default, the Live Preflight feature checks for and alerts you to common stop-the-presses-level errors as you design. Does your document have broken links? Is it missing fonts? Is text overset somewhere? Is InDesign failing to connect to the targets of URL hyperlinks?
If the answer to any of these questions is yes, a red bullet appears in the status bar at the bottom-left corner of the document window (Figure 1) next to an error count. Sure, you could ignore it, just as you might ignore your car’s pesky low-fuel light, but ignoring either long enough will eventually have you walking—one back from the print shop without your print job, the other—well, everywhere.
width=”475″ height=”26″ /> Figure 1. A red bullet icon in the document window indicates preflight problems in the document.
Double-clicking the red indicator (or choosing Window > Output > Preflight) opens the Preflight panel, which offers more information and help in resolving the identified problems. The panel lists each problem separately, and you can expand each entry to see details that will help you nail down and repair the exact issue.
For Figure 2, for example, I clicked the disclosure arrow beside the TEXT entry to learn that the problem was, more specifically, one of overset text. Another click told me, even more specifically, that it was a text frame on page 21.

Figure 2. The Preflight panel in InDesign organizes and lists some of the document’s preflight problems.
You can highlight a problem to see precise information about it in the Info section, where InDesign suggests remedies. In our example, you could fix the problem by enlarging the text frame, by editing the text to fit within the existing frame, or by adding more threaded frames to contain the overset text.
To jump right to the problem, you would click the hyperlinked page number (21, in our example) to the listing’s right. InDesign will zoom in on the object in question. If the problem appears on a parent page, the Preflight panel will link to its prefix instead of a page number.
Live Preflight can be a great help, but you need to keep four very important facts in mind:
- Live Preflight can be turned off. Deliberately or accidentally unchecking the On setting in Preflight panel (top left) disables Live Preflight. InDesign will then stop looking for problems, the panel won’t list any errors, and the indicator in the bottom left of the document window will be gray and labelled Preflight Off.
- By default, Live Preflight ignores objects on the pasteboard, non-printing objects, and anything on hidden layers. The last one is particularly distressing if you often create interactive documents such as fixed-layout ebooks or Publish Online documents. A common practice is to export these with some layers hidden because they are destined to be turned on or shown only in response to user-driven actions. Imagine your surprise when, after seeing a green (no errors) indicator, you turn on a hidden text layer only to find that the last few lines are overset and invisible to readers! If you want InDesign to examine these types of objects as well, choose Preflight Options from the Preflight panel menu. In the Include section of the resulting dialog box, turn on the Objects On Pasteboard and Non-printing Objects options (Figure 3) and/or change the Layers menu from its default (Visible & Printable Layers) to All Layers.
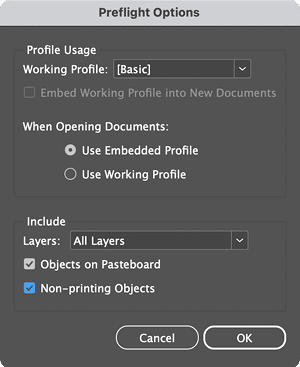
Figure 3. Be careful of the Preflight Options defaults. You will want to expand the scope of Live Preflight if you customarily turn layers on and off in your documents.
- Live Preflight may not show you all the errors in your document. By default, Live Preflight and the Preflight panel are set to show a maximum of 100 errors per error category. That’s more than enough for the average document and the out-of-the-box preflight profile. But someday you may have more than 100 errors, and you’ll want to see all of them at one time. To be ready, choose Limit Number Of Rows Per Error > No Limit from the Preflight panel menu (Figure 4).

Figure 4. You can remove the limit on the number of problems per category Preflight will report.
- By default, InDesign looks for only the most basic problems: overset text and missing fonts, images, and URL links. Of course, those aren’t the only problems that will stop a print job. Fortunately, InDesign can check for many more types of problems. You just have to enable those types of checks, and preflight profiles can help you.
Powerful preflight profiles
You can set up Preflight to seek, identify, and offer suggestions for fixing a host of common and uncommon problems, or conditions, that afflict even the best-designed publications.
The conditions you choose will depend on the type of document you’re designing. For instance, for a black-ink-only job, InDesign can look for any color other than black, which is highly useful to ensure you don’t send rich black or RGB black to press for a grayscale project. Such conditions don’t apply to full-color documents, so the Preflight panel will fill up with erroneous color warnings.
That’s where a profile comes in. A profile is a group of conditions that you can save and select based on the specifications that your printer needs. One printer working on your glossy color magazine will have entirely different standards than another printer working on your photocopied flyer.
The default profile, [Basic], checks for just four conditions. To search for more, you can create custom preflight profiles, each with different conditions. You can choose any profile to check your document as you’re working.
The Preflight Profiles dialog box (Figure 5) is where you define these profiles and choose which conditions will cause you to see red (bullets). Fire up InDesign, and I’ll show you how to harness these hidden powers.
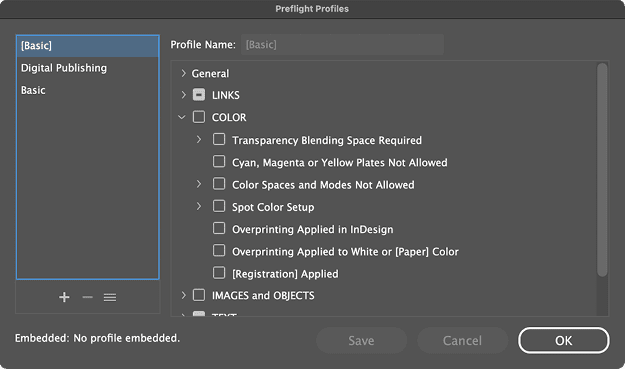
Figure 5. The Preflight Profiles dialog box
- If the Preflight panel isn’t already open, choose Window > Output > Preflight.
- From the Preflight panel menu, choose Define Profiles to open the Preflight Profiles dialog box.
- On the left, at the bottom of the list, click the plus sign to create a new profile.
- At the top right, rename the profile to something more descriptive and useful.
- In the area beneath the Profile Name field, choose which conditions you want InDesign to be on the lookout for. You can expand the categories to reveal conditions, sub-conditions, and options. You’ll learn more about these in the next section. For now, turn on what you want; you can always change them later.
- Click OK to save the profile and close the dialog box. (To create multiple profiles in one sitting, you can click Save to save the current profile but keep the dialog box open.)
- Back on the Preflight panel, select your new setting from the menu in the upper-right corner. Instantly, Live Preflight will re-evaluate your document against the conditions you chose. Figure 6 shows all the errors in my (intentionally) flawed document after I activated nearly all the conditions for a single profile. Compare it to the initial count that the [Basic] profile caught in Figure 2!
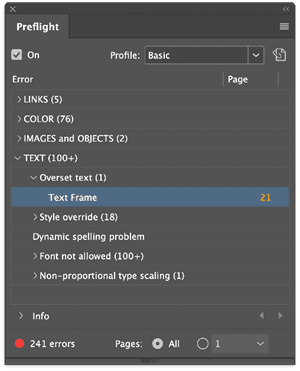
Figure 6. Most of these errors would have gone unidentified if I had used the default [Basic] preflight profile.
Preflight conditions
By activating a condition in a preflight profile, you’re telling InDesign to trigger an error if something in your document matches the condition. That creates an error entry in the Preflight panel and turns the Live Preflight indicator red.
InDesign can evaluate many conditions; however, you’ll never turn them all on at once. (Some even conflict with each other!)
Here’s a section-by-section look at what constitutes a profile, along with some of the primary conditions you should pay attention to and the situations in which you’d want to use them.
- General. In this section’s Description field, you can describe your profile to help you, your coworkers, and your clients determine when to use it.
- Links. I recommend turning on the Links Missing or Modified and Inaccessible URL Links conditions. The last condition, OPI Links, is unnecessary unless you’re actually using Open Prepress Interface image replacement.
- Color. Prepress workers, who typically handle overprint settings, should turn on the Overprinting Applied In InDesign condition, and everyone should always turn on the [Registration] Applied condition, which checks for the use of the Registration color swatch, which looks black onscreen but is really 100% of all four process ink colors. Also turn on Overprinting Applied To White Or [Paper] Color, which can avert catastrophe.
- Images and Objects. In addition to being applicable to placed images, many of the conditions in this section pertain to natively created objects, as well. (Trivia fact: Images and Objects > Bleed/Trim Hazard is the only place in InDesign where the common printing term live area appears.)
- Text. This section has the largest collection of conditions. They’re self-explanatory.
- Document. This section has only five conditions and, again, they’re all self-explanatory.
Creating profiles with the right conditions enabled isn’t limited to for-print publications. For example, the Color section’s Color Spaces And Modes Not Allowed condition enables you to disallow CMYK colors, which is helpful to make sure your screen-only projects don’t exclude the most vibrant colors. Similarly, you can prevent the accidental use of spot colors if you want to limit your print to the four process inks.
Sharing preflight profiles
You can share your preflight profiles to ensure everyone on your team is checking for the same errors.
After you create the profiles you need, click the menu icon (three stacked lines) to open the Preflight Profile menu (Figure 7). Choose Export Profile to save the highlighted profile as a IDPP file. Give it to your clients or collaborators, and they can import it with the Load Profile command on the same menu.
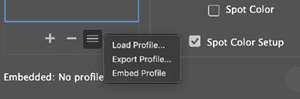
Figure 7. The Preflight Profile menu offers options to import, export, and embed profiles.
Alternatively, if you collaborate on InDesign documents or produce templates for others, you can embed preflight profile files into the file, and these profiles will be available to anyone working on the document. Choose Embed Profile from the Preflight Profile menu.
PDF Preflight in Acrobat
If you’re packaging and sending InDesign documents or templates directly, then Live Preflight is the end of your creation-side preflight ability. However, if you prefer the more common method of delivering PDFs, then you have even more preflight power at your fingertips in the form of Acrobat.
How you find these features depends on whether you’re using Adobe’s “new Acrobat experience” user interface or the classic version, but the Preflight dialog box that opens is the same regardless of how you get there.
New Acrobat
If you use new Acrobat (Figure 8, left) with colored toolset icons on the left, follow the steps below. If you use the classic Acrobat interface (Figure 8, right) with colored icons down the right side, skip to the next section.
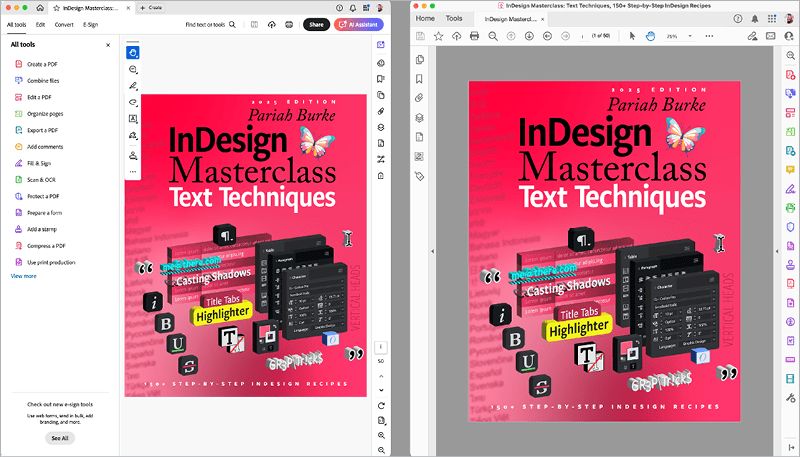
Figure 8. Which one looks more like your Acrobat:
the new interface (left) or the classic interface (right)?
- In the All Tools section at the left, click the View More link at the bottom. (You may have to scroll to see it.)
- Find the Use Print Production toolset (Figure 9), and activate it to load its menu in the left sidebar (Figure 10).
- Click Preflight to open the Preflight dialog box.
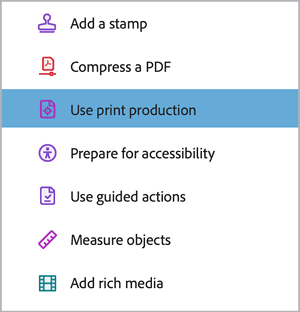
Figure 9. Use Print Production appears after selecting View More in the All Tools section.
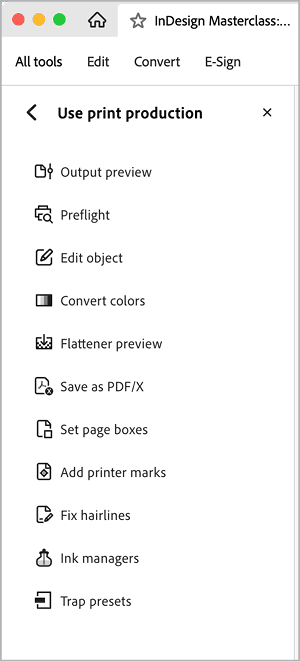
Figure 10. The Use Print Production tools
Classic Acrobat
If you’re not using the new Acrobat interface, follow these instructions:
- Click the Tools tab in the top left corner of the Acrobat application window. This will show you all of Acrobat’s toolsets categorized, with the option to open them or add them to your Tools on the right of the Acrobat window.
- Scroll to the Protect & Standardize section, and locate the Print Production toolset (Figure 11). If the button beneath it says Add, click to add it to your Tools. If the button says Open, the Print Production tools are already installed.
- Return to your document.
- Select Print Production from your tools to load the toolset into the side panel (Figure 12).
- Launch Preflight.

Figure 11. Print Production tools are in the Protect & Standardize section of the Tools tab.
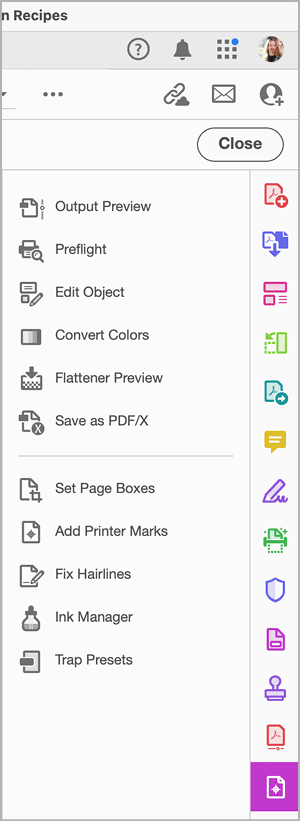
Figure 12. The Print Production tools in the classic Acrobat interface
Preflight profiles
As you can see in Figure 13, the Preflight tool in Acrobat uses profiles like its counterpart in InDesign, but its offerings are much more robust.

Figure 13. The Acrobat Preflight tool
In addition, the Preflight tool in Acrobat isn’t limited to just finding problems; it can also fix many problems and even modify PDFs that aren’t broken per se. For instance, in the PDF/X section you’ll find profiles to convert a PDF of any standard to different PDF/X version specs for specific print workflows (Figure 14).

Figure 14. Some profiles (called fixups) can actually fix PDF problems instead of just identifying them.
The PDF Fixups section has other useful functions, such as the ability to convert the document, including images, to RGB or CMYK with or without spot colors, to flatten transparency in various resolutions, and even to convert all text to outlines, eliminating the need to embed or send fonts.
These functions take Acrobat Preflight beyond the role of simple problem sniffer; instead, it’s a digital production tool that can perform many common changes and preparations on PDFs.
Using Acrobat Preflight is easy. Select a profile from the list and click the Analyze button (enabled for preflight condition evaluation profiles only) to check the document against the profile’s conditions. When Preflight has finished, it will switch to the Results tab (Figure 15). From there you can click the Create Report button to export a preflight report, which is perfect for sending a job back to a designer for an informed repair of the InDesign document.
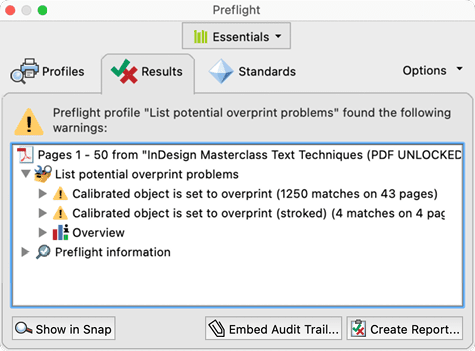
Figure 15. The Results tab of the Preflight tool
Or, if you select a profile that not only analyzes but also fixes something, you can click the Analyze And Fix button, which will evaluate the document, and attempt to fix or alter it, and prompt you to save a new copy of the PDF, leaving the original file unmodified. At the bottom of the Profiles section, click the Further Options toggle to limit the analysis and fixup to specific page ranges or to visible layers (Figure 16).
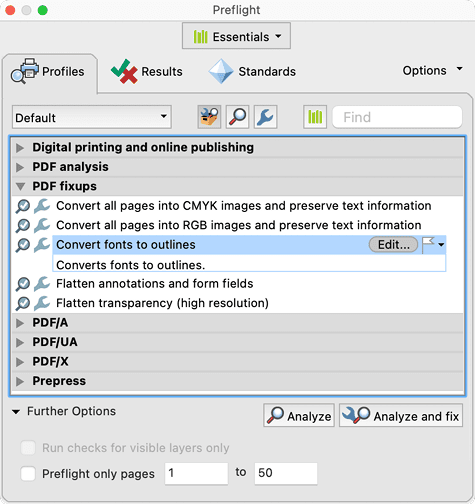
Figure 16. Further Options opened
If you don’t find the exact profile or fixup you need, you can make a new one.
In Acrobat’s Preflight dialog box, click Options and choose Create New Preflight Profile. The Preflight: Edit Profile dialog box will appear.
On the right, name your new profile and optionally provide a description, the author’s name, and the author’s email address. You can also choose into which profile group Acrobat should save your new profile—an existing group, a new group, or the default Custom Profiles group (Figure 17).

Figure 17. Creating a new preflight profile
Your profile will show the classifications of conditions and fixups in the Profiles list on the left. Select the first category and profile that seems like it might be related to what you want Acrobat to look for or fix. When that section opens, look at its controls, turn on your desired options, and select the condition’s type: Error, Warning, Info, or Inactive (Figure 18). Respectively, these classify a failure of the condition as a problem that needs to be fixed, is something you should personally evaluate and decide whether it’s a problem, is simply information to be passed back to you, or is something that should be completely ignored.
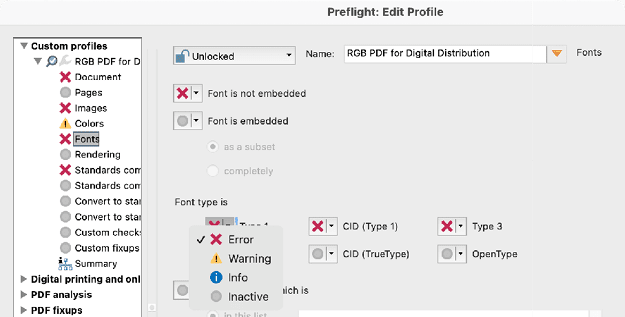
Figure 18. Configuring checks to show an Error, Warning, or Info, or to be Inactive and not run at all
Tip: When in doubt, hover over the condition name for a moment to see a tooltip with insight into the purpose of the condition.
Click the Custom Checks profile to see dozens of specialized conditions ranging from looking for faux bold and italics, to the total percentage of ink coverage—a crucial check given that different types of paper have different ink saturation absorption rates (Figure 19). Highlight the ones you want, and click the Include In Profile button (the left arrow) beneath the checklist to add the selected checks to the profile.
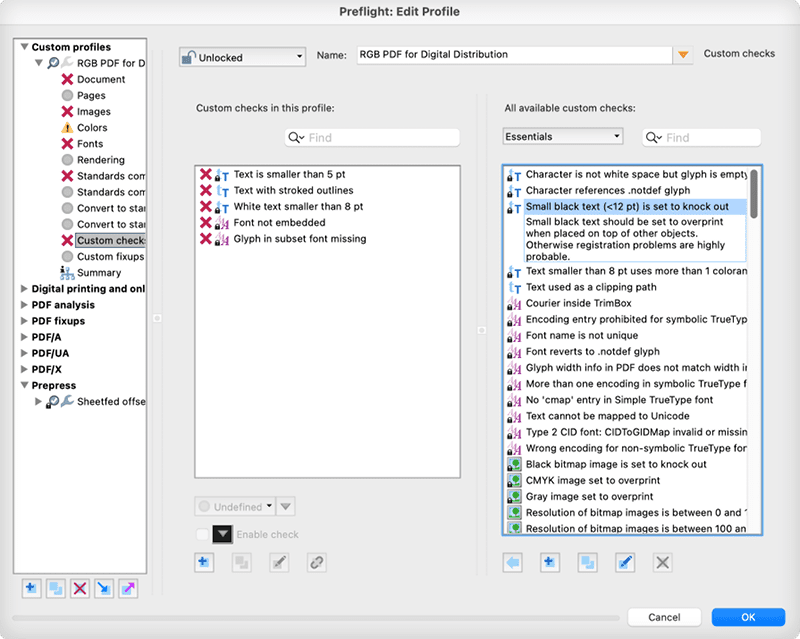
Figure 19. Adding custom checks to the profile
Similarly, in the Custom Fixups profile, choose fixups you want Acrobat to automatically perform if you use the Analyze And Fix button (Figure 20). You can run checks, repairs, and fixups all from the same profile. You can even run dozens of each, fully processing a PDF with a single click on that Analyze And Fix button.
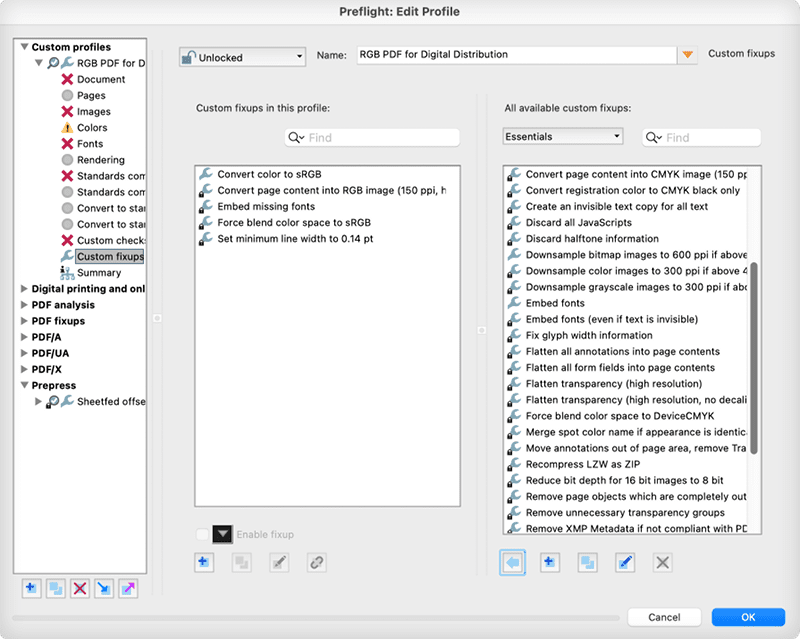
Figure 20. Custom fixups can correct errors automatically.
When your profile is finished (you can always edit it again), click OK to save it and return to the main Preflight tool. Or click Save to save the profile and either edit or create another profile.
To use the profile, scroll through the menu directly above the profile list, and you’ll see your new profile under the category you assigned it (Figure 21). Highlight it, and click the Analyze or Analyze And Fix button.
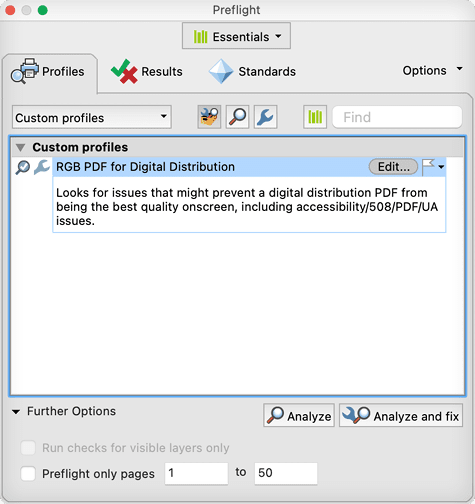
Figure 21. My new profile is in the Custom Profiles group, ready to analyze or analyze and fix.
Acrobat Preflight profiles are easily shared, too. Highlight a profile and choose Options > Export Profile to save a KFP file to your computer or network. Others can load the profile by choosing Options > Import Profile.
Smooth Flight Ahead
The good news: You now know how to preflight (and fix!) documents in InDesign and Acrobat, enabling you to get press-perfect printed documents and pixel-perfect digital publications. You’re welcome!
The bad news? You no longer have an excuse as to why your files aren’t press-perfect and pixel-perfect. I’m sorry.
Commenting is easier and faster when you're logged in!

Recommended for you

Beware Stacked Transparency in PDF Files Across Long Documents
The Problem I recently encountered a PDF export problem that plagued me for mont...

Tip of the Week: Using the Book Panel to Preflight Multiple Documents
There are three new Links panel icons in InDesign CC that you'll see when workin...

Tip of the Week: Finding Hidden Items With Preflight Profiles
This tip was sent to Tip of the Week email subscribers on June 12, 2014. Sign up...