


I’ll admit it. A year or so ago, I thought Pinterest might be a flash in the pan. (Or maybe a “flash in the pin”?) Social media flavor of the year, the new kid on the block, the youngest who got all the attention. But I wondered if its popularity would last.
Like millions of others, I joined Pinterest and discovered that posting images and links by “pinning” them to virtual corkboards could be strangely addictive. If you’ve ever collected anything — coins, dolls, stamps, comic books, state souvenir plates — or spent time organizing memories into scrapbooks, you know what a satisfying outlet for obsession it can be to acquire things, organize them in an aesthetically pleasing way, and then show them off to others.
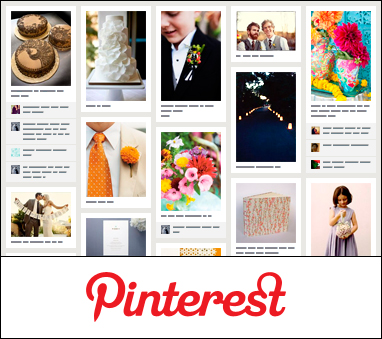
Figure 1: Pinterest lets you “pin” images and organize them into categories on virtual corkboards.
Still, I wondered if pinning might wear out its appeal eventually, like the latest game or app that people play for a while and then move on from.
But Pinterest has proven to have surprising staying power, and it’s getting harder to ignore its reach and influence all the time. As a matter of fact, Pinterest is now the third-largest social media site, right behind Facebook and Twitter. In 2012, Pinterest vaulted past LinkedIn to grab the number three spot based on the number of site visits it receives, according to a report released by Experian.
Part of Pinterest’s staying power, I think, is that it’s proven to be not just fun but useful. You can use Pinterest boards to plan a wedding or vacation, keep track of recipes you want to try out, share useful information, and much more.
Pinterest also manages to bottle the fun of window-shopping in a turbo-charged social way, allowing you to easily discover new trends in food, fashion, and home decorating, or check out books, movies, and music your friends recommend. All of which helps it drive lots of traffic to commercial sites and generate the sound of ringing cash registers.
Pinterest now generates more referral traffic than Google+, YouTube, and LinkedIn all together — since most pins link back to the website where the image originated. According to a recent study by Bizrate Insights, a Pinterest user is 72 more likely to have discovered an item they’d like to buy on Pinterest than a Facebook user is by using Facebook.
And yes, Pinterest can be useful for professional purposes as well. Out of the four largest social media sites, Pinterest is arguably the most visual in nature — so it’s a natural medium for design pros to gravitate toward. In fact, Pinterest can be a great way to share your creative work with your clients and colleagues, as well as demonstrate your professional expertise — as long as you follow good social media etiquette in the process (and keep certain copyright issues in mind).
So let’s talk about the slightly more pinstriped side of Pinterest. Below is a roundup of some of the best tips and insights I’ve come up with for pinning like a pro.
By the way, for the rest of this article, I’m going to assume you’re already on Pinterest, and know the essentials of how pins and boards work. But if you’ve managed to hold on to your Pinnocence so far and need a basic tutorial, the “Getting Started” section of Pinterest’s Help page will walk you through Pinning 101.
Tip #1: Don’t Just Promote — Share Pins that Inform and Entertain
Wondering if it’s okay to use Pinterest for self-promotion? The answer is the same as it is for Facebook, Twitter, and other social media sites: Self-promotion is fine in moderation, but you’ll need to mix it in with other interesting content so you’re not just talking about yourself all the time. You might want to set yourself a golden ratio to follow — something like, talk about others or post non-promotional content five times for every time you promote your own work.
On the Pinterest for Business page, Pinterest points to a few examples of companies that are using Pinterest in ways that exemplify the soft, social approach it recommends — which is to emphasize lifestyle, mood, and personality over direct advertising.
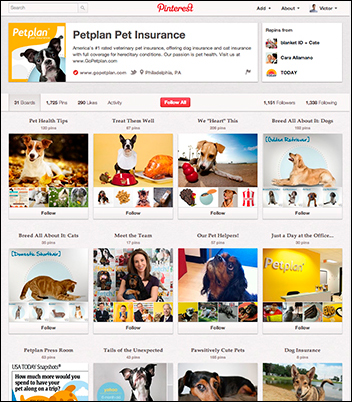
Petplan, the company that offers health insurance for our animal companions, posts a mix of useful pet health tips and cute photos of furry friends to build its audience of animal lovers, along with more promotional content and information about its plans and policies.
Figure 2: Petplan’s pinboards feature a healthy mix of tips, info, and of course, adorable pets.
Etsy, the popular online marketplace for handmade and vintage items, says its goal is “inspiration — not just sales. We maintain a careful balance of Etsy items and other content pinned to maintain authenticity with our audience.”
Figure 3: Etsy uses its pinboards to communicate the style and sensibilities of its brand.

This is, of course, Branding 101: When you advertise effectively you’re not selling products — you’re selling the emotions, ideas, and experiences that people associate with those products. So smart businesses set up Pinterest boards packed with images and links that generate an emotional response and create a social bond with their customers.
For creative pros, one of the best ways you can use Pinterest professionally is to share your expertise. You can establish your credibility in your professional sphere as you demonstrate your taste, knowledge, and creativity through the boards you create and the pins you share.
For example, my fellow CreativePro author Pariah Burke has Pinterest boards that allow him to share his well-developed professional sense of design, typography, epublishing, and technology in general — as well as his other varied interests and multi-faceted personality.
Figure 4: Pariah Burke’s pinboards show off his diverse range of interests.

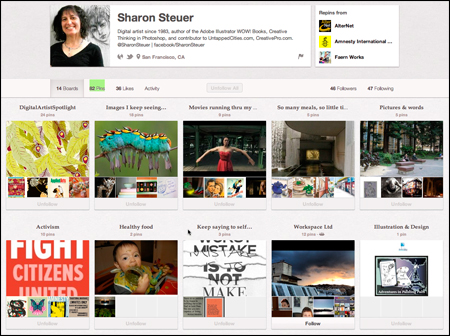
Sharon Steuer, another one of my colleagues here at CreativePro, uses Pinterest to share links to postings on her blog So Many Meals, So Little Time, which focuses on adventures in healthy eating. But she also makes sure to share the spotlight with other artists, by featuring their work (with permission, of course!) on a board she created called “DigitalArtistSpotlight.”
Figure 5: Sharon Steuer’s pinboards include a DigitalArtistSpotlight board as well as a board for her “So Many Meals, So Little Time” food blog.
Tip #2: Make Sure Your Pins Point Somewhere Worth Going! Whenever Possible, Pin the Original Source.
Every pin that gets posted on Pinterest has an end destination — it’s a link to either an image file on Pinterest’s servers, or a page on the web somewhere. When you click a pin, it’ll take you wherever it links. That’s what makes Pinterest such a great driver of referral traffic, as mentioned earlier.
In that regard, a pin is only as useful as the place that it ultimately points to. Pins that point to locations on the web that supply more info about the image in question are always more worthwhile that pins that simply link to a dead-end image, or to an image search result. So as you’re pinning, try to find that best source possible for your pin to link to.
And of course, if you can host an image on your own site and surround it with relevant info — and then pin it to Pinterest from your site — that’s better than simply uploading the image to Pinterest with minimal info.
If you’re pinning from a blog entry, check to see if the entry credits another blog, site, or online publication that originally posted the image … and then follow the link back to the originator so you can pin from the primary source. You’ll often find that by doing that your pin will connect your audience to more and better information about the image.
If you’re going to repin someone else’s pin that you see on the Pinterest home page, it’s generally worth clicking through to see where the pin points before you repin it. If it doesn’t lead anywhere worthwhile — if it only links to a Google image search, for example — then you might want to see if you can find the original source of the image on the web, and create your own pin that links to it, rather than repinning the dead-end one.
Tip #3: Make Your Pins More Searchable by Adding Descriptive Text
It’s all too easy to create pins with little or no text in the description field. You’ll see lots of pins floating around Pinterest with descriptions that consist of a one-word comment, like “Funny!” or “Yummy!”
But avoid the lazy approach. Taking a few seconds to add descriptive text to your pins not only provides useful context for your audience, it will help them get found by more people in search — especially if your description includes keywords people are likely to be searching for.
Here’s a nifty trick that lets you easily populate a pin with relevant text from the web page you’re pinning. Assuming you have the “Pin It” button installed on your web browser (if you don’t, see the tutorial here), simply highlight the text you want to travel along with your pin, and then click Pin It.
Presto — the text you highlighted appears in the description field to get you started. You can then edit or add to it as needed.
Figure 6: The Description field for this pin is automatically populated with text I highlighted on the article page at Wired.com before I clicked the Pin It button. I then added the words “From Wired.com” at the beginning of the description for clearer attribution.

Also, be aware that hashtags work on Pinterest, just like they do on Twitter. So, for example, adding a hashtag like #typography or #watercolors or #Photoshop to the description field for a pin can make it easier for users interested in those subjects to find.
Tip #4: Make Sure Your Pins Give Credit Where Credit Is Due
One issue that has dogged Pinterest is that fact that many users share photos and artwork in a way that doesn’t credit the photographers and artists who created them — or even link back to the websites where they originated.
As a creative pro, you’ll want to set a good example by making sure that the descriptions for your pins always include proper attribution when that information is available — in addition to following the good linking practices described above.
Tip #5: If You Have Copyright Concerns, Limit What You Share, and Protect Your Content
In the past, there’ve been lots of controversies about the extent to which you retain control of your own photos when you upload them to Facebook, based on the language in Facebook’s user agreement. Many people have similar concerns about Pinterest.
I won’t try to rehash all those arguments here, except to say this: Remember that any time you share your work on the Internet, even your very own website, you wind up surrendering a little bit of control over it. Putting your work online means that — legally or illegally — other users might take it and circulate it, or even alter it, in ways you didn’t intend. The bottom line is that the only way to maintain 100% control of your work is not to post it online in the first place.
Many artists and photographers worry that the language in Pinterest’s user agreement allows it to claim ownership of the original work they post. I’m no copyright expert, but to the best of my ability to understand these issues, I don’t believe that social media sites like Facebook or Pinterest are trying to assert that they own the copyright on the images their users upload. I think they’re just trying to protect themselves from being sued for hosting those images on their own site and allowing them to be shared in various ways (including, quite possibly, in some forms of advertising).
Ultimately, having your images displayed as thumbnails on Pinterest isn’t all that different from having them displayed in a Google image search. The main effect for both of those things is that they might help direct traffic to your website — and drawing in visitors is why you’ve got a website in the first place.
But if you’re worried about the extent to which Pinterest or any other site might claim ownership of the images you post, then it makes sense to be judicious about how much of your work you share. You might embrace the strategy of musicians who make one track from a new album available as a free download, hoping listeners will then want to purchase the full album. So instead of pinning all of your artwork or photos on Pinterest, you might choose to post occasional items to serve as “free samples” that link back to your own site, where visitors can see (and possibly purchase) all of your work.
You can also take some steps to protect your content from being shared on Pinterest in ways you’re not happy with.
First, watermarking all of your images with identifying information such as your name, web domain, and possibly a copyright statement is a good habit to get into, so that they’re more likely to identify you as their creator when they’re shared on Pinterest.
Second, if you have content that you absolutely don’t want to be shared on Pinterest, you can block it from being pinned simply by adding a meta tag to the header of each page on your site whose content you want to protect.
Here’s the code to add to the head section of the page:
<meta name="pinterest" content="nopin" />
Once that tag is in place, any user who tries to pin from the page in question will see the following browser message:
“This site doesn’t allow pinning to Pinterest. Please contact the owner with any questions. Thanks for visiting!”
Tip #6: Want Your Content Shared on Pinterest? Make Your Web Pages Pinterest-Friendly
Assuming that you do want the exposure and referral traffic that can result from having your work shared on Pinterest, there are two key steps you can take to encourage that.
First of all, for any pages on your site that you’d like to make Pinterest-friendly, you’ll obviously need to make sure that they contain pinnable images. After all, a page that contains no images can’t be pinned.
If you’ve got pages on your site that contain lots of text without much in the way of images, such as news articles or essays, one great approach is to follow the Wall Street Journal’s lead: Take a key quote from each page and turn it into a pull-quote graphic that can then be added to the page as something to pin.
Figure 7: An example of a pull quote image the Wall Street Journal created to serve as a pin for one of its articles.

Next, Pinterest offers a selection of buttons and widgets you can add to your site to encourage pinning. Check them out on Pinterest’s Widget Builder page.
Figure 8: Pinterest offers a selection of handy buttons and widgets that you can place on your web pages.

If you have merchandise for sale on your website, you’ll probably want to follow Etsy’s lead and make sure that the page for each item you sell has a Pin It button so that it can be easily shared on Pinterest.
Tip #7: Keep Tabs On Which Images from Your Site Are Being Pinned
Naturally, you’ll want to keep track of how your online content is being shared on Pinterest. As with all social media, tracking your engagement is a great way of getting feedback on what’s working for you and what isn’t. Paying attention to metrics like the number of times an image is pinned, repinned, or liked can tip you off as to how successful it is at appealing to your audience.
You can keep track of images that are pinned from your site using what Pinterest calls your source page. The URL for your source page will follow this format:
pinterest.com/source/yourdomain.com
So, for example, the link below will show you all of the pins on Pinterest that currently link to CreativePro.com:
https://pinterest.com/source/creativepro.com/
When I tried this, I was pleasantly surprised to see how many pages from my own sites had been shared by various pinners.
Tip #8: Create Collaborative Boards
Sometimes I feel like Pinterest users could use a little more um, Pinteraction. If there’s one thing I find a little bit disappointing about Pinterest compared to other social media sites, it’s that Pinterest can feel a little less … social. At least among the pinners I know and follow, it often feels like everyone is so busy posting their pins that they rarely take the time to comment on others’. Pinners gladly reshare pins, and sometimes click the Like button — but I don’t see the kind of friendly, conversational comment threads spring up on Pinterest that I do on Facebook or even on Twitter.
Which can make pinning feel like kind of a solitary pursuit. But there’s one underutilized feature of Pinterest that can make pinning more of a collaborative activity: the ability to create shared boards using the “Who Can Pin?” feature.
Figure 9: When you create a new board on Pinterest, the “Who can pin?” area lets you invite other contributors, who will also be able to add pins to the board.

You might use collaborative boards for group projects, or as a place where a group of friends can swap ideas and inspiration. Collaborative boards will show up on the profiles for each of the contributors, so they allow for audience crossover, too.
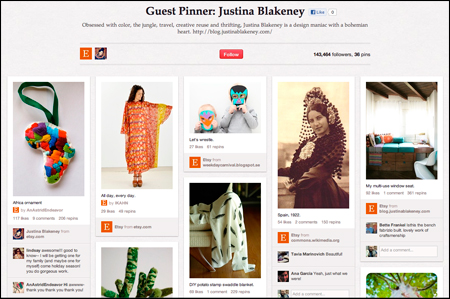
Etsy uses shared boards to feature a weekly series of Guest Pinners who are invited to add their point of view to Etsy’s boards.
Figure 10: An example of one of Etsy’s recent Guest Pinner boards, each of which puts the spotlight on an individual Etsy user and lets them contribute their own sense of style to Etsy’s Pinterest profile.
Tip #9: Use a Secret Board to Proof Your Important Pins Before They Go Live
You may have experienced this on Facebook: You’re posting something important — maybe a link to an announcement on your blog, or a piece of content you’re unveiling after long labor — and as soon as you post it, you spot an error of some kind. Or maybe it just didn’t render the way you were expecting, and you’d like to do some tweaking. So you wind up scrambling to delete the posting, hoping not too many people saw it in the seconds or minutes before you caught the mistake.
Pinterest offers a nice way to proof your pins before they go live: Simply set up a secret board called something like “Pin Testing.” (You’ll see the control that lets you set designate a board as Secret in Figure 9 above.) Send your important pins to the Pin Testing board first. Then give them the once-over, and if they look the way you want, you can easily move them to one of your public boards.
***
Dave Awl is the author of Facebook Me! from Peachpit Press. He currently teaches social media marketing classes, in addition to helping organizations large and small to successfully develop and maintain their social media presences. You can visit his website at Awlpoint.com for more info, and follow @DaveAwl on Twitter.
***
Editor’s note: If you’re wondering where the Pinterest button is on CreativePro, it’s coming. In the meantime, it’s super easy to install and use the Pinterest bookmarklet in your browser.
This article was last modified on January 18, 2023
This article was first published on January 23, 2013
Commenting is easier and faster when you're logged in!

Recommended for you

Understanding Web Design, Hand Coding, and WYSIWYG
Web Design is very intimidating for quite a few people. For just over two decade...

A Review of the Adobe Post Mobile App
Recently Adobe released a new mobile application for iOS (iPhone), Adobe Post. L...
New Mohawk Logo Designed by Pentagram
The 81-year-old paper company Mohawk unveiled a new logo that it says will let i...