


There are few things traditional artists who work on the computer find as exciting as animating their work. With Photoshop’s sidekick, ImageReady, the task becomes as easy as pie. And with Alien Skin’s new Photoshop plug-in, Xenofex 2, life — the life of an artist in pursuit of a moving image, that is — just got even easier.
Here are a couple of examples. Let’s tackle them in steps:
Shattered Dreams
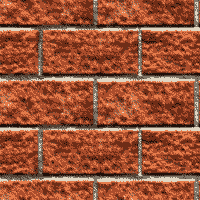
In Photoshop, load an image that lends itself to a “break out” sort of animation — something busting out of the screen. In this example, we’ll use an image of a brick wall.
1. On the Layers palette (press F7 if it’s not currently displayed), drag the Background layer title onto the Create a new layer icon on the bottom of the palette. Do this procedure five times for a total of six layers in the image (see Figure 1).

2. Uncheck the visibility icons (the little eye icons) to the left of the layer titles, for every layer except the background and second from bottom layer, and make sure that the second from bottom layer (titled “Background Copy”) is highlighted (it’s the active editing layer).
3. Choose Alien Skin Xenofex 2.0> Shatter from the Filter menu.
Let’s break for a moment and cover what the controls do in the Shatter interface (see Figure 2). First of all, if you want a better view of larger images in the preview window, click on the Zoom tool in the Shatter interface, hold Alt/Opt, and then click in the window.

Callout “a” in Figure 2 is the Piece Size (in pixels) control. As the name suggests, you can increase the size of the pieces of the image that make up the shatter effect by dragging to the right with the slider. I’d suggest that you make bigger rather than smaller pieces to enhance the effect.
Callout “b” is the thickness control. If you want to really see the edges of each shard of the shattered image, increase this amount.
Callout “c” is the control for increasing or decreasing the amount of tumble a piece of the shattered imager displays. I recommend a high value, because doing so enhances the three-dimensional quality of the effect.
Callout “d” is the Time factor, and the key to creating an animation. Imagine the life cycle of an explosion: it begins quietly and everything is in order, and then as time progresses, the exploding whatever increases in size as particles are randomly distributed.
Finally, callout “e” is the transparency option. Depending on the type of shatter animation effect you want to create, you may or may not want this option checked. As is the case with the shattering brick image, we do not want the transparency turned on, but instead we want the brick shards rendered to a white background, which is the default value in the interface.
Certainly, there are more options for the Shatter effect, but these are really the only ones we need concern ourselves over to make an animation.
To continue with the Shatter effect:
4. Set the Time slider to about 9, make other adjustments to other values as your artistic instincts dictate, and then click on OK to apply the effect.
5. Repeat step 5, while progressing the active layer by one up in the layer stack. In other words, choose Background copy 2 next, press Ctrl+Alt+F/Cmd+Opt+F (to call the last used filter in Photoshop without applying it), and then increase the Time value to about 18.
6. Increase the time value to 25, 45, then 90 for the remaining three layers.
7. Save the file as MyFile.psd in Photoshop’s native file format.
Ready, Set, Animate
Now that we have the raw working materials for an animation, let’s see how to actually do the animation. While Photoshop does not have a GIF animation engine, its sister app ImageReady certainly does. If you already have a GIF animation program, I’d suggest that you save out each layer as a TIFF file and use the GIF building program. If not, let me breeze through the details on GIF making right here.
In ImageReady, press F11 to display the animation palette. To totally cover animation creation in ImageReady is beyond the scope of this article, but here are the basics (see Figure 3):

1. You want to optimize the image so that all the layers are as compact as possible, because a multi-frame animation is large by Internet standards for folks with dial-up connections. To do this, you use the Optimize palette (press F10 to display it), and use diffusion dithering. Then see how few colors you can get away with and still have a good-looking image. Hint: You can probably decrease the colors to about 16 or so because the animation is moving, and folks will not be able to carefully examine each frame for compression artifacts.
2. Choose the bottom layer, and hide all the other layers. How fast should your animation go? That depends on your image material. I myself decided to use the fastest setting in ImageReady: No delay. In Figure 3, see callout “a”; by click+holding on this area, you can see and work with the timing pop-up menu.
3. Click on the add frame icon (callout “b”), and then reveal the second from bottom layer by clicking on the layer title on the Layers palette.
4. Repeat step 3, progressively revealing the layers from bottom layer to top.
When you’ve done that, choose File> Save Optimized As, and then save the GIF image to your hard drive.
This wasn’t so hard, was it? The Shatter effect can produce a really cool animation (see Figure 4).
Cracked Glass
A variation on the Shatter animation can be easily accomplished using the Xenofex Cracks filter, Here’s how this one goes:
1. Pick a favorite picture of yours, bring it into Photoshop, and as with the bricks file, create six total layers (including the Background) as you did earlier.
2. Choose Filter> Alien Skin Xenofex 2> Cracks.
3. The control for “animation-specific” filtering is the Crack Length (see Figure 5). For sure, the other controls are important for creating an individual style of effect in your own imagery, but for right now, let’s only concentrate on animation essentials. To begin with, use a crack length of 59, and then click on OK to apply the effect.

4. Use the progressive values of 128, 145, 189, and 1004 on the remaining layers.
5. Save the image to PSD image format, and then bring it into ImageReady.
(Note: you can perform all your editing and filtering in ImageReady, if you like. I prefer Photoshop for image compiling, but it’s a matter of personal taste and patience. The important point is that when you install Xenofex to Photoshop, it is available in ImageReady, too)
Now, with the Cracks effect, you probably want a longer duration for the frames to advance. Something like .5 seconds will produce a GIF that looks like Figure 6.

The message I’d like to leave you with is that if you can change sliders in a Xenofex or other filter, then you can animate the effect. For example, try out this article’s steps with the Lightning filter or the Flag filter. You’ll be surprised at how easily you can accomplish something that evokes “oohs” and “ahhs” from visitors to your site! The only problem will be that you can’t hear them.
Gary David Bouton is an author and artist who is largely responsible for the book “Inside Adobe Photoshop 7” and wouldn’t mind at all if you bought a copy. Gary also hosts a thread on the Photoshop Gurus site.
This article was last modified on January 3, 2023
This article was first published on June 6, 2003
Commenting is easier and faster when you're logged in!

Recommended for you
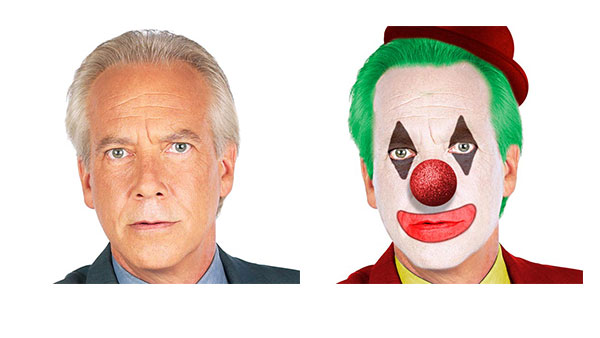
How to Make Anyone into a Clown in Photoshop
If your boss has ever accused you of clowning around in Photoshop instead of doi...

Creative Blöks: The Perfection Fairy
Each step you take on a creative path—whether you’re designing, drawing, or deve...
10 Free Vector Patterns, Volume 3
You may have seen my 20 free vector patterns and the follow-up 20 free line...