

Few projects have the budget for a lot of custom photography. Yet if you use too much stock photography, you risk looking like everyone else. The answer is to merge two or more images into something unique, and the best tool for that is Adobe’s Photoshop.
In the following tutorial, I’ll show you how to composite individual photographs into a new image. To follow along, merge your own images or download the photos below by clicking on them.
Here are the images to collage together:

“clouds_jwillsphoto” by Jennifer Wills is licensed under a Creative Commons Attribution-NonCommercial 3.0 Unported License.

“frame_jwillsphoto” by Jennifer Wills is licensed under a Creative Commons Attribution-NonCommercial 3.0 Unported License.

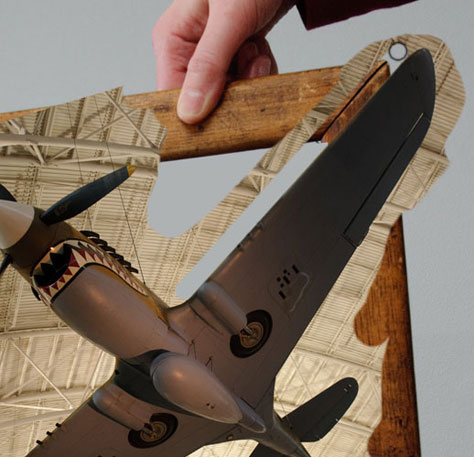
“plane_jwillsphoto” by Jennifer Wills is licensed under a Creative Commons Attribution-NonCommercial 3.0 Unported License.
The end result will look like this:

Step 1.
In Photoshop, open the file clouds.jpg or whatever you want as your background image. Then open the other images you’ll composite, select the Move tool (shortcut key: V), and click-and-drag them on top of the background photo (or select each image and copy and paste). To help you keep track of what’s what, name the layers by double-clicking on each one in the Layers panel and typing in a new name.

Step 2.
Add a layer mask to the plane layer by clicking on its name in the layer panel, then clicking the Add Layer Mask icon at the bottom of the Layers Panel.

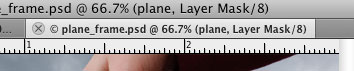
Make sure the mask is selected by clicking on it. You can confirm it’s selected by looking at the name of the file, which should say “plane, Layer Mask/8”.
Make black your foreground color. A good shortcut for this is to hit the “D” key which sets the default foreground (white) and background (black) colors. Then hit the “X” key to swap those colors so black is in the foreground.
Now select the Brush tool (shortcut key: B) and choose a large brush with some hardness. I used a 100-pixel round brush with 85% hardness.
Step 3.
Begin painting out the background of the plane. It will disappear as you paint because, on a layer mask, wherever you paint in black disappears. Wherever you paint in white becomes visible. The old Photoshop adage is, “White reveals, black conceals”.

As you get close to the plane, zoom in and reduce your brush size for greater precision. If you overpaint an area, don’t worry—nothing has been destroyed. You can restore the detail by hitting the X key to swap to a white brush and painting back in anything you inadvertently made invisible.
For masking a straight line, such as the edge of a wing, click once on an edge of the wing, release, move your brush cursor to the end of the wing, and click again while holding down the Shift key. You’ve now created a straight line between those two points.
 Step 4.
Turn off the visibility of the plane layer and select the frame layer by clicking on it in the Layers panel. Choose the Magic Wand tool (W) and in the Options bar, set the tolerance to 30 and uncheck the Contiguous box. Click the gray background outside of the frame. Now click the Add Layer Mask icon at the bottom of the Layers panel, and this is what you’ll see:
 Hit Command/Control-I to invert the layer mask, and you should see the cloud background through the frame.
Step 5.
Finally, let’s make the plane look as though it is flying through the frame. Turn on the plane layer’s visibility and select its mask. (Remember, you have to click on the mask thumbnail, not the plane thumbnail.)
Choose a brush and paint with black on the areas where you want the plane to appear as if it’s behind the frame. I painted back the wing on the left and a bit of the tail. The final image should look something like this:
Note: An article with this same title but completely different content appeared on CreativePro.com in 2006. That article was written by Colin Smith.
This article was last modified on January 6, 2023
This article was first published on July 25, 2011
Commenting is easier and faster when you're logged in!

Recommended for you

Dehazing an Image in Photoshop
Learn how to rescue images beset by fog and atmosphere with Photoshop's Camera R...

Mastering Photoshop Smart Objects: Layer Comps
If you need to develop several versions of a composition in Photoshop, Layer Com...
How to Make a Cinemagraph in Photoshop
Cinemagraphs are images in which just a portion is animated on an endless loop....