


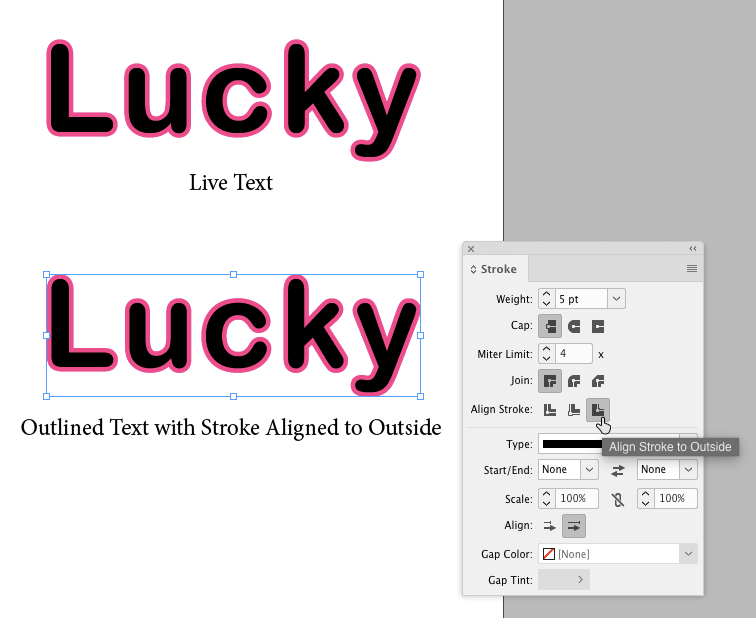
If you’ve ever had to convert stroked text to outlines in InDesign, you know the meaning of disappointment. What was a perfectly aligned stroke sitting behind the live text becomes…a mess.

By default, the stroke is aligned to the center. So you might try changing it to align to the inside or outside. But you will probably find no joy with either.

Though you might get lucky, if none of the letters overlap or have any enclosed spaces (aka “counters”). In that case, you can simply change the alignment of the stroke to the outside and go about your day.
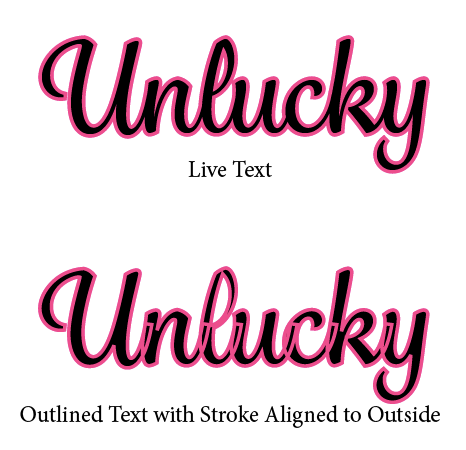
But if you’re dealing with a script font, or the text contains letters like a, b, d, e, g, o, p, or q, you’re out of luck.
The fix that I like to use here is to make a stack of three copies of the outlined text. The bottom copy has the stroke aligned to the outside, the middle copy has the stroke aligned to the inside, and the top copy has no stroke.

So the bottom copy adds the stroke around the outside of the letters, the middle copy makes strokes visible in the counters, and the top copy obscures any defects. Well, almost any. You may also have to play with the stroke width and miter limit values to get the effect right.
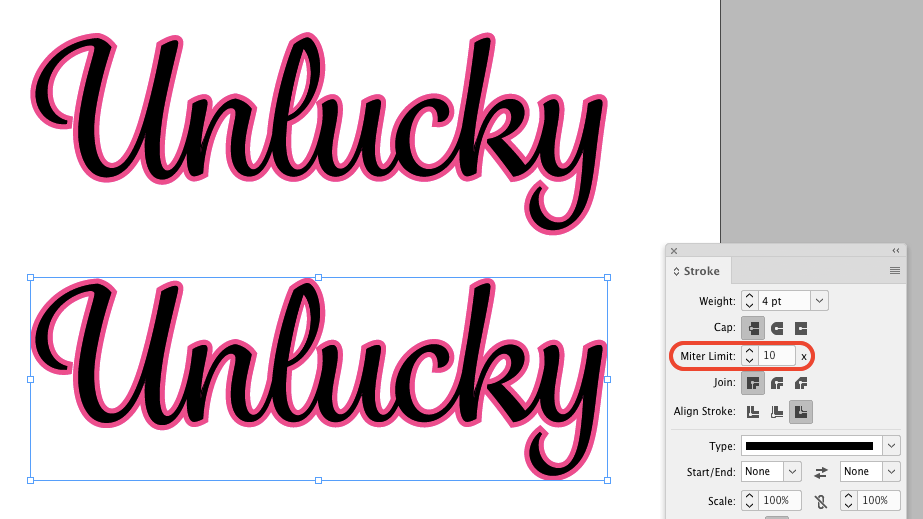
Just remember to group the three copies of the outlined text so they don’t come out of alignment.
This article was last modified on October 14, 2022
This article was first published on September 4, 2018
Commenting is easier and faster when you're logged in!

Recommended for you

Using the Shift+Arrow Keys to Extend a Text Selection in Both Directions
Selecting text in InDesign is easy... except when it's baffling! Here's a quick...
Mysteries of the Elliptical Overset Cell Symbol Revealed
Not all overset marks are the same, and when it comes to tables, paying attentio...

The Case of the Missing Placeholder Text Contest Answer and Winner
Solve this InDesign mystery for a chance at winning a great prize.