


Where’s My Clipboard?
Of course, one thing you absolutely cannot do with high-bit files is copy and paste. The commands aren’t available in high-bit mode. What you can do, though, is to move pixels from one high-bit image to another, using the Clone tool. The major shortcoming is that you can’t reposition the pixels in the destination document once you’ve moved them, so you have to bring them in exactly in the right place. Here’s one way.
First, select the pixels you want to move in the source high-bit image, using the techniques described above. Then, to allow pin-registration between the source and destination documents, turn on Rulers (Command-R, or View>Rulers), and drag a pair of guides to touch the top and left sides of the selection (see figure 13) — I usually zoom in to 1600% view to do this precisely.
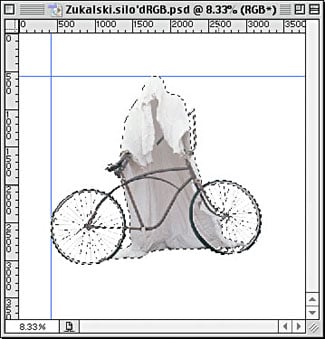
Figure 13: The source selection, with Guides.
The next step is to transfer the source selection to the desired position in the destination document. You may want to experiment by copying and pasting between 8-bit/channel duplicates of the image to get the positioning exactly right. If you do this, you can shift-drag from the down-sampled duplicate of the destination document to its high-bit equivalent. Or you can simply drag the selection from the high-bit source document to the high-bit destination, and position it as you wish. Then, to facilitate pin-registering, drag guides to the top and left edges of the selection in the destination document (see figure 14).
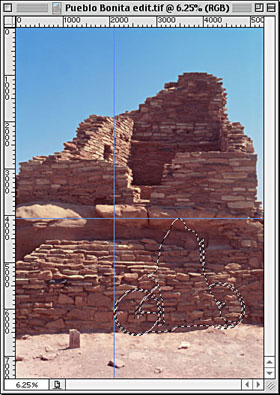
Figure 14: The destination selection, with Guides.
Now you’re ready to move the pixels. Choose the Clone tool, make sure it’s set to Aligned, and Option-click on the intersection of the two guides in the source document to set your source point. Then switch to the destination document and align the Clone brush with the intersection of the two guides in the destination document. (An easy way to do this is to hold down the option key to get the precision cursor, but don’t click, or you’ll lose the source point in the source document.) Once the brush is aligned, hold down the mouse button, and start painting. You start at the guide intersection, but because it’s outside the selection, nothing appears until you reach the selection. When you do reach the selection, you’ll find that it’s exactly registered with the source (see figure 15).
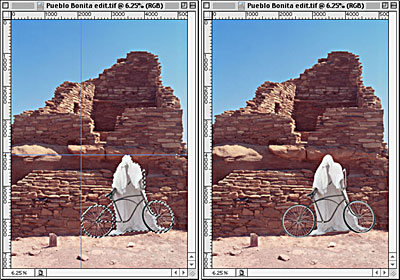
Figure 15: The pixels transferred from source to destination, with and without selection border and guides.
Where’s the Conclusion?
So let’s summarize.
- You can’t make complex selections with feathering and transparency in high-bit files. But you can transfer such selections to high-bit files.
- You can’t adjust layer blending and opacity in high-bit files. But you can fake it with the History brush.
- You can’t paint on high-bit files with the Paintbrush tools. But you can fake it with the History brush.
- You can’t copy and paste pixels between high-bit images. But you can move pixels from one high-bit image to another with the clone tool.
All these techniques work in both Photoshop 6 and in Photoshop 7 — those of you with sharp eyes may have noticed that all the screen shots are in fact from a beta version of Photoshop 7. I hope to live to see a version of Photoshop that has full support for high-bit files, including layering, blending, and all the fun filters, but Photoshop 7 won’t be it. If you want to see more high-bit support in future versions of Photoshop, you need to ask for it, which you can do in the Features Requests section of the Adobe User-to-User Forum dedicated to Photoshop (you’ll have to register first, but it’s painless and doesn’t result in a ton of incoming spam). Meanwhile, use these tricks to get by.
Read more by Bruce Fraser.
This article was last modified on January 3, 2023
This article was first published on March 26, 2002
Commenting is easier and faster when you're logged in!

Recommended for you

How to Prepare Raster Images for Use with Illustrator Brushes
In the process of testing Illustrator features released last June in the Creativ...

The Digital Art Studio: Rescuing Old Photos #1
As the representative digital professional in my family, I’m frequently tapped t...

Turn a Photo into a Planet Using Photoshop
We’re all familiar with panorama photography, and you may have used Photos...