

Cheap Trick 3: Use the Arrow Keys to Move Curve Points
Using the mouse to move curve points is a bad idea for several reasons. First, it’s not easy to be precise. Second, it forces you to move the cursor from the image, so you can’t sample numbers from the Info palette. Third, it’s slow.
If you know the actual numerical value you want to set, use Cheap Trick 2 to simply type in the output value. But if you’re at all like me, there are probably times when you want to work visually. Instead of dragging curve points with the mouse, use the arrow keys. Use the up, down, right, and left arrows to move the Curve point one level in each direction, or add the Shift key to move in 10-level increments.
If you have multiple points on a curve, you can select each one in turn by pressing Control-Tab (on either platform). Add the Shift key to reverse direction.
In Figure 6, I tweaked the contrast very quickly by Command-clicking to set a point for the shadows, and another for the highlights. I used the arrow keys to move the points, and Control-Tab/Control-Shift-Tab to toggle between them.
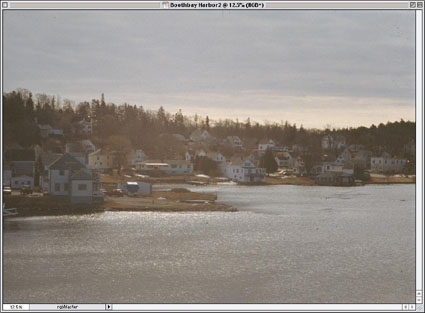
Figure 6: You can effect quick contrast adjustments by assigning one point for shadows and a second for highlights and then using the arrow keys to adjust each.
Cheap Trick 4: Levels Clipping Display
Levels is my tool of choice for making rough adjustments to contrast by setting black and white points using the black and white input sliders. But the RGB histogram in the Levels tool doesn’t distinguish between true black and white (level 0 or 255 in all three channels) and saturation in a single channel (0 or 255 in one channel only). Use the Levels clipping display to see exactly what is being clipped as you move the sliders.
The Levels clipping display gives you a means to distinguish between actually forcing pixels to black or white or simply increasing saturation slightly by forcing a single channel to 0 or 255. This trick can take some time to become comfortable with, but once you’re used to it you’ll wonder how you ever lived without it. Mac users have had access to a variant of this trick in all versions of Photoshop since Photoshop 2.5, but it involved jumping through some hoops and putting up with some psychedelic behavior on screen. In Photoshop 6, it works on all platforms, is a lot easier to invoke, and even works on Levels Adjustment Layers.
To use the Levels clipping display, hold down the Option (Mac) or Alt (Windows) key, then drag the black or white input slider. When you drag the black input slider, the image turns white, except for the pixels being clipped (that is, forced to level 0). When you drag the white input slider, the image turns black except for the clipped pixels. (See Figure 7.)
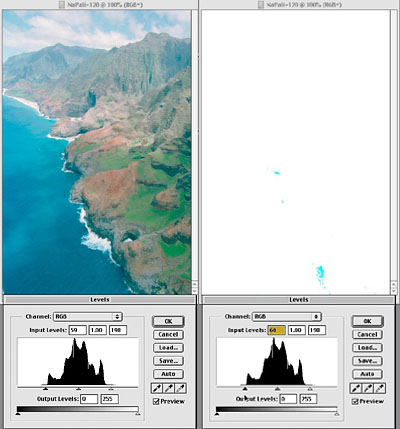
Figure 7: Photoshop’s Levels clipping display (right) shows what pixels are being clipped as you make your adjustments.
The cool thing about this is that, unlike the RGB histogram, the clipped pixels show you exactly what’s being clipped. In the black clipping display, pixels that show up as black are indeed being turned black — they’re forced to level 0 in all three channels. But you’ll also see cyan, magenta, yellow, red, green, and blue pixels. The table below shows the value pixels are clipped to, as indicated by the color coding you’ll see on the screen.
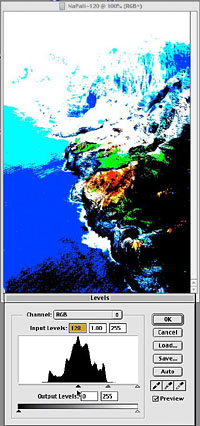
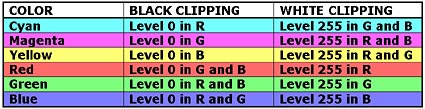
Figure 8: Color coding in the Levels clipping display shows you the values to which clipped pixels are forced, as in the fairly extreme example above. The table shows the pixel values corresponding to each color.
This article was last modified on July 18, 2023
This article was first published on July 11, 2001
Commenting is easier and faster when you're logged in!

Recommended for you

Adobe Drops Fonts, Leaves Users Stranded
We wish this were one of our infamous April Fool’s Day jokes, but it’s not. At s...

This Week in InDesign Articles, Number 27
Want more CS5 coverage? Want some good tips for CS3 and CS4? Check out this week...
Apago Releases PDF Shrink 4.2
Apago Inc., a software developer for the graphic arts and document management in...