


Remember those cool flight maps from Raiders of the Lost Ark and the other Indiana Jones movies?
There are tutorials all over the web for how to make effects like this in applications like After Effects, Final Cut Pro, and even Keynote (courtesy of the amazing Erica Gamet). Here’s how to make something similar with InDesign.
See also: Adventures in Keynote Animations at CreativePro
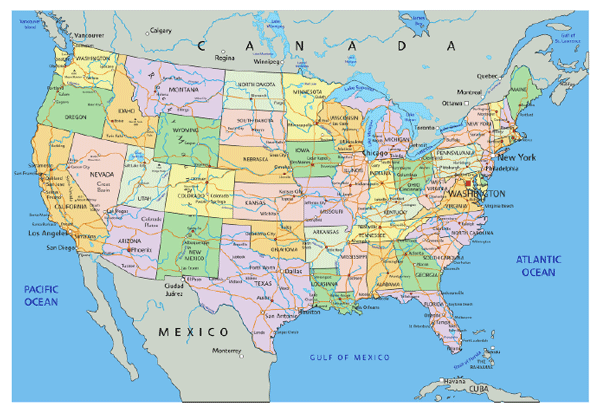
Start with a background map image. It’s best to put it on its own layer or at least lock it so you’re not accidentally selecting it as you work with the animation effects.
Use the Pen tool to draw a straight line (curved lines won’t work) from one location to another. Format the line with a solid stroke.
With the Selection tool, copy the line and paste it in place (Edit > Paste in Place), so you have two copies stacked on top of one another.
Select both copies.
In the Animation panel, click the button to convert to motion path.

The top copy of the line becomes the motion path.
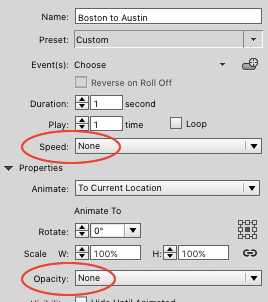
In the Properties section, choose Animate: To Current Location.
![]()
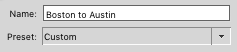
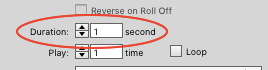
Give the animation a name.
If you want to control the animation with a button, deselect the On Page Load event.

Make sure that both Speed and Opacity are set to None.
Preview the animation. If it moves too quickly or slowly for your taste, and adjust the Duration.
Create a mask (a frame with no stroke and no fill) that just reveals the end position of the animation. Masking the animation is what will make the line appear to grow in length rather than just move over the map.
With the Selection tool, select the animated line. Cut it and paste it into the mask (Edit > Paste Into).
To control when the animation plays, make a button in the Buttons and Forms panel. Name it to match the animation.
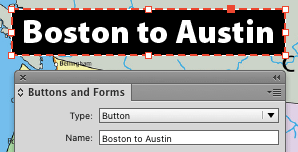
For the Action choose On Release or Tap, Animation, Play.

Use the EPUB Interactivity Preview panel to preview the animation to confirm that the button works.
Now repeat the process for as many legs of the trip as you want. You can either use different buttons for different legs of the trip, or wire up all the legs of the trip in the right order to the same button.

When you’re satisfied, export the document to Publish Online or Fixed-Layout EPUB.
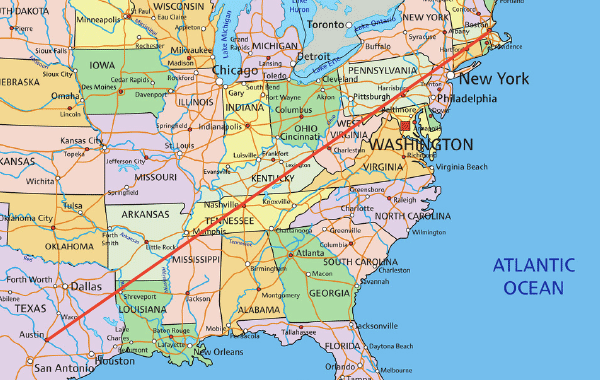
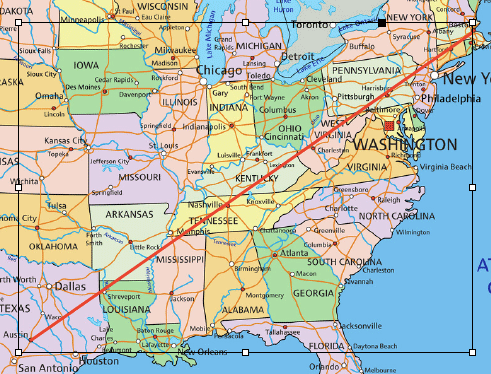
Here’s what a finished animated route map looks like.
Be aware that if you need to tweak any settings of a masked animation, you will need to cut it out of the mask (paste it in place so it doesn’t get moved out of position). After you make your tweaks, paste the animation back into the mask, and go back to the Buttons and Forms panel and re-establish the button to trigger the animation (the trigger event is destroyed when you cut the animation out of the mask).
This article was last modified on July 25, 2019
This article was first published on January 25, 2016
Commenting is easier and faster when you're logged in!

Recommended for you

Follow the Yellow Brick Road
For this yellow brick road, we need multiple wavy dashed lines. But InDesign wil...

I Should Have Known That
Sometimes you learn something that is new to you, but obvious to others. I compi...

InDesign Tips for Optimal Form Wizardy in Acrobat
What's the best way to design form field elements in InDesign so that after you...