
Lightroom in Black and White
Learn multiple methods of making photos black and white and fine-tuning the appearance for the look you want.
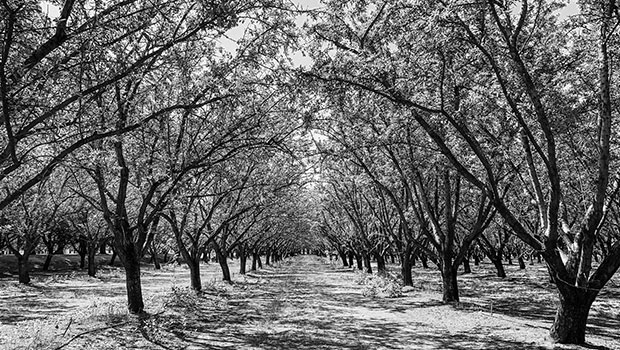
Making photos black and white is a separate treatment today, but for much of the history of photography, it was the only option—color film first didn’t existent, and then was often too expensive for most people to process. Even long after color did become the norm, black and white remains a popular artistic choice. Now, of course, we can create the effect easily in software. Converting a color photo to black and white isn’t just a matter of removing the color saturation, however. In Lightroom and Lightroom Classic, you’ll find multiple methods of making photos black and white and fine-tuning the appearance for the look you want. Most photo editing programs offer similar options, but I’m focusing just on the two current versions of Lightroom for this article. You’ll find the controls in the Edit panel of Lightroom (the newer cloud-based app, until recently called Lightroom CC) and the Develop module in Lightroom Classic, depending on which version you use.
One-click B&W
The easiest method is to let the software handle the conversion with a single click of the B&W button in Lightroom, or the Black & White option under Treatment in Lightroom Classic. This is the quick approach that produces basically the same effect as reducing the Saturation slider to –100, converting all color values to grayscale.

The easiest method of switching to black and white in Lightroom.
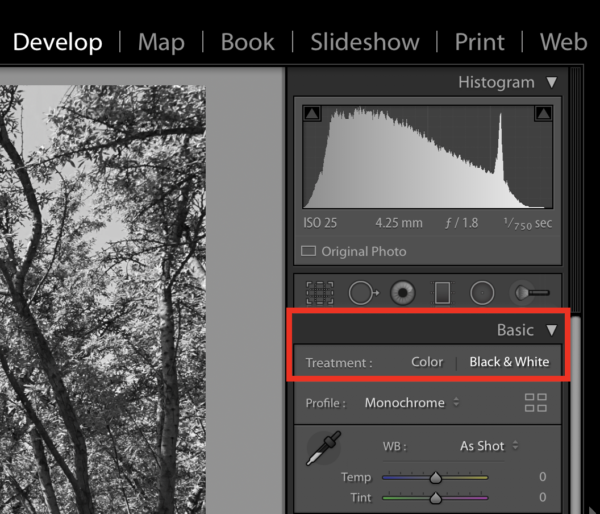
The easiest method of switching to black and white in Lightroom Classic.
Profiles and Presets
The next-easiest path to black and white is to select one of Lightroom’s presets, which incorporate tone adjustments that are good
for some situations. For example, the B&W High Contrast preset features an increased Whites value and decreased Blacks value to accentuate the difference in tones. In Lightroom, click the Presets button at the bottom of the Edit panel, and then select one of the options under B&W in the panel that appears. In Lightroom Classic, reveal the Presets list in the side panel at the left side of the editing area, and choose an option under B&W.

Use already-made presets for several black and white looks in Lightroom.
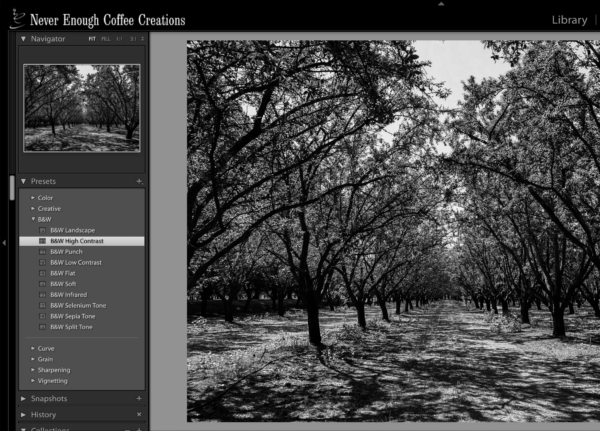
The Presets panel in Lightroom Classic appears to the left of the image.
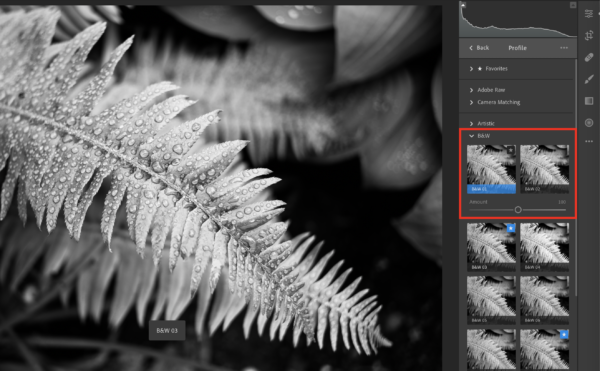
Adjust the intensity of the profile’s effect using the slider below the selected profile in Lightroom.

The Amount slider for profiles in Lightroom Classic appears at the top of the Profiles pane.
The Colors of Black and White
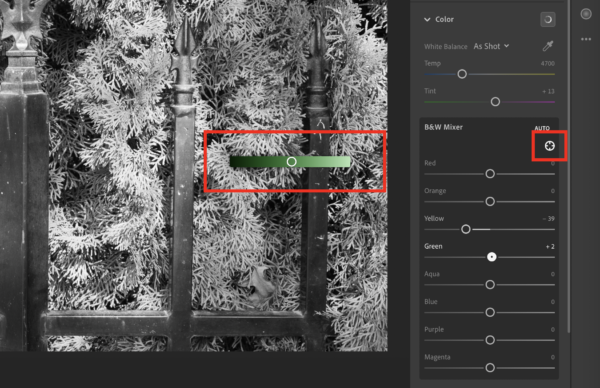
It may seem as if the color has been drained from a black and white image, but it’s still there, leading to greater specificity in how the grayscale tones are rendered. This ability gives you a lot of latitude in editing areas dominated by one color. For instance, when adjusting a color photo with large swathes of green, you can manipulate just how dark or light the green hues are represented in grayscale. Want a darker sky? Push the Blue or Aqua sliders to the left. In Lightroom, convert the image to black and white using one of the methods outlined above, and then open the Color pane. Click the B&W Mixer button to the right, which reveals sliders for each color channel. (in Lightroom for iOS and Android, you’ll see a Gray Mix pane, where you can select a hue and adjust its luminance). When you change one of those, the effect applies only to that hue in the image.

The original color image.

Adjusting just the green hues to make them darker.

Pushing the Green slider to the right makes the bushes lighter.
When you use the Targeted Adjustment Tool, Lightroom previews the hue beneath the mouse pointer. As you drag, you see the relative change in the color hue as well as the black and white image.

The B & W panel in Lightroom Classic.
A Black and White Exercise
In many cases, switching a color image to black and white will result in a perfectly fine image. And sometimes the presets and profiles might be exactly what you’re looking for. Once you understand how the colors are interpreted, though, and how to adjust their appearances, you can edit your black and white photos more to your liking. I’ll leave you with a quick exercise to help you see the potential of black and white scenes. If your camera has this feature, set it to capture photos in Raw+JPEG and set the JPEG to save in a black and white simulation. On some cameras, the scene in the viewfinder and the LCD will preview the black and white version before you take the shot. You can then look at the black and white versions on the camera, or compare them with the color raw versions after you import them into Lightroom.
Commenting is easier and faster when you're logged in!

Recommended for you
How to Make a Cinemagraph in Photoshop
Cinemagraphs are images in which just a portion is animated on an endless loop....
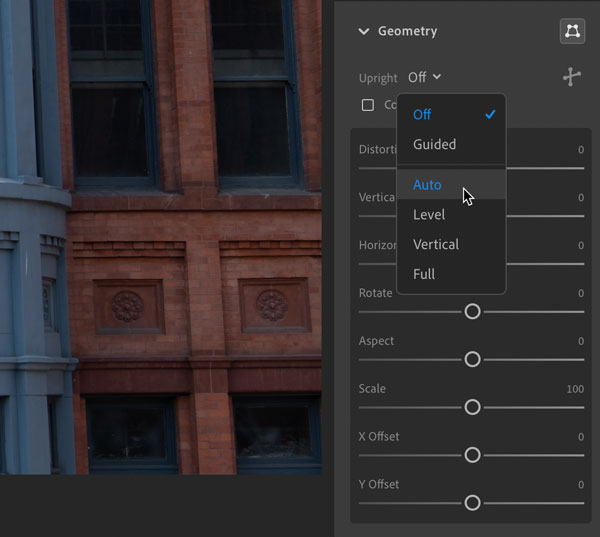
Straighten Up Photos with Lightroom’s Geometry Tools
Have people ever told you to “straighten up”? Maybe they think it’s your attitud...

Working with Albums and Collections in Lightroom, Part 2
How to use filters and smart collections in Adobe Lightroom to organize your pho...