
Label Placed Images in InDesign
Here’s how to label placed images with their resolution, color space, and other data.

This article appears in Issue 42 of InDesign Magazine.
“Anyone know of an InDesign script to find the effective PPI of each image in a document, and to put that information in a label on a new layer over the image itself?” A number of years ago, someone asked this question on social media. When I read it, I knew precisely what script the author needed— only he already owned it, and it’s not actually a script. Plus, this same tool can display almost any type of information about images in the document.
The Need
Consider a layout like the one in Figure 1. Let’s say that it’s a catalog of images produced from a particular publication, project, or folder. Along with the images themselves, you might want to see and/or print information about those images. Such information could be limited to the effective PPI (the resolution of an image as affected by its scaling) as used in a particular document (Figure 2) or a bevy of data about each image, such as the image color space, file name, embedded ICC profile, actual PPI (the true resolution of the linked file), dates of creation and modification, and much more (Figure 3).
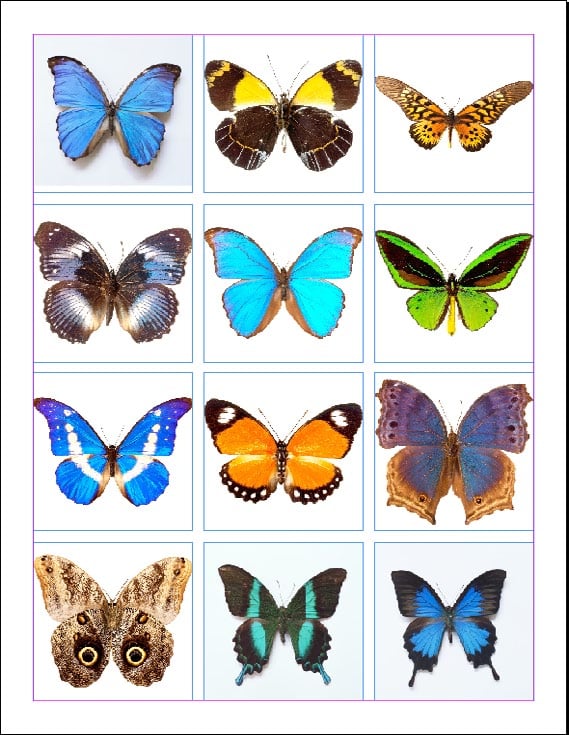
Figure 1. A catalog of images

Figure 2. Images bearing their effective PPI values

that shows the image’s Effective PPI, Actual PPI, color space, ICC profile, creation time, modification time, and link type.” width=”539″ height=”453″ /> Figure 3. Images with several pieces of accompanying data a designer or production artist might need to know at a glance
Effective PPI Labels
Getting back to the original question, let’s start by putting the effective PPI atop those images.
- Open your document that already includes linked images. On the Layers panel, create a new layer named _Image Info or something equally distinctive.
- If you want effective PPI to appear when you print, move on to the next step. However, if you only want to see the effective PPI onscreen without the risk of it accidentally winding up in the print or PDF output, right-click the _Image Info layer and choose Layer Options. In the Layer Options dialog, disable the Print Layer option (Figure 4). Now, even if the layer is visible, it won’t print or be in your exported PDFs (unless you force non-printing objects to print in the Print or Export to PDF dialog boxes). In the Layers panel, the names of non-printing layers appear in italic.

Figure 4. Setting the Image Info layer to not print
- Select the first image with the black arrow Selection tool, then right-click on the image and choose Captions > Caption Setup.
- In the Metadata Caption section of the Caption Setup dialog box, enter “Effective PPI: ” (including the space) in the Text Before field. Leave the Text After field blank and choose Effective PPI from near the top of the Metadata dropdown field (Figure 5).

Figure 5. Choosing to display an image’s Effective PPI
- By default, the image’s effective PPI information will appear below the image, nestled against the frame’s bottom edge. To make the information appear within the image instead, leave the Alignment field as Below Image, but set a negative value in the Offset field—a value of about half the height of the image. If you’re doing this for multiple images, try to set an Offset value to a negative of half the height of the average image (Figure 6).

Figure 6. The negative Offset value will place the label over the image.
- Optionally, set a paragraph style for the label in the corresponding field, but definitely change the Layer field to _Image Info. Thus, all effective PPI labels will end up on the layer you created for that specific purpose. Don’t check the Group Caption with Image box; doing so will move the images to the potentially non-printing _Image Info layer, too.
- Click OK, and, voilà! Not a darned thing happens. There’s one more step to expose the information you just configured.
- Right-click on the image once more, and head to the Caption submenu. Select Create Live Caption. Bam! There’s the Effective PPI label, in its own text frame, on the _Image Info layer.
- If you placed the label on top of the image, as I suggested above, you might want to give its frame a fill color so that the label stands out against the picture. A little inset spacing in Text Frame Options, maybe changing the paragraph horizontal or vertical alignment, might also improve its appearance and clarity (Figure 7).

Figure 7. With a partially transparent fill, text frame insets, and rounded corners (right), the label’s appearance and clarity are greatly improved from the original (left).
- Now that you have one image label, let’s get the label onto other images, exposing their respective effective PPI values. Do not go back to Step 1. Instead, copy the label frame you just created and paste—careful to remain on the Image Info layer—atop each of the other images in your layout. You can also Option/Alt-drag the label frame from one image to the next. If you have many labels to create, use Edit > Step and Repeat.
The data in the label (the bit after the static “Effective PPI: ”) will automatically update to reflect the effective PPI of the image behind it. You won’t be labeling subsequent images with the data from the first; the metadata in the label—a Live Caption object—will always be from the image it touches. You now have your images labeled with their effective resolutions. If you go back and scale those images, the label updates to reflect the new resolutions.
More Informative Information Labels
To expose more information about each image, something like Figure 8, the process is identical—with one extra step.

Figure 8. A more detailed image label created the same way
- If you already have effective PPI labels on your images, remove them. Regrettably, while InDesign’s Live Captions update when the image changes, they don’t up- date when you change their definitions (for example, if you change what label it should show in Caption Setup). Instead, each change to the Caption Setup requires recreating the Live Caption object.
- Return to the Caption Setup dialog box. Leave the bottom section options unchanged from the previous setup (unless you want to change them) and instead focus on the upper section, where you had previously defined the Text Before and Metadata comprising the effective PPI label.
- Leave the effective PPI line alone but click the plus sign to its right to insert a new line.
- From the Metadata field, select the information you want in your label. It can be anything: the image’s date of creation, modification, placement into the document, or output (of the InDesign document itself), the actual resolution of the original image file, the color space or ICC in the image, the transparency, skew, or rotation transformations applied to the image, the photo credit, the location the shot was taken (if those values were entered into the image’s metadata). Once you’ve chosen the information to expose, add a label to identify that information to the Text Before field, and, optionally, something in the Text After field (for example, “PPI” to communicate the measurement system).
- Repeat the last two steps for each new piece of information you want in your label. Each line of metadata will be output to the Live Caption object text frame as a new paragraph. Figure 9 shows the data set I configured.

Figure 9: My settings for creating the more detailed image catalog label.
- Click OK, then generate your first label by right-clicking on an image and selecting Captions > Generate Live Caption.
- Following the instructions in steps 9 and 10 of the previous section, style the caption text and frame, then get copies onto the other images.
Automatic Labels During Place
InDesign can also automatically generate the information labels at the moment you place one or more images into the document.
- First, configure the labels you want in Caption Setup. All the options you used above are available.
- Choose File > Place and pause in the Place dialog. Note that you must import an image through File > Place, at least the first image, rather than using any of the other methods of placing images.
- In the Place dialog, select your desired image (or images) and check the option to Create Static Captions (Figure 10). Now click the Open button.

Figure 10: The Place dialog box with the Create Static Captions option enabled.
- Unless you had a frame selected already, your image(s) will create a loaded cursor. What you may not notice, though, is that images aren’t the only things on that loaded cursor—there is also a small bit of text. (You’ll see the cursor icon includes a small 2, indicating two objects, image and text.) Place the image into the document. The cursor is still loaded with the label data you configured in Caption Setup (Figure 11). Click on the image you placed, and you’ll drop a text frame containing that label. If you loaded multiple images for placement, each will be followed by a Live Caption object.

Figure 11: After placing the image, its static caption is also ready to place.
When using this technique, there is something very important to keep in mind: Captions created at place time are not live. They’re static captions, meaning that, after creation, they won’t update to reflect changes to linked images they describe. If the image changes, you’ll need to delete the automatically generated caption object and recreate it by selecting Captions > Generate Live Caption or Captions > Generate Static Caption from the contextual menu or the Object menu. Exposing image data about assets in a document or library is a common need for many creative workflows. The solution isn’t a script or plug-in, but the smart use of an included feature.
Commenting is easier and faster when you're logged in!

Recommended for you

Fonts on Friday: Influenced by the ’70s
What better time to round up new typefaces than on Friday. Not only is “Fo...

InDesign CC 2015.4 Brings Small Changes in June 2016
Don’t worry, there’s nothing wrong with your calendar. It is indeed June 2016, a...
AIGA’s Centennial Celebration Continues
AIGA turned 100 years old in 2014 and many institutions and publications are cel...