
Keeping Long Text Fields on One Line When Using Data Merge

Using InDesign’s Data Merge features can be tricky at times. Fortunately, there are plenty of good data merge tips here at InDesignSecrets and at Adobe.com. Recently, I came across a trick that I thought was worth sharing. My particular problem was that the text frame wasn’t big enough for a long field in my data merge.
The Problems
You can see the problem in the screenshot below – the text “United States of America” should appear at the bottom of the address. But it’s missing because the text frame is overset.

And in this example, the text “Andrew Young International Boulevard” should appear on one line, not two.

Problems like these can be hard to notice, especially when you’re working with a database of 10,000 addresses! It would be very difficult and time consuming to proof the output and fix any mistakes you find.
Overset Text Reports
InDesign will inform you of overset text, but only after the merge is complete!
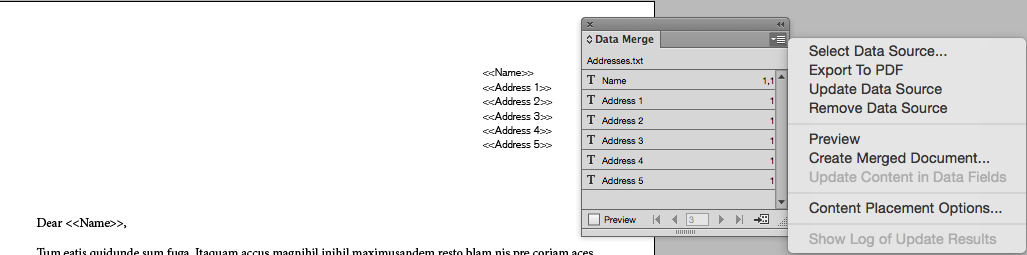
From the flyout menu in the Data Merge panel select “Export to PDF.”
Usually your Data Merge will look something like this:
When you export to PDF, InDesign creates a report. If there is overset text, each example is noted.
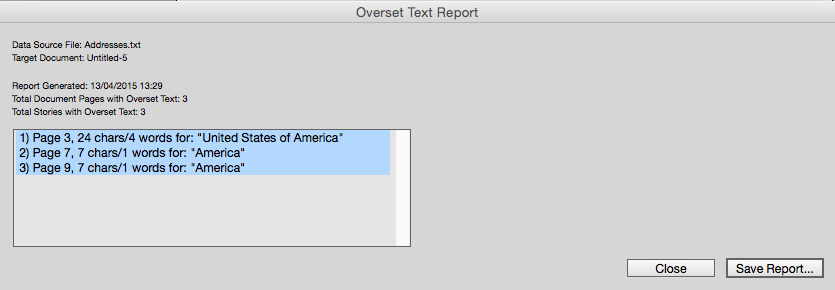
In this case, the overset happened because my text frame was not large enough. So I need to come up with a solution that fixes the overset text problem and keeps each data field on one line.
InDesign has a great feature to combat this, which was introduced in CS6: Auto-Size.
Using the Auto-Size Text Frame Option
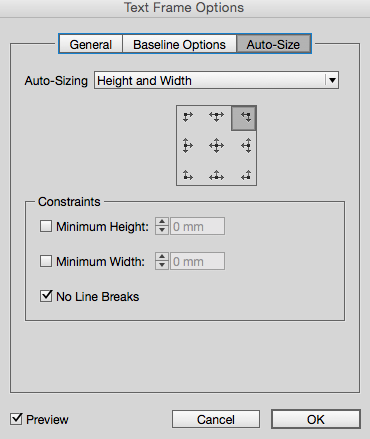
Select the text frame with the Address Fields, and then you can go to Object > Text Frame Options. The third Tab over is called Auto-Size.
In this case, I chose to resize from the top right corner, and selected the option for “No Line Breaks.”
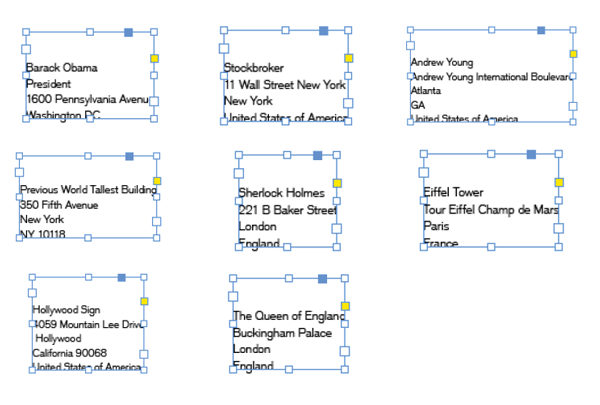
Now all my text frames expand from the top right to fit all the text for each data field on the one line without spilling over to the next.
This article was last modified on July 8, 2021
This article was first published on April 15, 2015
Commenting is easier and faster when you're logged in!

Recommended for you

Make Scalable Shapes with Data Merge
Data Merge is a feature of InDesign that I use regularly to prepare personalized...
Import a Folder Full of Pictures, One Per Page
In an earlier article, I wrote about how to import lots of images into InDesign...
Alias One Color Swatch to Another
Perhaps you know that InDesign's Ink Alias feature (hidden inside the Ink Manage...