


This article appears in Issue 100 of InDesign Magazine.
For years, designers and content creators have wrestled with the problem of coordinating shared reviews. Typically—within recorded history, anyway—PDFs were attached to emails that went to clients or stakeholders for comment or approval. In most cases, stakeholders printed the attached PDFs, manually marked up problems or changes, scanned the marked-up PDF, and returned the scanned file to its owner to implement the requested changes. Once the changes were made, designers would repeat the same PDF-to-email workflow, often many times, until the project was finally approved. To this day, many organizations continue to use this same low-tech review workflow.
With the release of Adobe Creative Suite 5 in April 2010, Adobe introduced Adobe CS Review, an online component that was part of a larger set of five web-based services named CS Live. Using a new panel inside of Adobe InDesign, InCopy, Illustrator, Photoshop, or Premiere Pro, designers invited reviewers via email to comment on document proxies hosted on Acrobat.com. Simple mark-up tools allowed multiple reviewers to comment in real time, but after two years of lukewarm customer interest, CS Review was discontinued in April 2012.
In 2014, New Zealanders Marcus Radich and Gemma Hurst put their heads together to build a new online review and approval system. After working together in and around the creative industry for over 15 years, Radich and Hurst had seen and experienced the frustration creatives and marketing teams face on a daily basis of gathering feedback and sign-off on work. Their company vision was set: to shift the unproductive habits of marketing teams and creatives globally, enabling smarter review and faster execution of brand-approved campaigns.
Their mission was to make the process as simple and intuitive as possible. By eliminating pain points from other previous systems, Radich and Hurst introduced PageProof in June 2015.
Account Setup
and Dashboard
A quick look at the PageProof website reflects the product’s concept of simplicity. Lean and uncluttered, the site is open and airy, almost to the point of feeling like a work in progress (Figure 1).
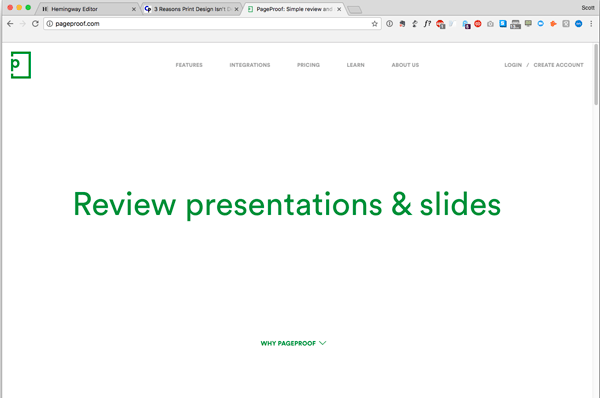
Figure 1: The open look of the PageProof website conveys a sense of simplicity. Scrolling down reveals much more about the product’s features, third-party integration, and clients.
Setting up an account is as easy as typing in your email address and password. Once you receive your activation email, click the activation button, and you’re into the system. From there, you’re delivered to the dashboard, where you can upload your first proof.
The PageProof dashboard (Figure 2) provides access to your Inbox, sent proofs, and proofs waiting to be sent (Outbox).

Figure 2: My PageProof dashboard indicates that I have one proof with three To Dos, or changes, requested. Mousing over the proof thumbnail (light green box) shows the document in color and exposes links for more info, printing, and downloading. Clicking the bell icon in the upper right corner triggers a drop-down Notifications menu. Clicking the S icon (my temporary user avatar until I upload one of my own) displays an austere main menu that includes links to web and video help files. New files to proof can be dragged onto the white center-left arrow icon.
The two icons in the upper right corner show a list of notifications and main menu access (the S icon is my temporary avatar until I upload one of my own). The icon in the lower right opens an in-app chat where you can start a new real-time conversation with the PageProof team or continue an existing conversation. It’s also where PageProof lets you know of new features and handy tips along the way (Figure 3).

Figure 3: The in-app chat shows conversations with the PageProof team. Open conversations are indicated by a green dot.
Proofing Workflow
Let’s look at a hypothetical situation to help better understand the PageProof workflow. I’m designing a book jacket for a fictitious publisher, using InDesign, of course. When I’m ready to show the layout to my client, I have two options for file upload and distribution: Drag and drop a PDF onto the Upload icon in my PageProof web dashboard (see Figure 2) or open the PageProof panel within InDesign (Window > Extensions > PageProof) (Figure 4).

Figure 4: InDesign’s PageProof panel provides access to your proofs without leaving the application. The panel’s functionality mirrors most of what’s found online in the PageProof dashboard. You can download and install the panel here.
The PageProof Add-on extension is free and can be downloaded here. It is compatible with InDesign, InCopy, Illustrator, and Photoshop. Coming soon is compatibility with Premiere Pro and After Effects, along with the ability to bring comments back into these products as a layer.
In the Create Proof dialog box, the file owner (in this case, me) can set a proofing due date, choose whether a PDF version can be downloaded, assign metadata tags (great for grouping proofs together and for searching), and add a personal message (Figure 5).
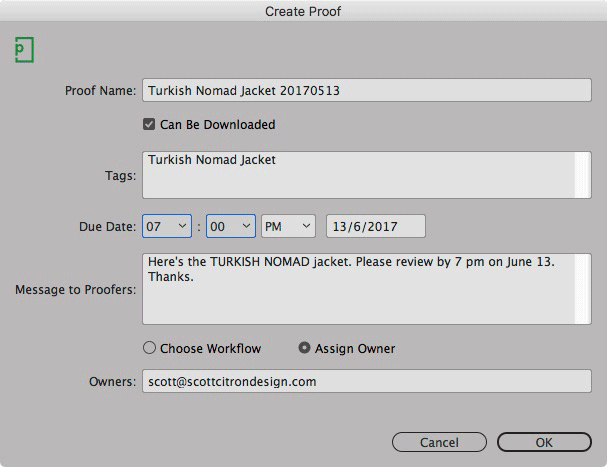
Figure 5: The Create Proof dialog box. Selecting Choose Workflow brings up a drop-down menu of pre-built workflows. Workflows let you easily route the proof from team to team (for example, first to marketing and then to legal for final approval).
Clicking OK uploads the file to the owner’s PageProof Outbox (Figure 6).

Figure 6: The online dashboard shows the status of files in your PageProof account. Here we have one document in the Outbox. “Proofers Needed” means the proof has yet to be assigned to one or more proofers.
The words “Proofers Needed” indicate that proofers have yet to be assigned to this document. If you select Choose Workflow and use a preset workflow template, PageProof will send out the proof immediately and route the proof through the workflow, gathering everyone’s comments.
Clicking the proof thumbnail opens the Proof Info panel (Figure 7).

Figure 7: The Proof Info panel tells you that this is Version 1 of the document and that the deadline for comments is June 13. Clicking Let’s Go button takes you to a window where the email addresses of proofers are added.
Clicking the Let’s Go button takes you to the Proof Setup window (Figure 8).
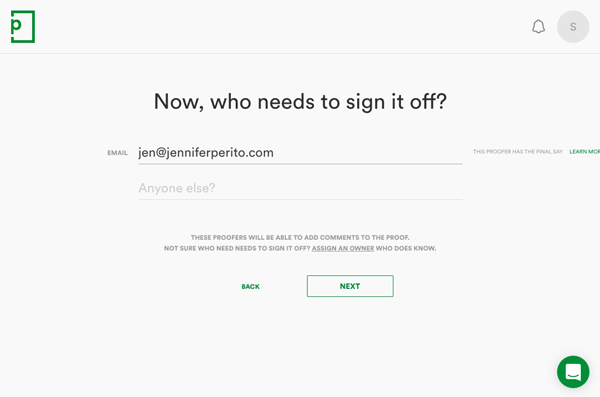
Figure 8: In the Proof Setup window, add the email addresses of final approvers who can comment on the document and ultimately have the final say. Clicking Next sends an email to all final approvers, letting them know a proof awaits their comments and approval. These reviewers don’t need to create an account to view and comment on the proof; they simply click the View Proof button in the email invitation.
To control how and when you’d like to be notified about the status of sent proofs, navigate to your Profile panel (Figure 9).
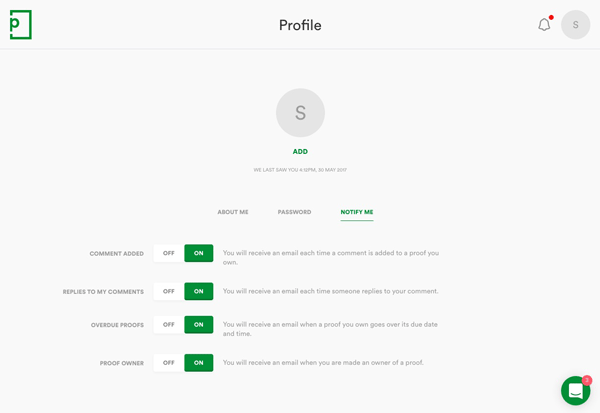
Figure 9: The Profile panel has four settings that can be turned on or off to control email notifications regarding added comments, comment replies, overdue proof deadlines, and proof ownership. The red dot in the upper right corner next to the bell icon indicates that unread notifications have been added.
Here, for example, if you’d rather not be bothered receiving emails each time a proofer adds a comment to your document, you can turn off the email notification.
Once a document has been sent, reviewers receive an email with a View Proof link (Figure 10).
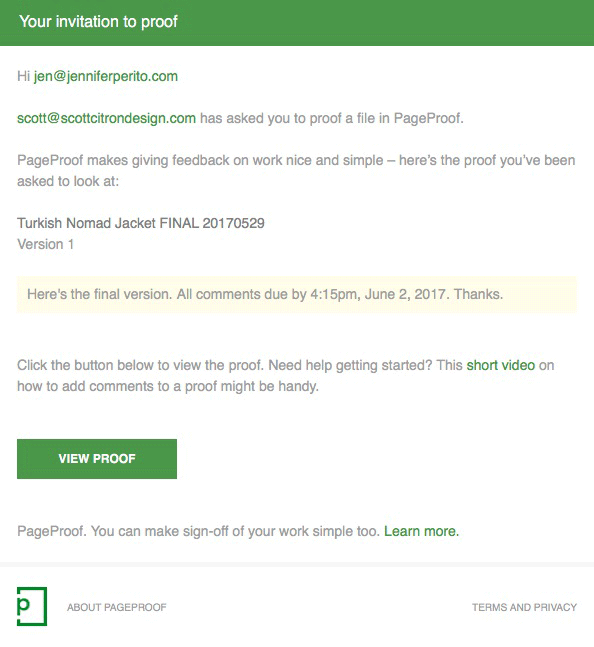
Figure 10: The email received by the reviewer. Included in the email is a link to a video on how to add comments for those new to the process.
Clicking the View Proof button takes reviewers to the online proof, which is already gathering everyone’s comments. Since everyone is commenting on the same proof in real time, the feedback process is quick and efficient.
For those concerned with privacy and security of proofs, PageProof is a uniquely different review and approval platform. All proofs, comments, and attachments are fully encrypted, prior to the data traveling across the internet via SSL (secure sockets layer). No other proofing system takes security to this level; it ensures that only those users officially invited to review the proof can do so. Forwarded links and email invitations just will not work for anyone else.
Have I mentioned that PageProof likes to keep things simple? Figure 11 shows our book jacket as it appears online. The client has marked up the layout with three comments, known as To Dos.

Figure 11: Here’s the Turkish Nomad dust jacket. Notice how only a small handful of tools on the left and below the jacket are provided. The red pen icon is the Comment tool. Below the red pen are the Zoom and Proof Info buttons. In the lower left corner are icons for keyboard shortcuts, printing, and proof downloading. Here the client has created three To Dos, which appear on the right side of the screen.
The key to proofing and commenting is the pen tool, found at the top of the tool stack on the proof’s left. Click the pen tool and it turns red, indicating it’s in markup mode. The red pen tool marks up proofs using dots, rectangles, or lines. Below the pen tool are the zoom tool (which also lets you rotate the proof) and Proof Info button. Figure 12, from a downloadable PageProof help document, goes into more detail about how the tools work.
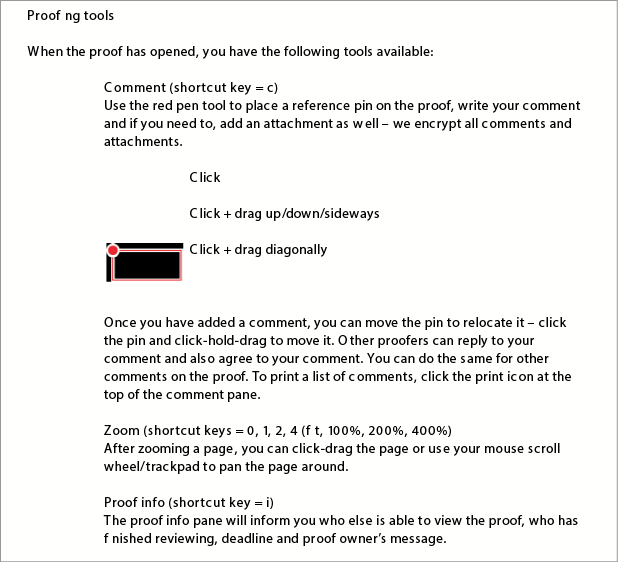
Figure 12: This extract from a PageProof help document tells you all you need to know about the Comment, Zoom, and Proof Info tools.
Figure 13 shows the proof in its latest stage before it’s returned to the owner (me, the designer) with three comments.
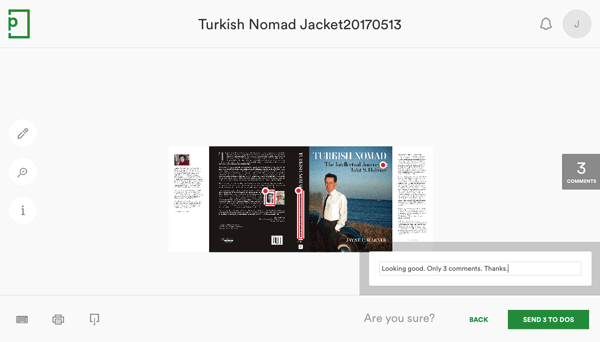
Figure 13: The proofed dust jacket. Clicking the green button sends the proof with three To Dos and a final note back to the file owner for correction.
Based on my Profile settings (discussed earlier), I then discover an email alerting me that the proof has been returned with three comments from the reviewer (Figure 14).
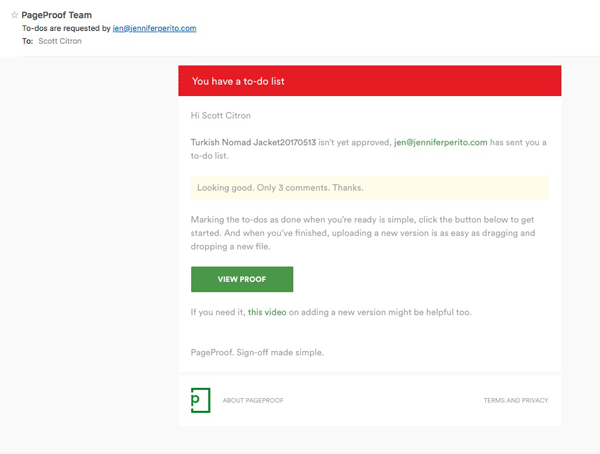
Figure 14: Here’s the email in my Inbox telling me the proofer has returned the dust jacket with three To Dos or comments that I need to address. Notice the sentence that reads “If you need it, this video on adding a new version might be helpful too.”
One feature I particularly like is how assistance is built into the system at each step. For example, in Figure 14, PageProof includes a hyperlink to a video explaining how to add a new version to the proofing process. Figure 15, from my PageProof dashboard, also explains what’s happening and how to proceed.
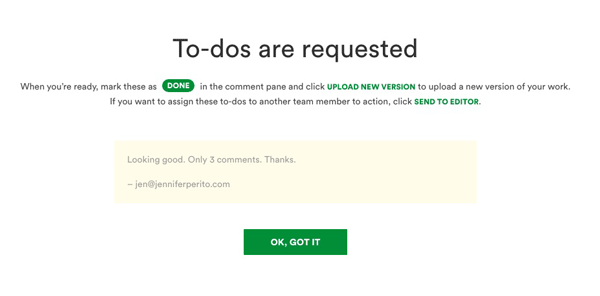
Figure 15: This screen in my PageProof dashboard explains how to mark To Dos when they’re done. There are also links to upload a new version of the proof or assign it to other team members via the Send to Editor button.
Once the three comments are addressed and marked as Done, the revised file is uploaded again for final approval. If there are no more changes, the approver can add a last comment before clicking the green Yes, Approve button to end the proofing process (Figure 16).

Figure 16: The final approver can add a brief comment before clicking the green Yes, Approve button.
When you’re viewing a proof with more than one version, there is a smart compare feature which not only displays the two versions of a proof side by side but analyzes and calculates the differences for you. This takes away the game of spot-the-difference and quickly (and, for you personally, easily) determines whether and where changes were made.
The Proof is in the Pudding
Kudos to the PageProof team for making document page approval as simple and straightforward as they have. As I do with most software, I found room for improvement, but nothing that I consider a deal-breaker. For example, the PageProof panel inside InDesign lacks many of the options that are available when you log in to it via the website. The good news is that the Adobe add-on is changing soon to eliminate the need to leave InDesign to visit the PageProof website at all.
Another thing I’d like to see is automatic updating of a document’s status in the InDesign PageProof panel. As it is, users must remember to click the Refresh button to make sure the panel is giving them the latest info about their documents. On the plus side, the InDesign PageProof panel allows you to upload your document from inside InDesign, whereas when uploading via the website, users must first convert their layout to PDF. According to the PageProof website, native InDesign documents will eventually be accepted for upload, but for now, that feature is missing.
As good as PageProof is, be aware that (at least for now) the system is not really geared for the kind of granular markup already available in Microsoft Word, InCopy, or Adobe Acrobat. Yes, words can be highlighted for change, but the system lacks the kind of robust commenting tools in Adobe Acrobat DC, for example. Last year I designed and produced a 900-plus-page book on Microsoft Office 2016 for McGraw-Hill. Throughout the months-long project, I would send PDFs to my editor, whom I’d schooled to use Acrobat’s commenting tools. When changes or fixes were needed, the editor indicated changes in Acrobat before sending me back his corrected version. What made this workflow so sweet was that back in InDesign, I loaded his commented PDF through the Annotations plug-in from DTP Tools. The plug-in would then display a page-by-page list of each change. Clicking on a comment would take me to the change, which could then be accepted or rejected.
The real magic was that accepting a properly formatted Acrobat comment would insert that comment into my original document before advancing to the next suggested fix. If, for example, the editor wanted a sentence to be rewritten, he would select the sentence and then rewrite it in the Comments panel. When I double-click the comment in the Annotations panel, the old sentence is automagically replaced by the rewritten version. No copying, pasting, or remembering the change was necessary on my part. The Annotations plug-in handled all the mechanics of fixing the file, saving me weeks of tedious aggravation on this mammoth project. If this level of text-heavy and intense copy-editing proofing is what you need, then PageProof is not for you.
But if you’re looking for a simpler, more secure review-and-approval system that covers a vast array of proof file types (HTML web banners, websites, video, audio, documents, Microsoft Office files and, of course, Adobe CC files) and is easy to learn and use, PageProof deserves your attention.
Commenting is easier and faster when you're logged in!

Recommended for you

How to Get More from Adobe Express Using Add-Ons
Expand the functionality of Adobe Express with third-party add-ons. These apps-w...

Typography Tips From the Pros
David Blatner asked eight type titans to disclose their dos and don’ts.
