

Almost everyone who has used InDesign has encountered the dialog box shown below. This is telling you that one or more of the fonts in the document you just opened are missing. You have a choice here: You can ignore the problem by clicking Close, or you can fix the problem now. Clicking Close will not change the file and will allow you to work even with the missing font(s). Normally, unless you’ve turned off this feature in Composition Preferences, substituted fonts are highlighted in your document with a pink color.

Fixing Missing Adobe Fonts
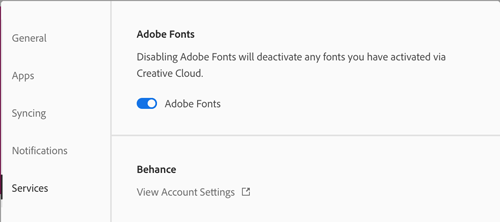
If the missing fonts are available in Adobe Fonts, you can fix the problem by checking the box for each font and then clicking Activate. If the syncing doesn’t work, make sure that you’re logged in to your account in the Creative Cloud app, and that you have Adobe Fonts turned on under Services in that app’s Preferences.
Fixing Missing Non-Adobe Fonts
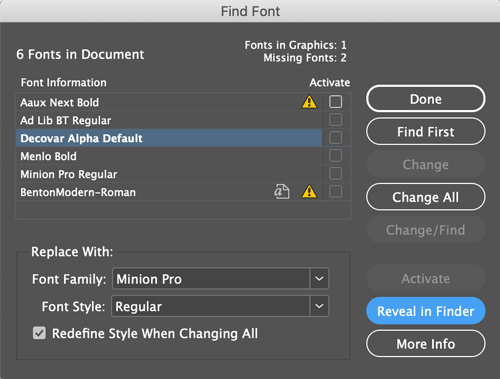
If the missing fonts are not in Adobe Fonts, you can click the Find Fonts button. This opens up the Find Font dialog box, which is InDesign’s manager for working with fonts—one of the essential resources we use when creating layouts.
In this dialog box, you can identify all the fonts used in the document, or just the missing fonts in the document, or in placed graphic files. You can do a complete Find and Replace for files in the InDesign file. To check on the status of your fonts, you can open this dialog box at any time by choosing Type > Find Font.

Within this dialog, you can view the fonts in the document in a scrolling list. InDesign uses the yellow alert icon to indicate missing fonts.
Missing Fonts in Graphics
An extra symbol appears for fonts in graphics. In the screen capture below, the Benton Modern font is found in a graphic and is also missing. InDesign can’t tell what kind of font it is. When one of these fonts is highlighted, the Find First button shown above turns into a Find Graphic button so you can search for the graphic where the font is located.

Replacing Missing Fonts
To replace the fonts within the InDesign file, you can highlight a missing font then use the familiar buttons to the right: Find First, Change, Change All, and Change/Find, which function similar to the way they work in the Find/Change dialog box.

However, be aware that you cannot use this dialog box to change the fonts in any placed graphics. To do this, you’ll need to open any of those graphics in the native application they were created in. You also cannot activate a missing Adobe font in a graphic from this dialog box.
More Find Font Features
Redefine Style
A powerful but often overlooked feature is the Redefine Style When Changing All checkbox.

Checking this allows you not only to change the fonts in the document but in all the styles using those fonts which are defined in the document as well.
More Info
Also, beginners may miss the More Info button.
Clicking this button opens a section where you can learn more about each font in your document. Select one of the fonts in the list and you can view the PostScript name, the version, any font restrictions, where the font is located in your system (or if it’s synced from Adobe Fonts), how many characters are used, what pages they’re on, and a list of the styles using that font.
Reveal in Finder/Explorer
Finally, don’t miss the Reveal in Finder/Reveal in Explorer button on the right for non-Typekit synced fonts. This helpful button allows you to go directly to a particular font’s location in the Macintosh Finder or Windows Explorer.
Originally published April 6, 2008. For the most current comments scroll to the bottom of the page.
This article was last modified on August 19, 2022
This article was first published on January 28, 2020
Commenting is easier and faster when you're logged in!

Recommended for you

Design Assets for Summer
Embrace all the season has to offer with these summery patterns, templates, brus...

How to Hide Noto Fonts in Your Font Menus
Two methods for slimming down your Adobe fonts menus by hiding the massive set o...

20 Desert Island Typefaces
If you could use only twenty typefaces for the rest of your life, which ones wou...