InDesign’s Font Manager

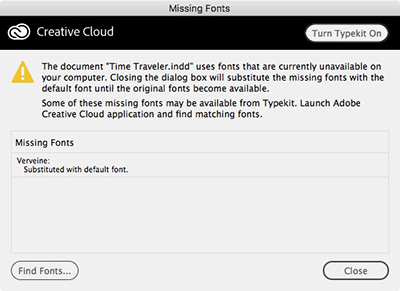
Almost everyone who has used InDesign has encountered the dialog box shown below. This is telling you that one or more of the fonts in the document you just opened are missing. You have a choice here: You can ignore the problem by clicking Close, or you can fix the problem now. Clicking Close will not change the file and will allow you to work even with the missing font(s). Normally, unless you’ve turned off this feature in Composition Preferences, substituted fonts are highlighted in your document with a pink color.
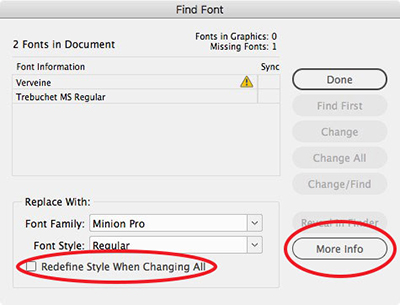
To fix the problem now, click the Find Fonts button. This opens up the Find Font dialog box. This is InDesign’s manager for working with fonts—one of the essential resources we use when creating layouts. In this dialog box, you can identify all the fonts used in the document, or missing fonts in the document or in placed graphic files. You can do a complete Find and Replace for files in the InDesign file. At any time, you can open this dialog box by choosing Type > Find Font to check on the status of your fonts.
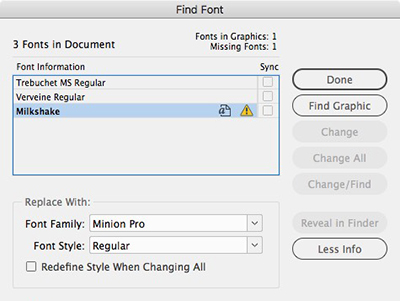
Within this dialog, you can view the fonts in the document in a scrolling list. InDesign uses the yellow alert icon to indicate missing fonts. Older versions also indicated the type of each document font: OpenType, PostScript fonts, or TrueType. If you need to access that information, there’s a script for that. An extra symbol appears for fonts in graphics. In the screen capture below, the Milkshake font is found in a graphic and is also missing. InDesign can’t tell what kind of font it is. When one of these fonts is highlighted, the Find First button shown above turns into a Find Graphic button so you can search for the graphic where the font is located.
To replace the fonts within the InDesign file, you can highlight a missing font then use the familiar buttons to the right: Find First, Change, Change All, and Change/Find, which function similar to the way they work in the Find/Change dialog box. However, be aware that you cannot use this dialog box to change the fonts in any placed graphics. To do this, you’ll need to open any of those graphics in the native application they were created in.
A powerful but often overlooked feature is the Redefine Style When Changing All checkbox (circled in the second graphic above). Checking this allows you not only to change the fonts in the document but in all the styles using those fonts which are defined in the document as well. Back in the day, we had to manually go through each of our styles to make those changes!
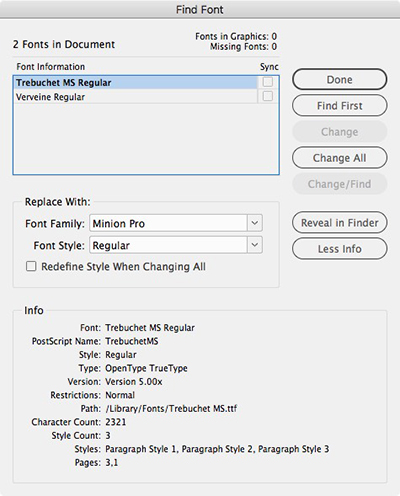
Also, beginners may miss the More Info button which I also circled in the illustration. Clicking this button opens a powerful Info section. This gives you a raft of information about each font. Select one of the fonts in the list and you can view the PostScript name, the version, any font restrictions, where the font is located in your system (or if it’s synced from Typekit), how many characters are used, what pages they’re on, and a list of the styles using that font!
Finally, don’t miss the Reveal in Finder/Reveal in Explorer button on the right for non-Typekit synced fonts. This helpful button allows you to click on a font in the list and be taken to that font within the Macintosh Finder or in Windows Explorer.
We are refreshing our oldest and most popular posts with updated information and screenshots. This post on InDesign’s built-in font manager was originally published April 6, 2008. For the most current comments scroll to the bottom of the page.
This article was last modified on August 2, 2022
This article was first published on September 30, 2017
Commenting is easier and faster when you're logged in!
Recommended for you
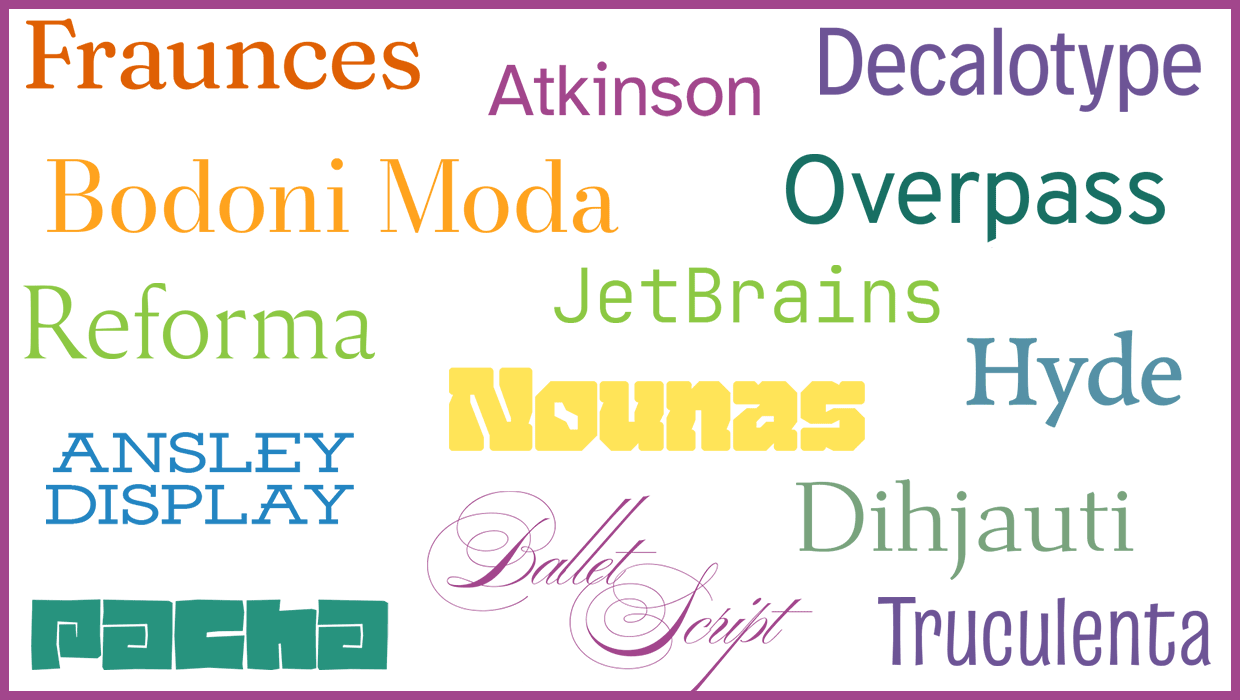
CreativePro Font Collection Vol. 2
A diverse set of professional-quality fonts cleared for commercial use

Can You Read Me Now? Testing the Limits of Readability in Design
I’ve long been obsessed with how things work. Sometimes I think maybe desi...


