
InDesign 101: Placing Images
Click? Drag? Move? Crop? There’s a wealth of options for what to do when an image hits your page in InDesign.

This article appears in Issue 70 of InDesign Magazine.
It’s hard to find any InDesign user who has never placed an image in a document. But that doesn’t mean that you know all the tips and techniques for working with images.
Here’s a rundown of everything you need to know to work smarter with those images.
File > Place
The first step in importing images is to choose File > Place (Cmd/Ctrl+D). Find the image you want to place. The Place dialog box appears. Use the navigational controls in your operating system to find the image you want to place. (You can choose more than one image, but we’ll cover that later.)
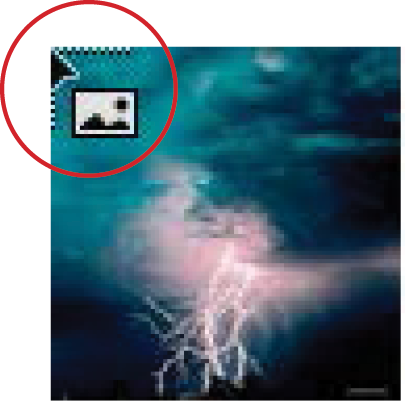
Click the Open button. This takes you back to your InDesign page. Your arrow cursor has been replaced by what is called a “loaded cursor” that displays a small preview of the image you chose (Figure 1).
You’ll move the cursor over the area where you want to place the image. You have two options for placing the image.
Click to place an image
If you click the mouse, you’ll place the image at its full size on the page. This means an image that is 1024 pixels by 768 pixels at 72 pixels per inch (ppi) will appear on the page at 1024 pixels by 768 pixels (approximately 14.22 in. by 10.66 in.). This is why images from most smartphones are huge when placed on an 8½” by 11″ page—they are stored at 72 ppi.
However, if you choose an image that is 1024 pixels by 768 pixels at 300 ppi, it will come in at approximately 3.41 in. by 2.56 in. when you click on the page. The number of pixels is the same, but the size of the pixels is about four times smaller than the first image (Figure 2). Think of the pixels in the higher resolution image as having been squeezed smaller to be more compact than the lower resolution image.
Tip: As the resolution goes up, the file dimensions go down.

Drag to place an image
If you want, you can drag with the loaded cursor to create a frame that is larger or smaller than the full size of the image.
Unlike drawing a regular frame, this frame is constrained to the same proportions of the original image (Figure 3), which means that if the image is landscape, you can only drag to make a landscape frame. The same goes for portrait images. When you release the mouse, the image fills the frame exactly.
Of course, there may be times when you don’t want your images to fit neatly into a frame. If so, hold the Shift key as you drag. You can then make the frame any size you wish. The image won’t fit exactly into the frame, so you’ll have empty space either on the top/bottom or left/right sides of the frame.
There’s one more modifier key you can use when dragging to place an image. If you hold the spacebar, the frame will stop resizing as you drag. You can then reposition the image without changing the size. I do this a lot when I realize I’m running out of space on the page and need to shift the image.

Loading the cursor with many images
You don’t have to stop at choosing just one image to place. Select as many images as you want in the Place dialog box. You can even mix images, text, movies, sounds, snippets, or anything else that InDesign lets you put onto a page. You’re not even limited to choosing from just one directory. After you click the Open button, and go back to the InDesign page, choose File > Place again. Navigate to somewhere else, and choose more items to place. You can go on and on this way for as long as you want.
Once you’ve loaded up the cursor, there’s a little blue number in parentheses in the cursor preview. This tells you how many items are loaded (Figure 4).

Controlling the loaded images
There are several keystroke controls for how images are handled in the loaded cursor.
Use the up/down or left/right arrow keys on your keyboard to cycle through the different images. The cursor preview changes as each one comes “up to bat.” This makes it easy to choose just the image you want in a specific location in the document.
If you can’t tell exactly what the image is based on the preview, take a look at the Links panel. The first image in the stack has a blue LP in the Page column. This way, if you can’t visually identify what the image is, you can tell by its filename (Figure 5).

Click the Escape (esc) key to delete an image from the stack. The number goes down.
Click any tool or keyboard key to empty all the images from the cursor. I always press the V key, as the next thing I usually want to do is select objects.
What can you do with a loaded cursor?
My students are always afraid that they’re going to do something to lose the stack of images in their loaded cursor. It’s actually pretty hard to lose the images in the cursor.
The basic rule is you can do almost everything in the program except choose a tool without losing the loaded cursor.
As soon as you choose a tool, either by clicking in the Tools panel or pressing a tool shortcut, you’ll lose the stack of images in the cursor. But even if you do lose the stack of images, that action is undoable. Press Cmd/Ctrl+Z to get the loaded cursor back.
Otherwise, that loaded cursor insists on staying loaded. You can even switch to a different document—InDesign or another program—and when you come back to the file, the loaded cursor will still be ready for action.
Creating a contact sheet with Gridify
At some time you may want to fill your pages with a grid of images to review or save as a PDF to send to a client. That’s when you can use the contact sheet keyboard modifiers as you place images.
Start by loading your cursor with as many images as you want. Then position the cursor on the page and start to drag. This creates a frame for a single image. Don’t release the mouse yet! You need to make columns and rows to hold the images.
Now tap the arrow keys on the keyboard: the right arrow to add columns, left arrow to delete columns, up arrow to add rows, or down arrow to delete rows. Hold the Cmd/Ctrl key and use the right and left arrows to increase or decrease the space between columns, and use the up and down arrows to increase or decrease the space between rows.
As you tap the keys, you’ll see dotted lines that indicate the rows and columns for the grid (Figure 6).

Continue dragging to increase the size of the rows and columns to however you want them to fill the page.
The downside to using this Gridify feature is that you are limited to placing images on only one page at a time. If you have more than one page of images, you have to create a new page, and then drag and tap to create the new columns and rows. This can get tiresome if you have hundreds of images.
Here’s a bit of trivia. Before there were digital cameras, photographers took pictures on rolls of film. The photographer would lay the negatives on black and white photographic paper and expose the sheets.
This created thumbnails of the images on the paper. You could also see sprockets and film information on the negatives.
These pages were called contact sheets because the negatives were in direct contact with the photographic paper. Clients would look at the images through a magnifying glass called a loupe. They would then use a wax marker to indicate which images they liked and how to crop them.
Creating an image catalog
If you want to fill a document with all the images in a specific folder, you can use the ImageCatalog script, which is already installed in your Scripts panel!
Open the Scripts panel, navigate to Application > Samples > JavaScript, and double-click ImageCatalog.jsx. A dialog box prompts you to choose the folder that contains the images you want to place. (Choose the folder, not the images.) Once you choose the folder and click Open, the ImageCatalog dialog box appears (Figure 7). This is where you can choose the number of rows and columns, the space between them, the fitting options, and more. You can even choose to add labels to the catalog and style them with a paragraph style.
The ImageCatalog script is pretty powerful, but don’t let it overwhelm you. See Bart Van de Wiele’s terrific tutorial on ImageCatalog.
![Dialog box shows settings for Options section: Number of rows, 3; Number of columns, 3; Horizontal offset, 12pt; Vertical offset, 24pt; Fitting: Proportional, Center Content, Frame to Content, all checked; Remove empty frames, checked. Labels section is checked and includes fields Label type: file name; Label height: 24pt; Label offset, 0 pt; Label style, [No Paragraph Style]; Layer: Layer 1.](https://creativepro.com/wp-content/uploads/2025/01/placing_images-fig07.jpg)
Placing images into existing frames
Not everyone has the freedom to place images anywhere they want on a page. Many people are limited to using templates, created by others, where empty graphic frames are waiting to be filled with images. Here’s how to work with frames that are already on your document pages.
Graphic or unassigned frame?
Why are there two different sets of tools to draw rectangles, ellipses, and polygons? This is something that mystifies most beginners.
On first glance you might not see much of a difference between the Rectangle Tool and the Rectangle Frame Tool, but look carefully.
First, when the two types of objects are on the page, notice that the frame created by the Rectangle Frame tool has two diagonal lines crossing from corner to corner (Figure 8).

The diagonal lines in the graphic frames are supposed to mimic the lines drawn in non-reproducing blue pencils on layout boards that indicated that an image was supposed to go in that space. It was a way of reserving the space so that it didn’t get filled up with copy or ads. The convention was carried over from layout boards to digital page layout programs. So when you draw a graphic frame using the Rectangle Frame tool, you are indicating “an image goes here.”
The other big difference is that unassigned frames can be set with a default stroke or fill. By default, InDesign creates a rectangle, ellipse, or polygon with a 1-point black stroke and no fill. Change the fill or stroke when no object is selected, and you’ve changed the defaults for any new unassigned shapes. The frame created by the Rectangle Frame tool will always have no stroke and no fill.
Since unassigned objects don’t have the diagonal lines crisscrossing the rectangle, they are a better choice for setting background colors and gradients. I know so many designers who complain about the clutter of the diagonal lines, but don’t know they can use unassigned frames.
So if you want to place frames on your pages to show where graphic should go, your best choice is a graphic frame. But that’s not your only choice, as you’ll discover shortly.
Clicking into an existing frame
Once you’ve got a loaded cursor, place it over a frame that is already on the page. One thing that throws beginners is they think the frame needs to be selected. Nope! It doesn’t have to be selected. It doesn’t have to be released from the master page. You just have to hover the cursor over the area of the frame.
Now look carefully at the cursor. Notice that when the cursor is outside the area of the frame, it has a squared corner at the top left of the preview (Figure 9). That squared corner indicates that if you click or drag, you will be creating a new frame for the image.

Now put the loaded cursor inside the area of the frame. Notice how the cursor now has curved lines at the top left. These indicate that the image is going to go into an existing frame (Figure 10).

Replacing an existing image
What if you’ve already got an image in a frame but have a loaded cursor and want to replace the image?
Position the cursor over the frame, and hold the Option/Alt key. The cursor displays the curved preview. Click. This replaces the existing image with the new one.
Converting frames
But wait, there’s more! Remember I said there is another choice for the kind of frames you can place images into? Well, you can put your cursor inside the area of an unassigned frame, and you’ll still get the curved lines to insert the image into that frame. Of course, as soon as you put the image into the frame, it’s converted from unassigned to graphic, but that’s no bother, because you wanted a graphic in that frame.
Tip: While this will work by placing an image into an empty text frame on your page, you can’t place an image with a loaded cursor into a text frame with text. You can select a text frame with text and place an image directly into the frame to replace the text.
A similar feature exists if you want to insert text into the area where there is an empty graphic frame or an unassigned frame. Just place your Text tool cursor inside the area of the empty frame. You’ll see a circle around the cursor icon. This indicates that if you click, you will be converting the frame into a text frame that contains text.
Container? Content?
Once you’ve got an image on the page, there are several different ways you can transform it. But first you have to understand the different parts of the image.
There are two parts to the item you placed on the page using the Place command: the image itself and the frame that holds the image. The frame is sometimes called the container. The image is sometimes called the content.
All images are held in a frame. If you dragged a file into your document to place the image, you automatically created the frame and put the image inside it.
Selecting and moving both the container and the content
Drag with the Selection tool over a frame that contains an image. While it’s not obvious, you’ve actually selected the frame (container) and the image (content). If you’re working on the default Layer 1 of a document, you see a blue bounding box and blue transformation handles. These blue items are for the container, but the content is still selected. The blue comes from the color for the layer.
Now move the Selection tool slightly inside the container. Don’t go too close to the center of the frame. If the cursor turns into a hand, move away from the center.
Wait till you see the arrow (Figure 11). Now press and drag the frame to a new position. Notice both the container and the content move together.

Selecting and moving just the content
Now, move the Selection tool more to the center of the frame where the donut (content grabber) is located. Notice that the hand cursor appears (Figure 12). Press and move the hand around. The image moves inside the frame.

Also, notice that instead of the blue color, the bounding box and handles are light brown. (This is assuming you’re working on the default Layer 1.) The light brown is applied to the elements because it is the RGB inverse of the light blue color of the layer. All the page geometry of images inside a frame use the RGB inverse of the color of the layer.
If you find it difficult to grab the content with the content grabber, use the Object > Select > Content command.
Selecting and moving just the container
This one’s a little tricky. Whenever you use the Selection tool to select a frame, you will always select the container as well as the content. But what if you want to select just the container?
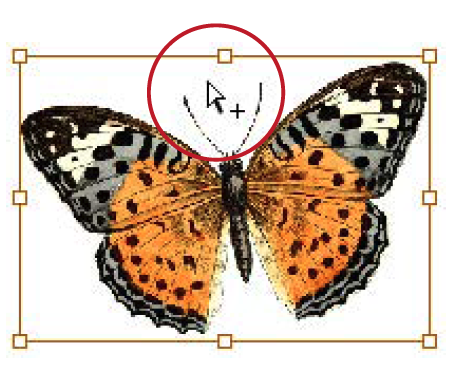
You would think that the command Object > Select > Container would help, but it doesn’t. It selects both the container and the content. Instead of the Selection tool, choose the Direct Selection tool. This tool is usually used to select individual points on a path or manipulate text wraps. This time, however, we’re going to use it to select just the container, without the content.
Place the Direct Selection arrow next to one of the sides. If you click, you will select either a point or segment along the path. Now hold the Option/Alt key. A plus sign appears next to the arrow (Figure 13). This indicates that instead of manipulating an individual point, you’re going to select the entire frame. Click.
The container alone is selected. Drag any point, segment, or the center point of the frame to move the container, not the content.
When 100% isn’t 100%
Here’s something that puzzles many of my students. Take a raster (pixel-based) image, and click to place it on a page. As I said at the beginning of this article, the image is displayed at its actual size—100%. Now place the same image, and drag to make a frame that is smaller or larger than the first.
Now click to select the first frame. The X and Y Scale Percentage fields display 100% (Figure 14). That’s as expected—we clicked to place the image.

Now click to select the second frame. The X and Y Scale Percentage fields display 100%.
Huh? How can that be? Didn’t we drag to place the image not at its actual size?
The answer is, take your Selection tool and click the content grabber, or double-click the image inside the frame to select the image inside the frame. Now look at the X and Y Scale Percentage fields (Figure 15). They show the true size of the image, either smaller or larger than the original.
The Selection tool displays the percentage of the container, which always snaps back to 100% at InDesign’s default settings. When you select the content, you see the amount that the image within was scaled.

Placement Proficiency
With these basics under your belt, and a few nagging mysteries explained, you should have a much easier time working with placed images.
Commenting is easier and faster when you're logged in!

Recommended for you

Use Place and Link to Impose Documents in a Printing Workflow
Learn how to keep your live artwork and imposed artwork in the same document and...
How to Quickly Place Multiple PDF Pages in InDesign
Learn how to place multiple pages of a PDF into InDesign with a few free scripts...
InDesign’s Three Kinds of Frames: Text, Graphic, and Unassigned
There's a lot of confusion about InDesign's frames out there. Let's set it strai...