


Wouldn’t it be cool if you could just type “–” and have InDesign automatically replace that with an em dash (—)? Or if you could type copyright and have it automatically expand to © copyright 2019 Ronco Corporation? Or type rbm and have it automatically expand to Ronco® Bass-O-Matic™?
The possibilities are endless. But you’re thinking “Duh! InDesign’s autocorrect feature does that.” Well, yes… but not really. Autocorrect won’t allow any special characters such as en dashes, em dashes, or trademarks in the autocorrect text. But I’ve discovered a sneaky way to include these characters. Here’s how.
- In InDesign, choose Preferences > Autocorrect, click the Add button, and add one “placeholder” autocorrection, such as z replaced by zz. You’ll erase this later, so it doesn’t matter that it’s something trivial like this.

- Next, you need to determine the numeric “unicode” values for the special characters you want to use. Don’t be scared off by this. You just need to write down a few numbers. The easiest way to do this is to enter a character in InDesign, select the character, and view the value in InDesign’s Info panel (Window > Info). Write down the value (everything after and including the x).
 The Info panel shows that the unicode value for this character is xAE. Here are a few values to get you started:
Single opening (left) quote ‘ x2018 Single closing (right) quote ’ x2019 Double opening (left) quote “ x201C Double closing (right) quote ” x201D Registered trademark ® xAE Trademark ™ x2122 En dash – x2013 Em dash — x2014 Bullet • x2022 Copyright © xA9 Micro ? x3BC Plus or minus ± xB1 - Open the Scripts panel (Window > Utilities > Scripts), right-click on the User folder, and choose Reveal in Finder (Mac) or Reveal in Explorer (Windows).

This will display a “Scripts Panel” folder on your screen. The parent folder of that folder is named “Scripts”. On the same level as the “Scripts” folder, you’ll see a folder named Autocorrect. In this folder you’ll find a file named “English USA.xml”, or similar.
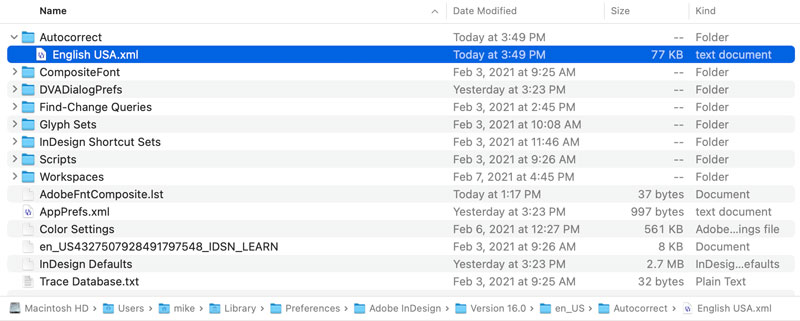
- Open the “English USA.xml” file in any text editor. Text editors such as BBEdit, Visual Studio Code, or Oxygen XML Editor are helpful because they will color code things on the screen making it easier to avoid typing errors. But any text editor will do, even Microsoft Word.
- Scroll to the very bottom of the text file, and delete the line <wordpair misspelled=”z” corrected=”zz” />.

- Now, type your new “wordpairs” as shown below. Be careful — the syntax must be exact. As you can see, each numeric value that you wrote down in step two must be preceded by an ampersand and a pound sign, and followed by a semicolon.
 Note: If you need to enter a “<” or “>” character in the XML file, you’ll need to enter “<” or “>” instead, since these are special characters in the XML world. For example, to replace “<–” with a left pointing arrow symbol, you would type:
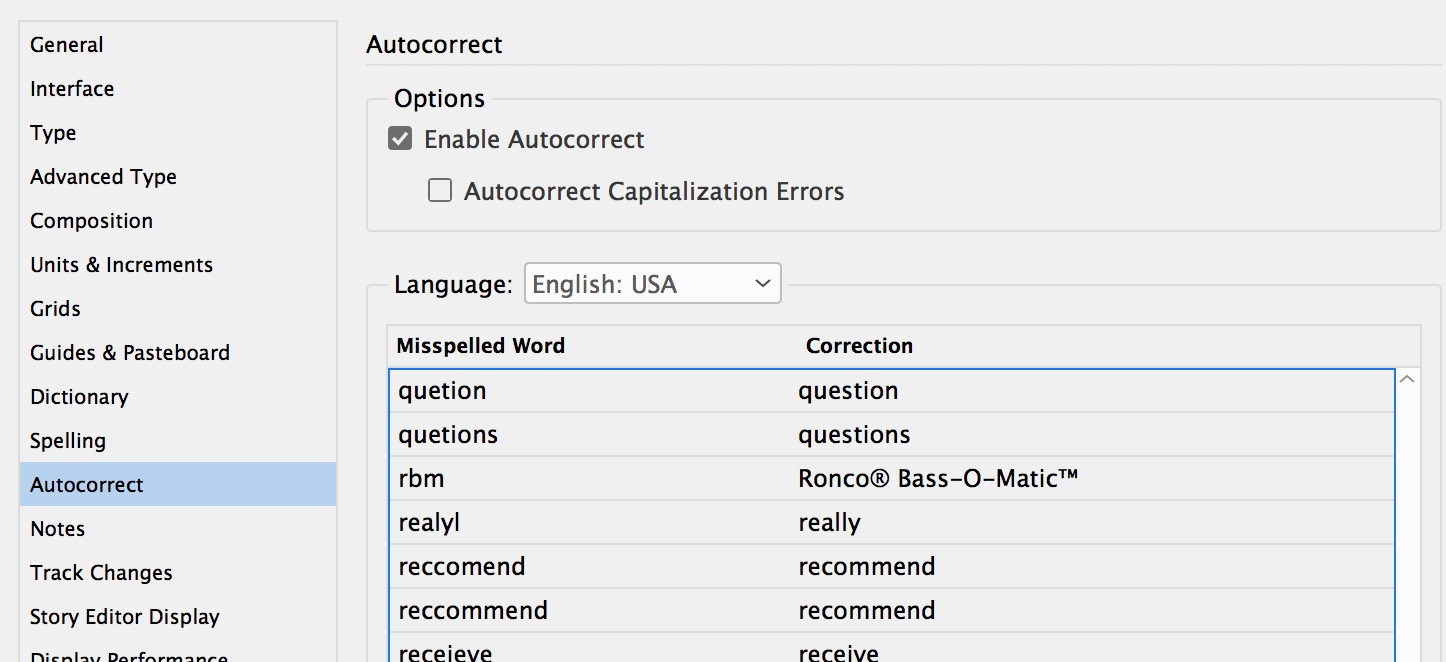
- Once you’re sure everything is correct, save the xml file as a “text only” or “plain text” file, and then close the file.
- Quit InDesign and then start it back up again.
- Choose Preferences > Autocorrect, and click “Enable Autocorrect” twice to toggle Autocorrect off and then back on. After you’ve done so, the “word pairs” that you entered should be visible in the word list in the Autocorrect dialog box (in alphabetical order).

- Then, open a file and try it out! If things don’t work as expected, go back to the XML file and examine it closely. Any missing or extra characters can cause the whole Autocorrect feature to stop working. If it gets too messed up you can always throw the xml file away and start over again from step 1.
This article was last modified on May 31, 2022
This article was first published on June 21, 2019
Commenting is easier and faster when you're logged in!

Recommended for you

Type Any Unicode Character You Want in InDesign
Special characters are a pain to type or find in the Glyphs panel; here's how yo...

Speedy Spell Check
Learn how to invoke InDesign's Dynamic Spelling feature with a keyboard shortcut...

Tip of the Week: Dynamic Spelling
This tip was sent to Tip of the Week email subscribers on June 18, 2015. Sign up...