
How to Mask Hair Using Today’s Techniques in Photoshop
Using Photoshop features like Generative Fill and Select and Mask makes the job of masking hair easier than ever.

If you still have nightmares of using old techniques for masking flyaway hair, rest easy knowing there are better retouching options today. Photoshop’s Select and Mask features have come a long way over the years, and the addition of Generative Fill gives you a toolset that does the job faster and easier.
However, even with modern processing power and AI-assisted features, hair remains one of the trickiest tasks to do well. The end result can depend on many factors: a subject on a noisy background intended for a low-res web ad won’t demand the same fidelity of a person against a clean backdrop for a high-res, full page magazine spread.
As such, there isn’t a single one-click option to mask hair perfectly. Some approaches will get you most of the way there, while others require a combination of techniques. This article provides an overview of the options in Photoshop, with pointers to more in-depth resources that may match your needs.
Select Subject
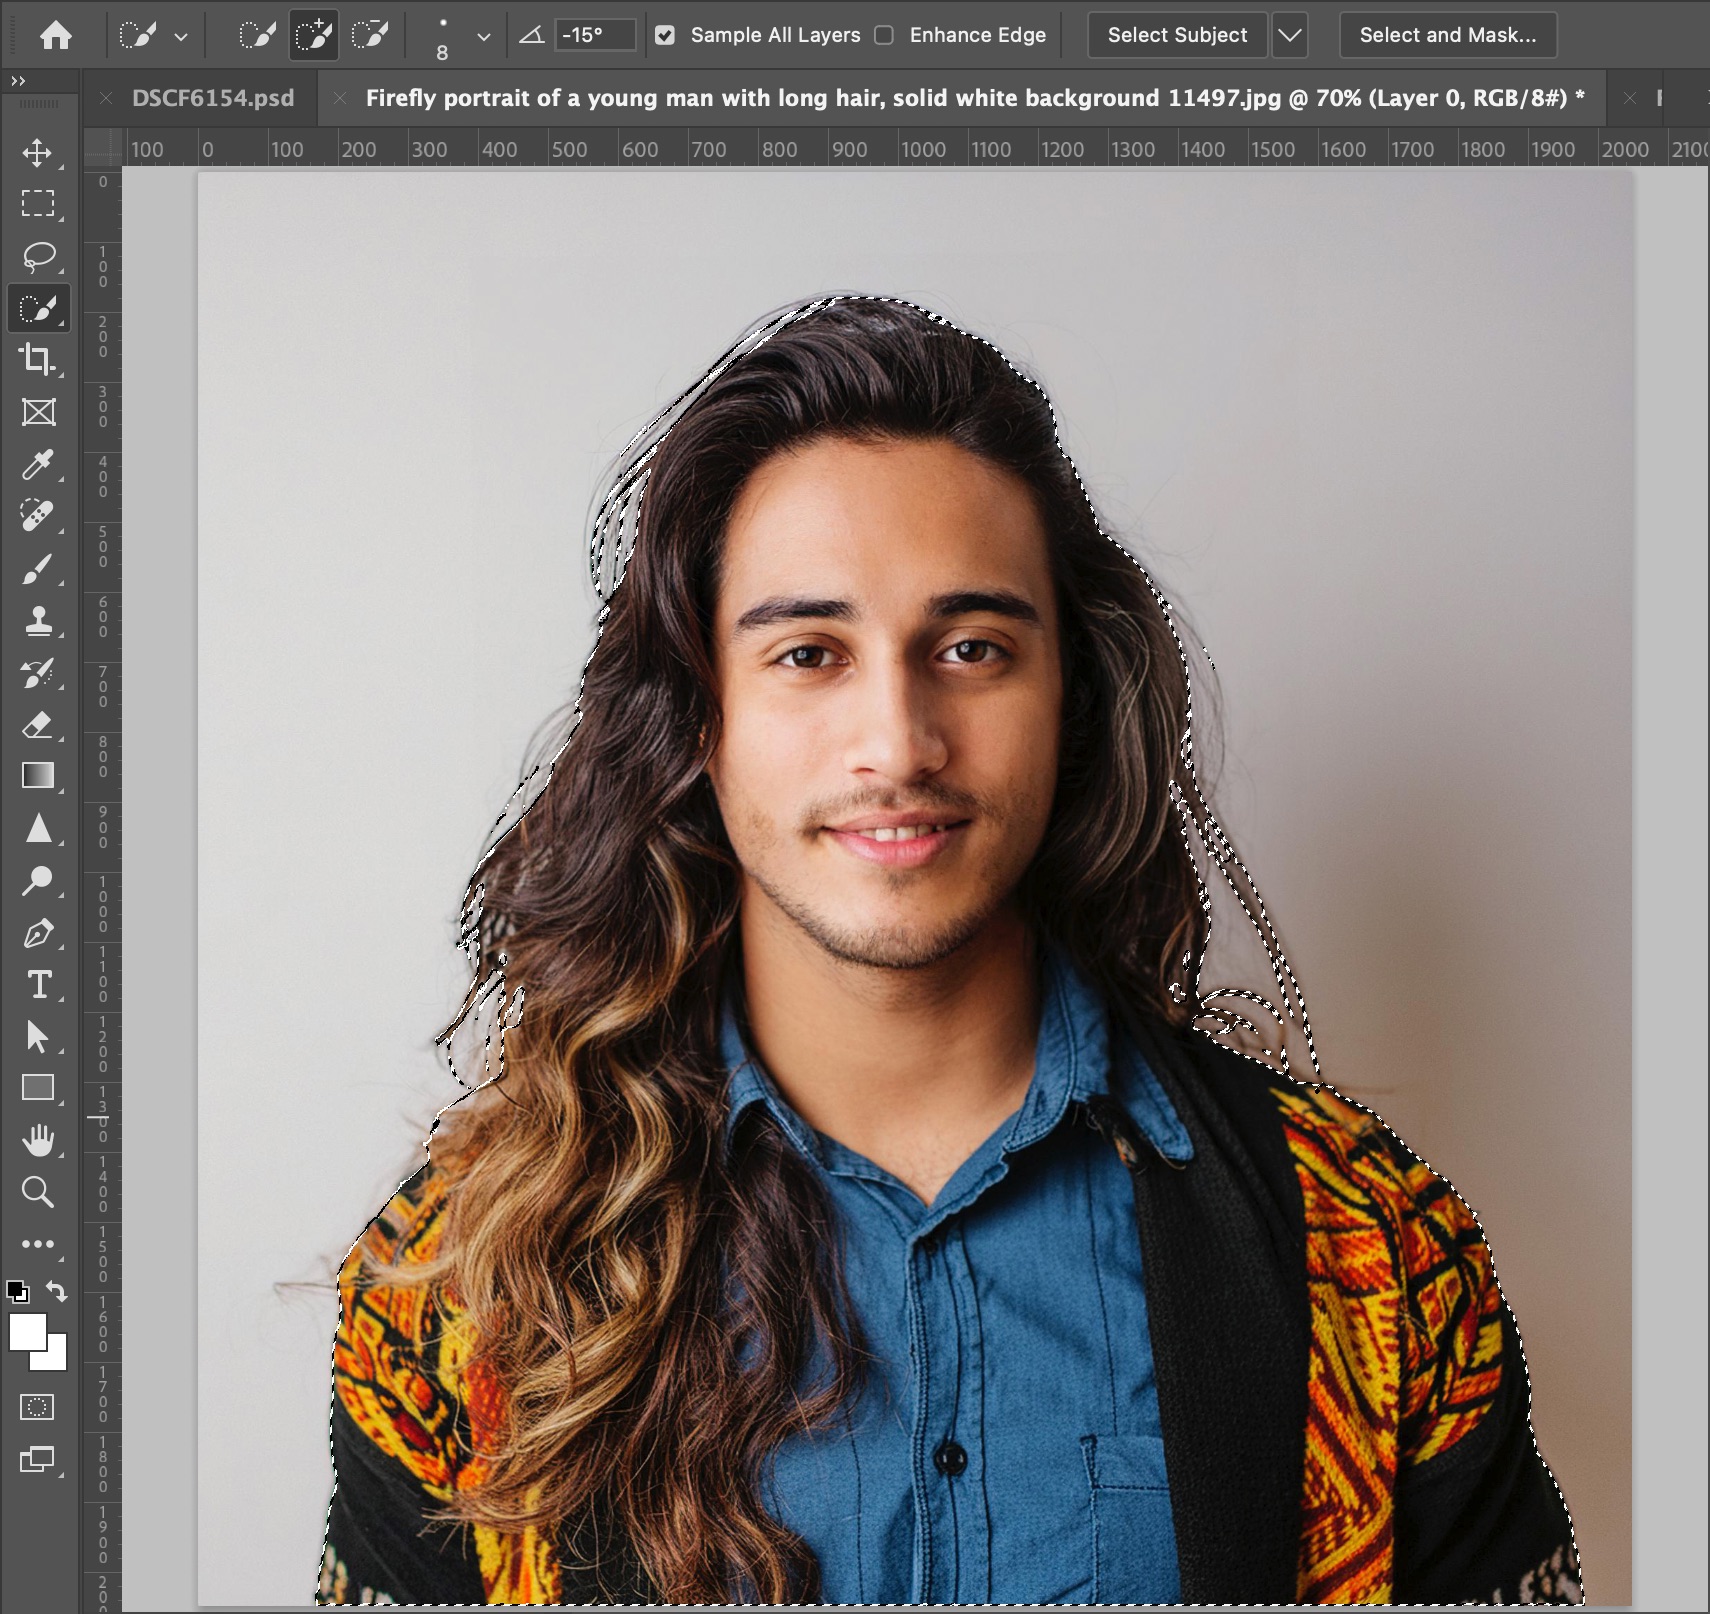
There are days when the idea of clicking a single button and getting a detailed mask sound like science fiction—it certainly did when we had to drag the Quick Selection tool and hope it did a large portion of the job. Now, just choose Select > Subject. Or, with one of the selection tools (Quick Selection, Object Selection, or Magic Wand) selected, click Select Subject in the Options bar.
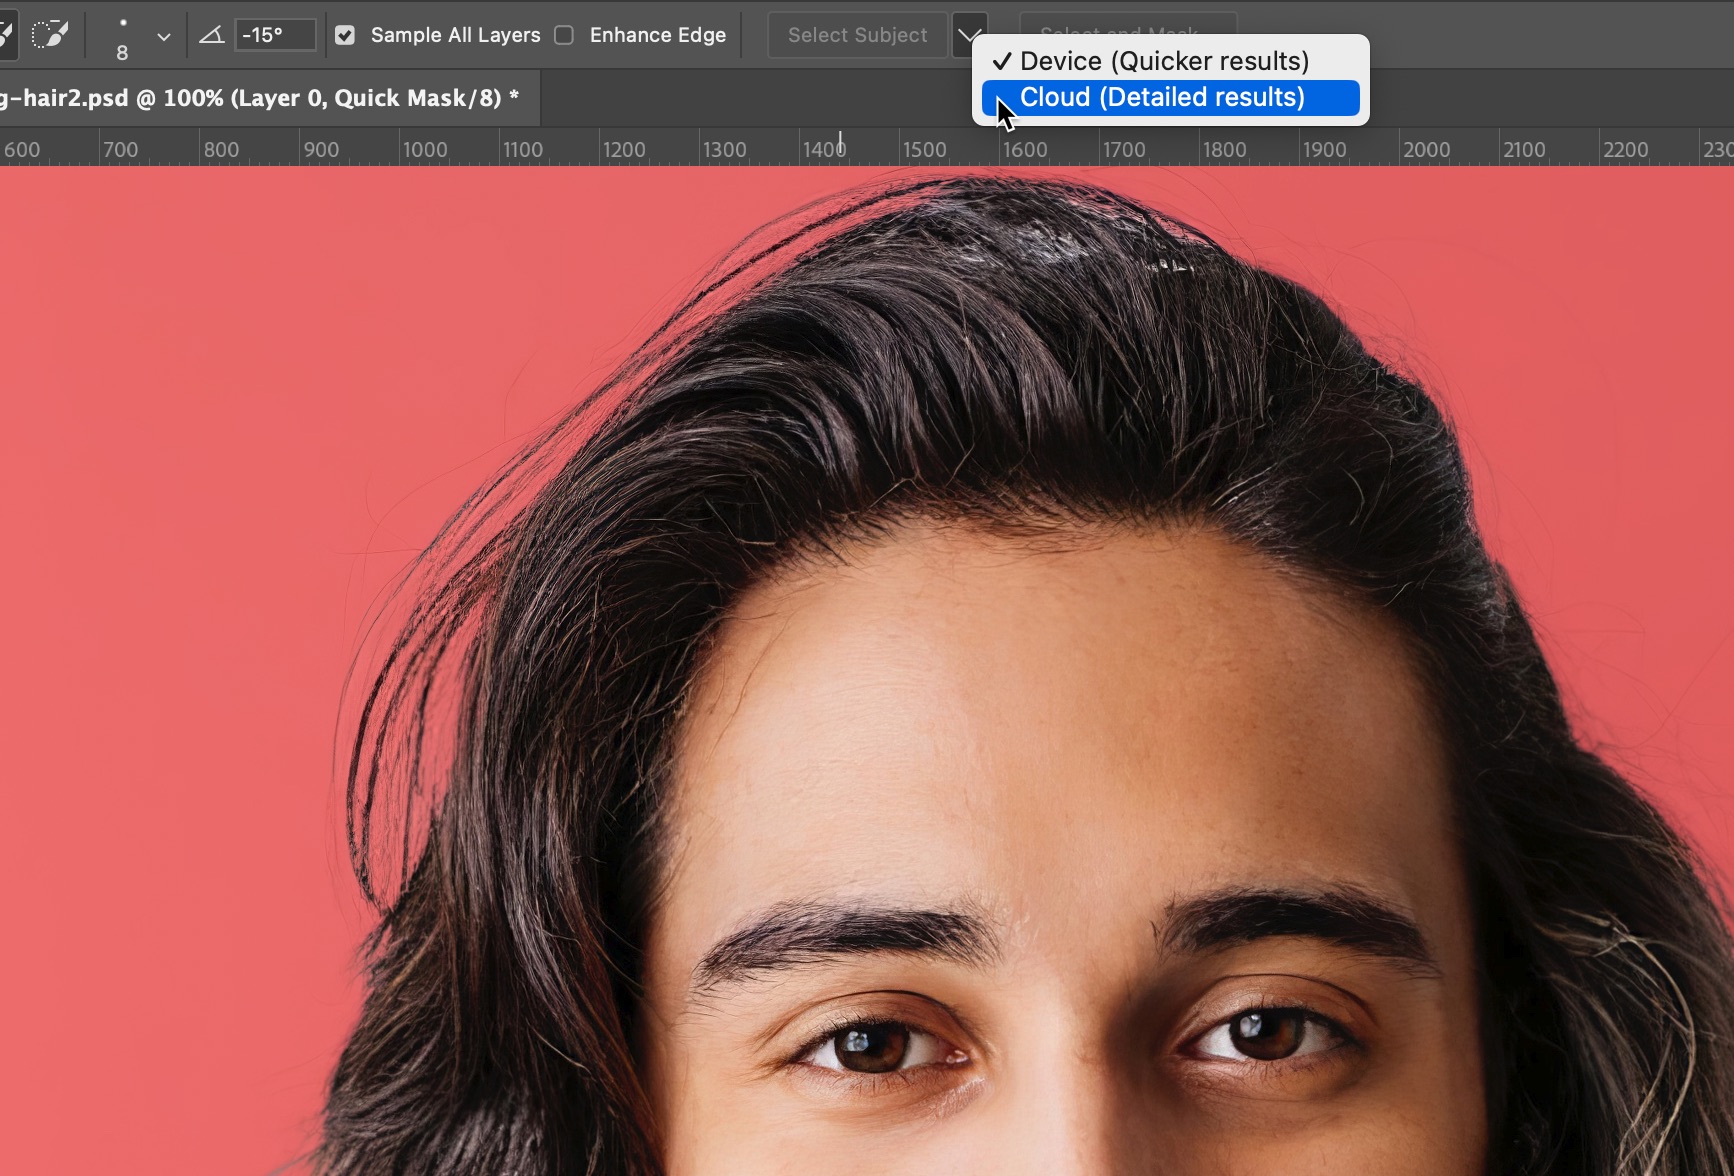
Editor’s note: The image of the man used in this tutorial was created with generative AI.
In this mode, Select Subject offers two options: click the menu to the right of the button and choose Device (Quicker results) or Cloud (Detailed results). The latter uploads the image to Creative Cloud, processes it with machine learning assistance, and then makes a better selection.
Select Subject is definitely the “quick and dirty” option, even though the results are generally pretty clean.
Select and Mask
The next approach, which offers more options, is Select and Mask. Choose Select > Select and Mask, or press Command-Option-R (macOS) or Ctrl-Alt-R (Windows). Or, with a selection tool active, click the Select and Mask button in the Options bar.
In the Select and Mask interface, click the Select Subject button to create an initial selection.
Our intent is to make a good hair mask, so before doing anything, expand the Refine Mode section and click Object Aware. Then, click the Refine Hair button in the Options bar.
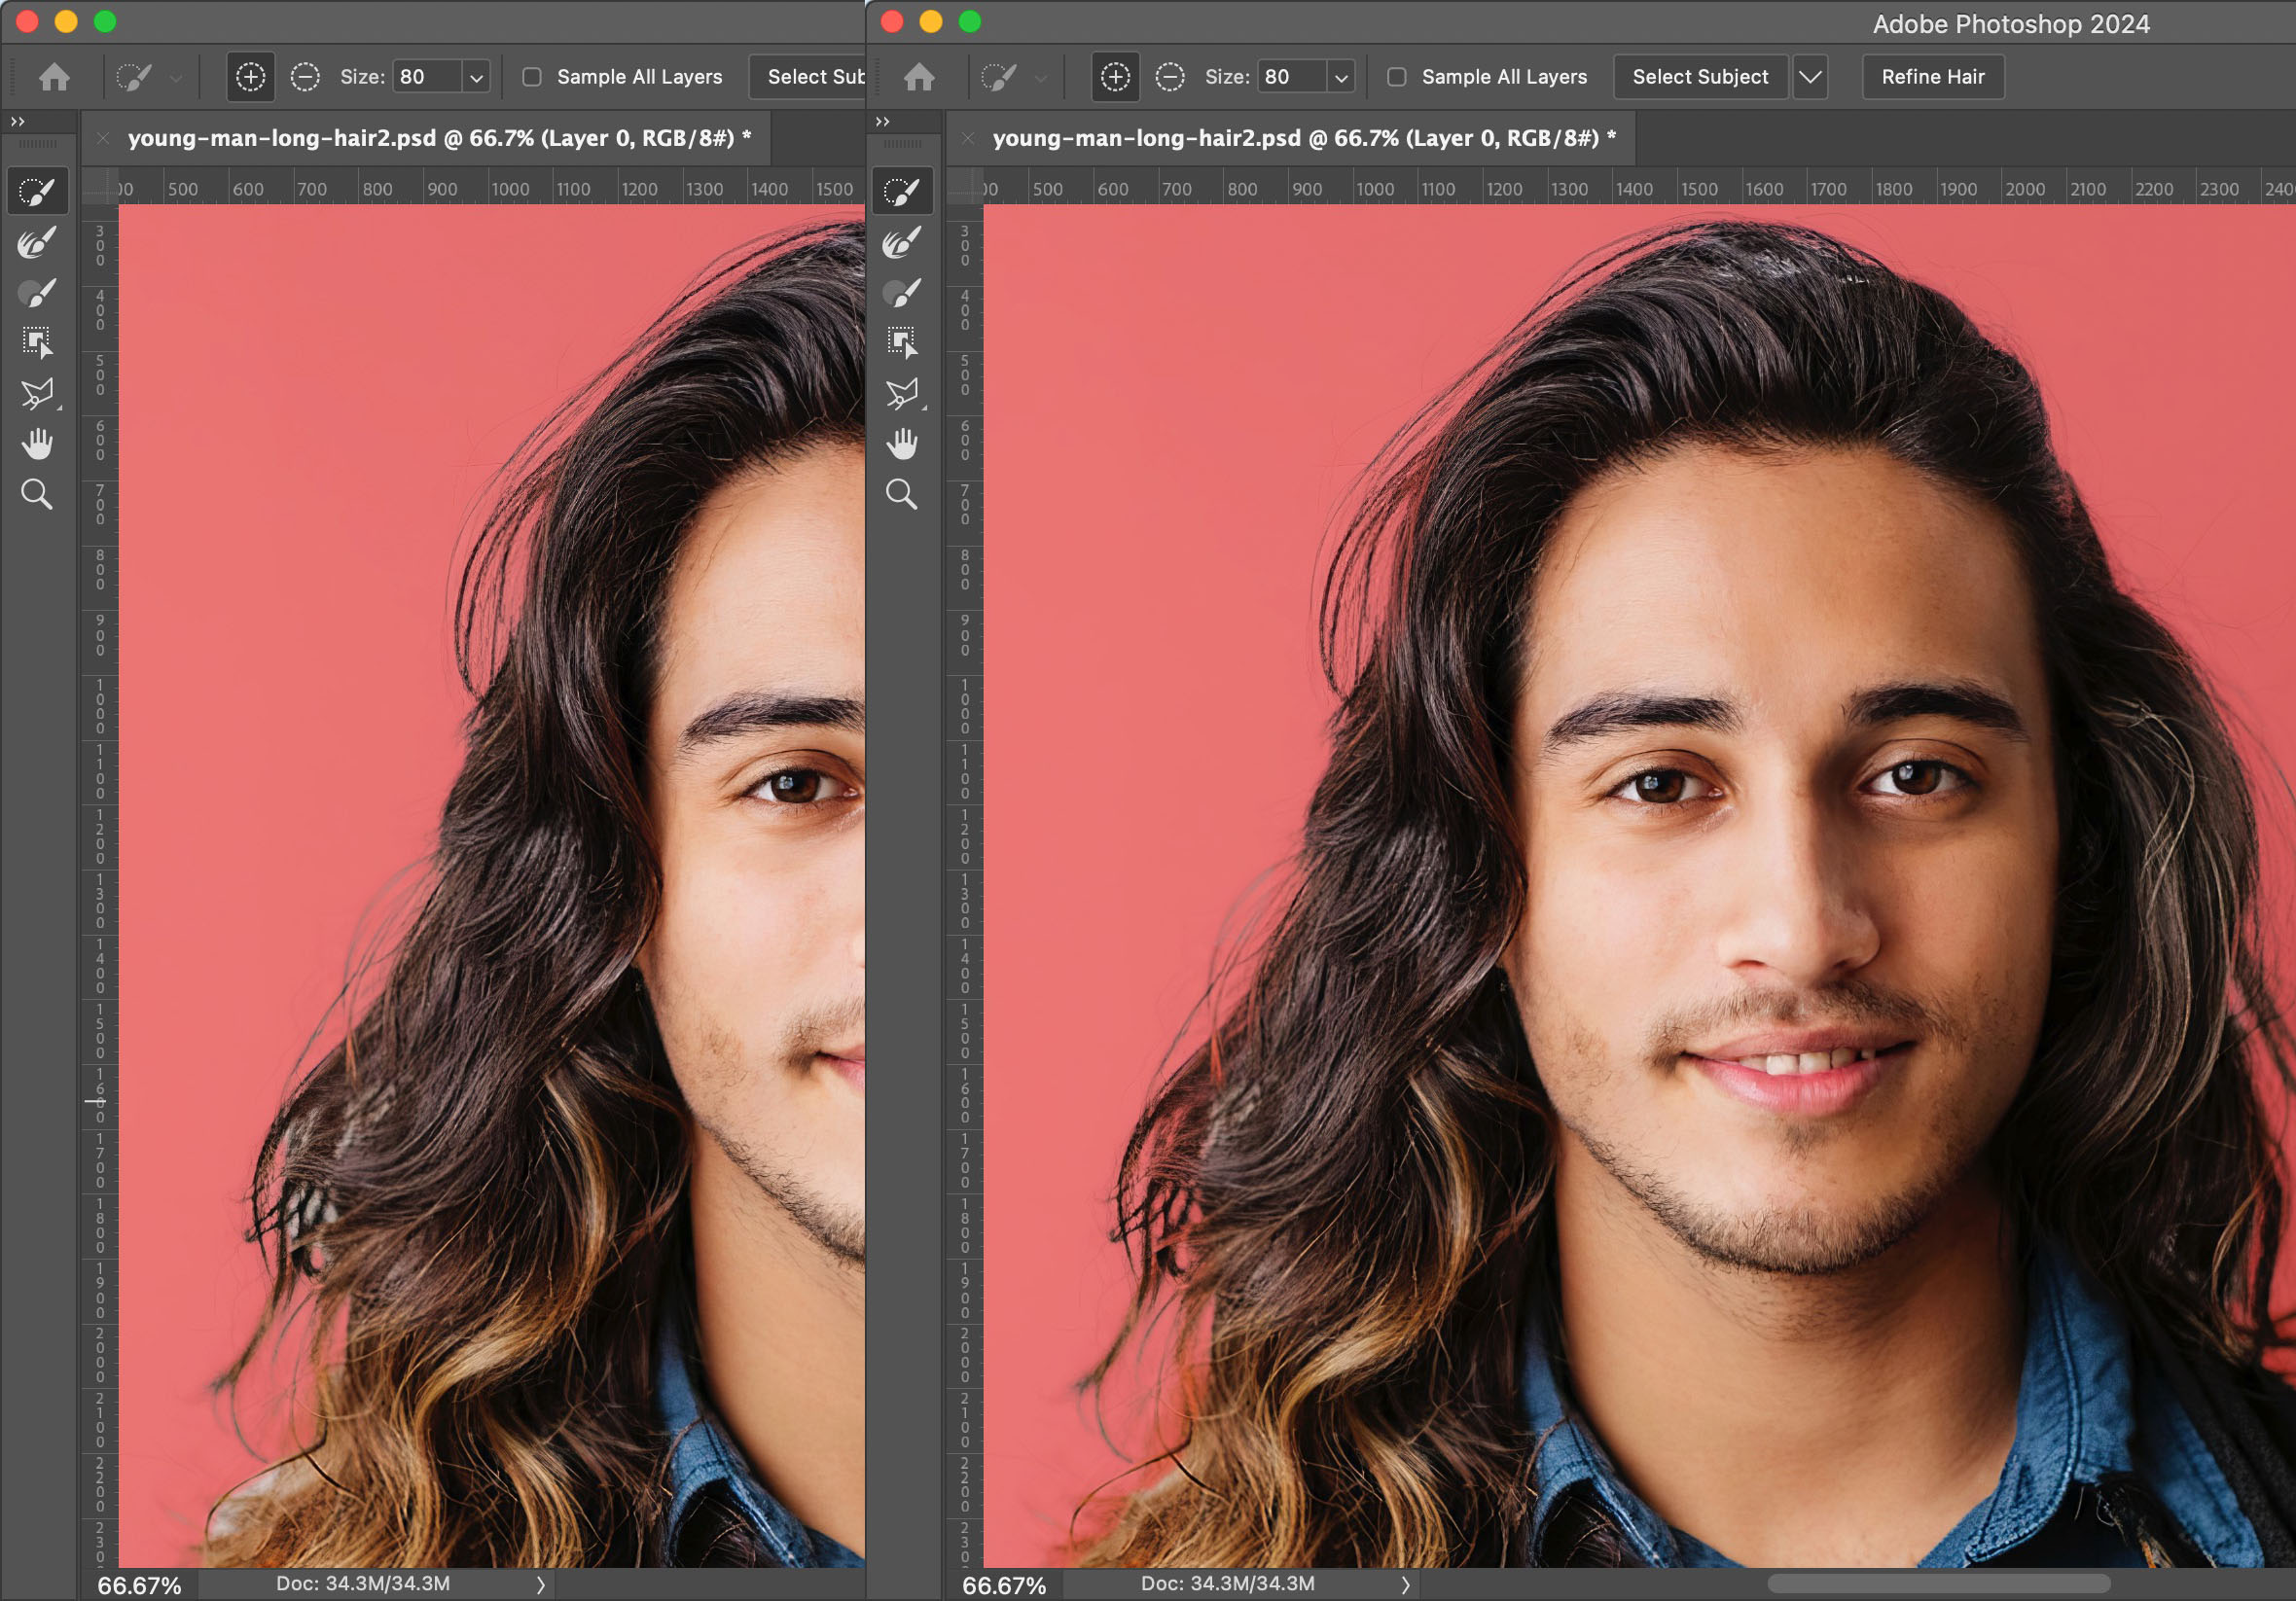
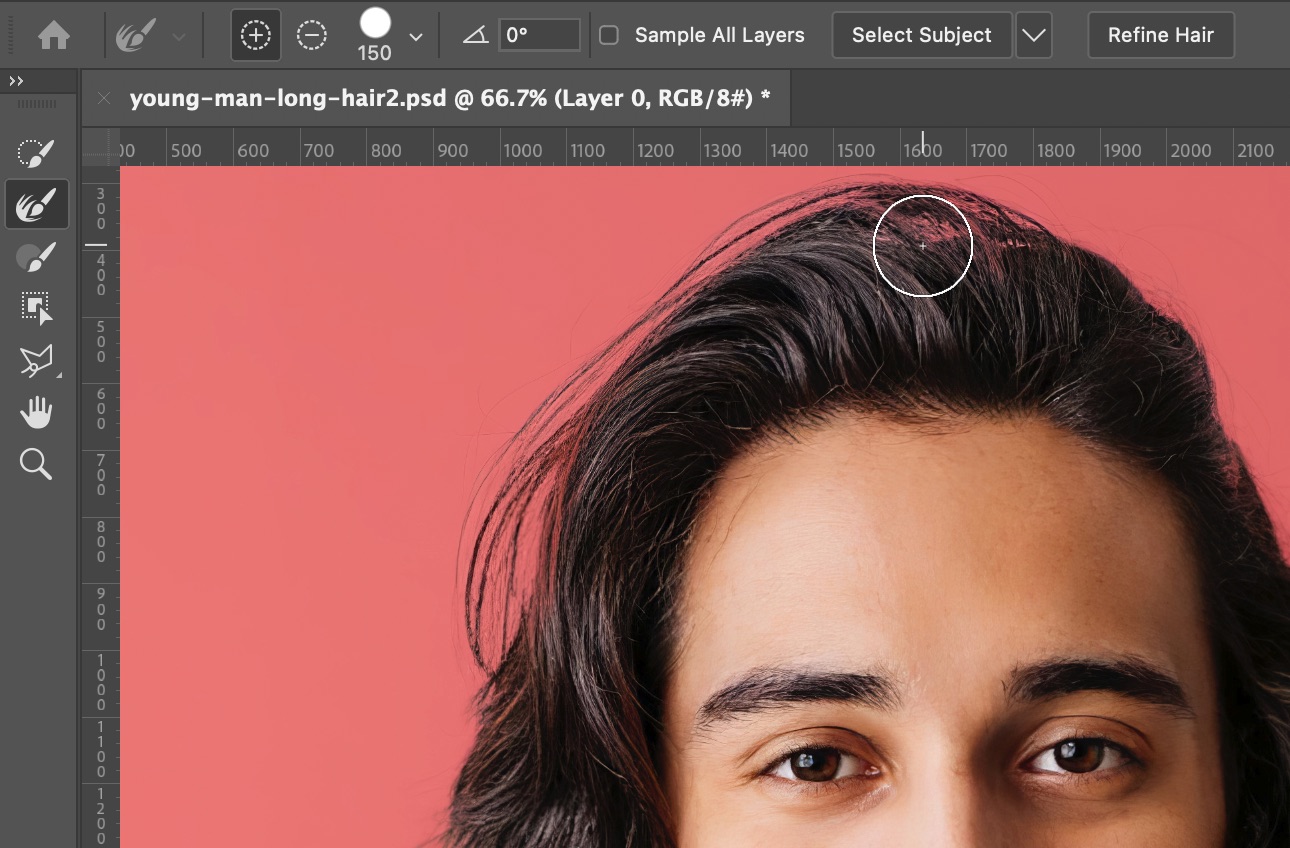
The algorithms behind Refine Hair are pretty good, but you may also need to do some manual work. Select the Refine Edge Brush tool from the toolbar and paint across areas where the original background is still showing through.
Depending on the subject and the background, other options in the Select and Mask window might produce better results, such as setting Refine Mode to Color Aware. Also be sure to preview the mask using view modes other than the default color Overlay, such as Black & White.
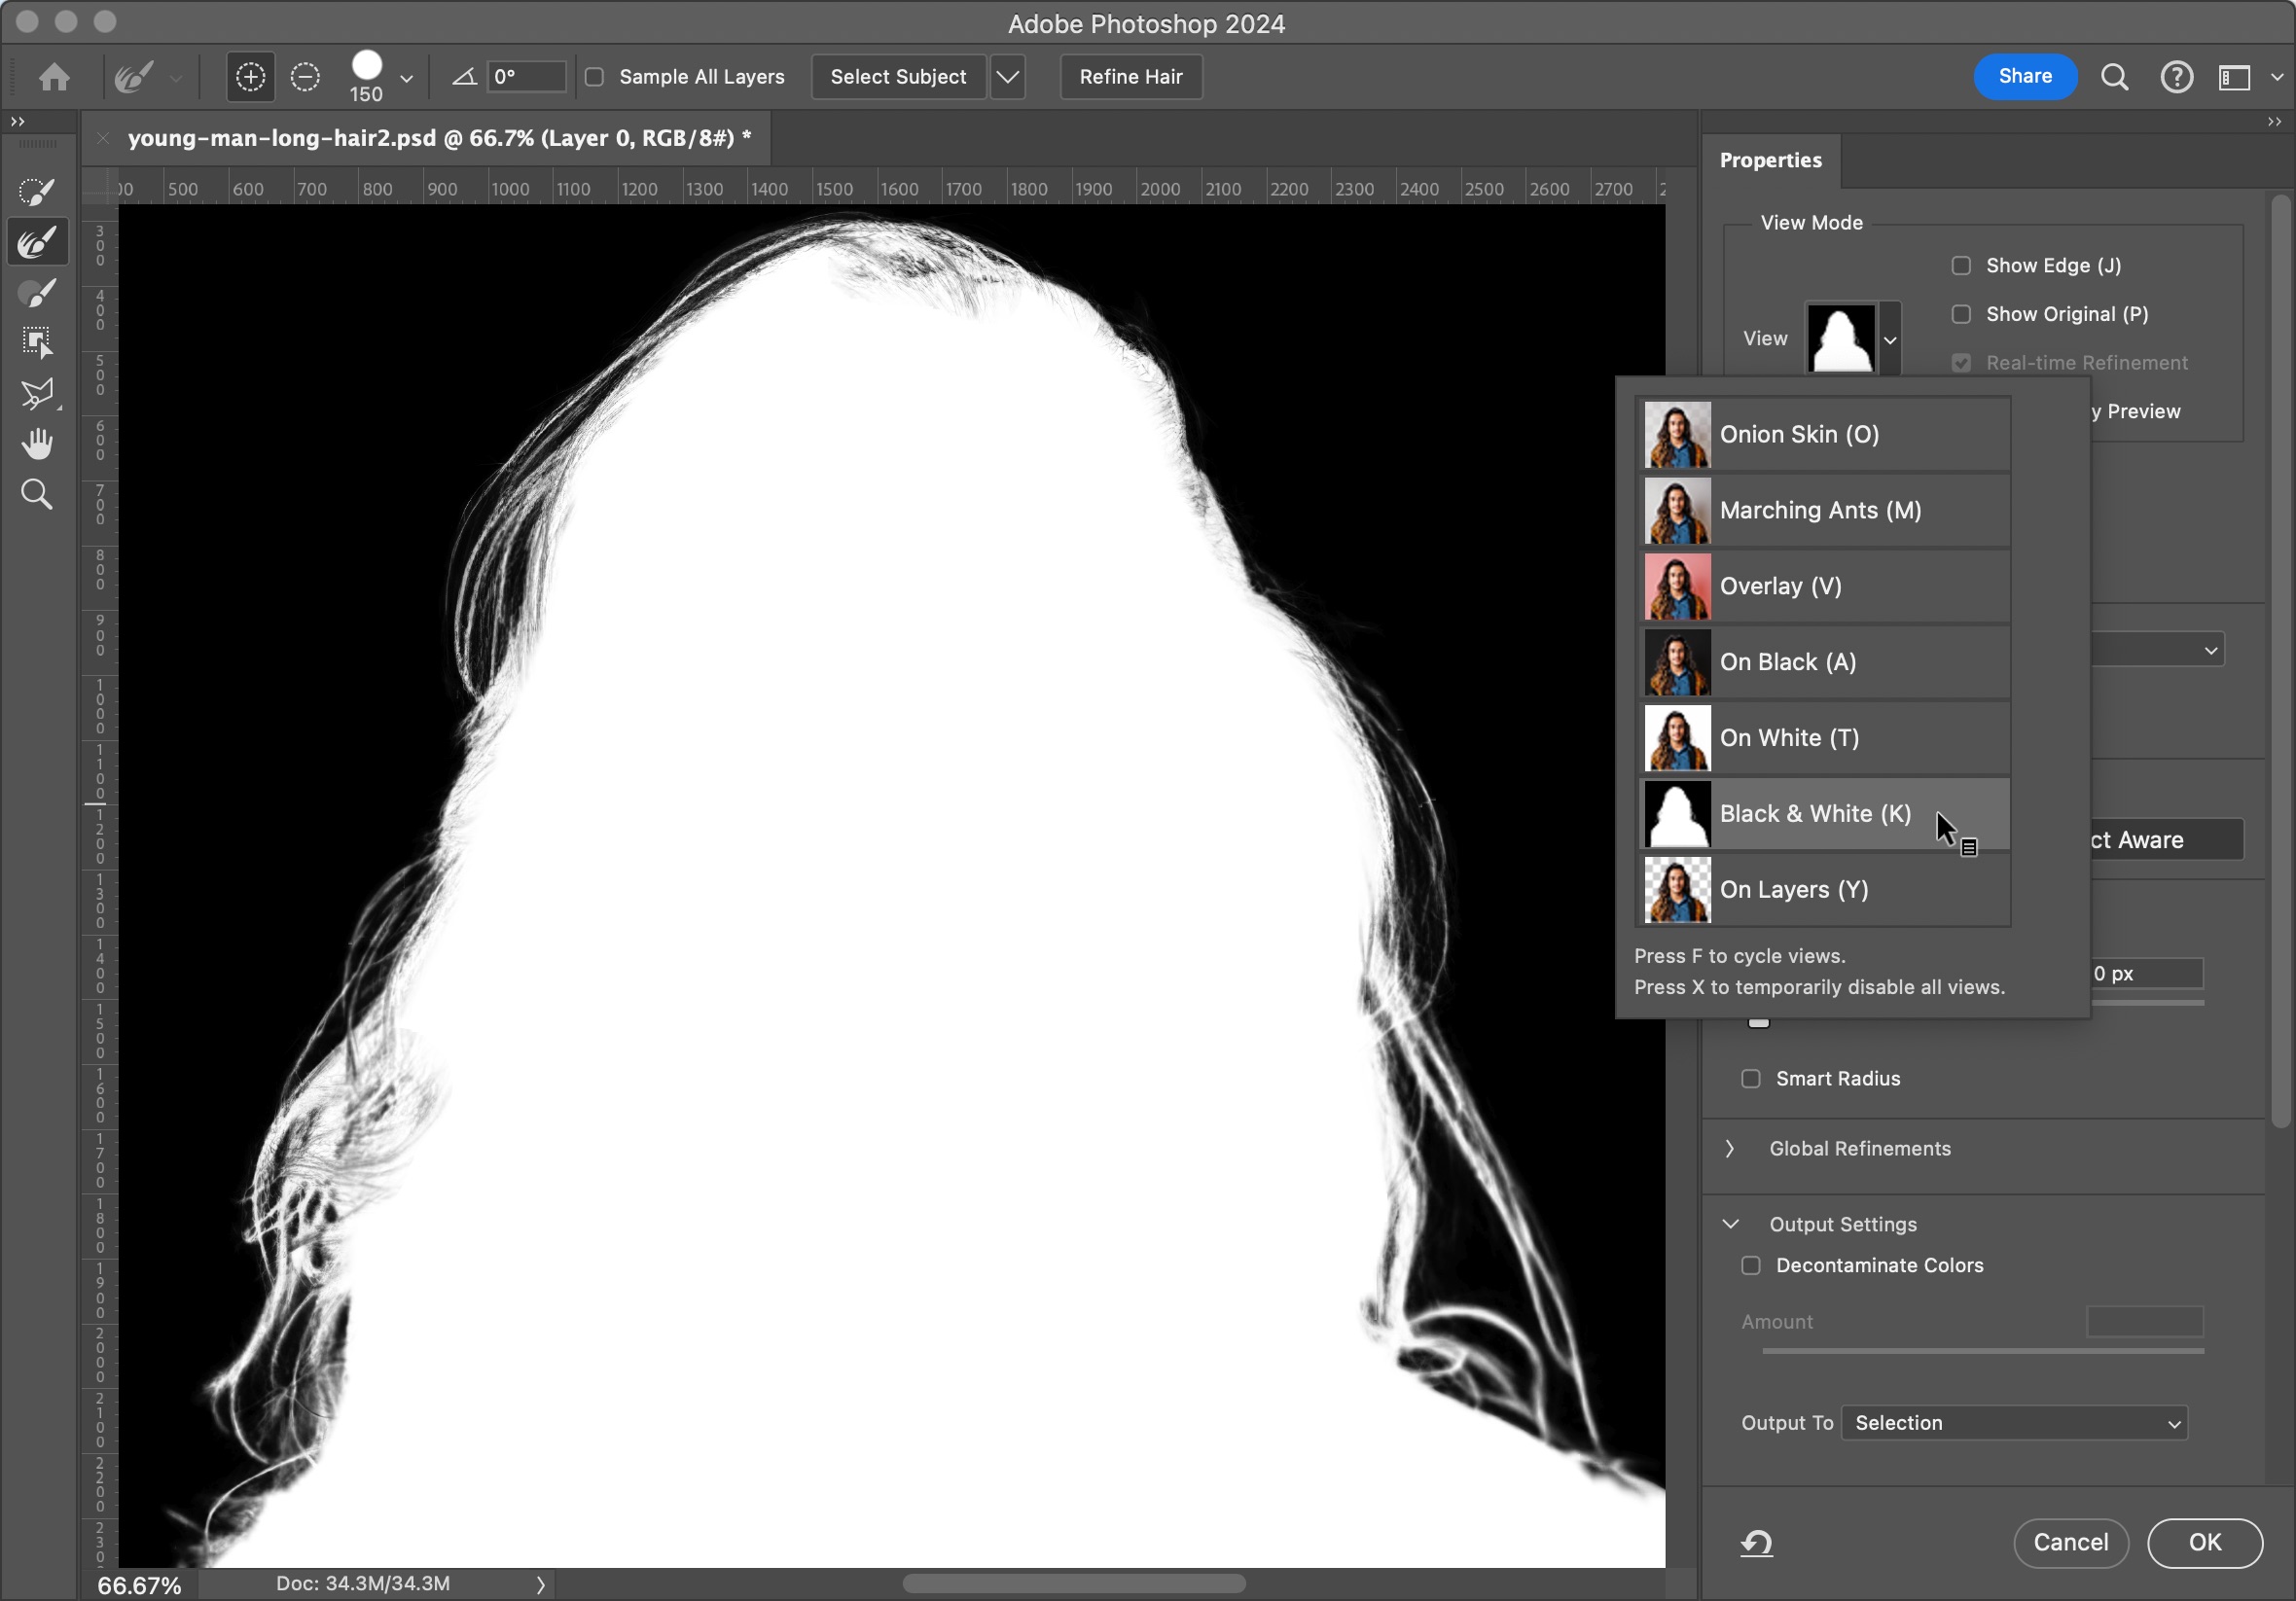
When you’re ready to apply the refined mask, choose an Output To option, such as New Layer with Layer Mask, and click OK.
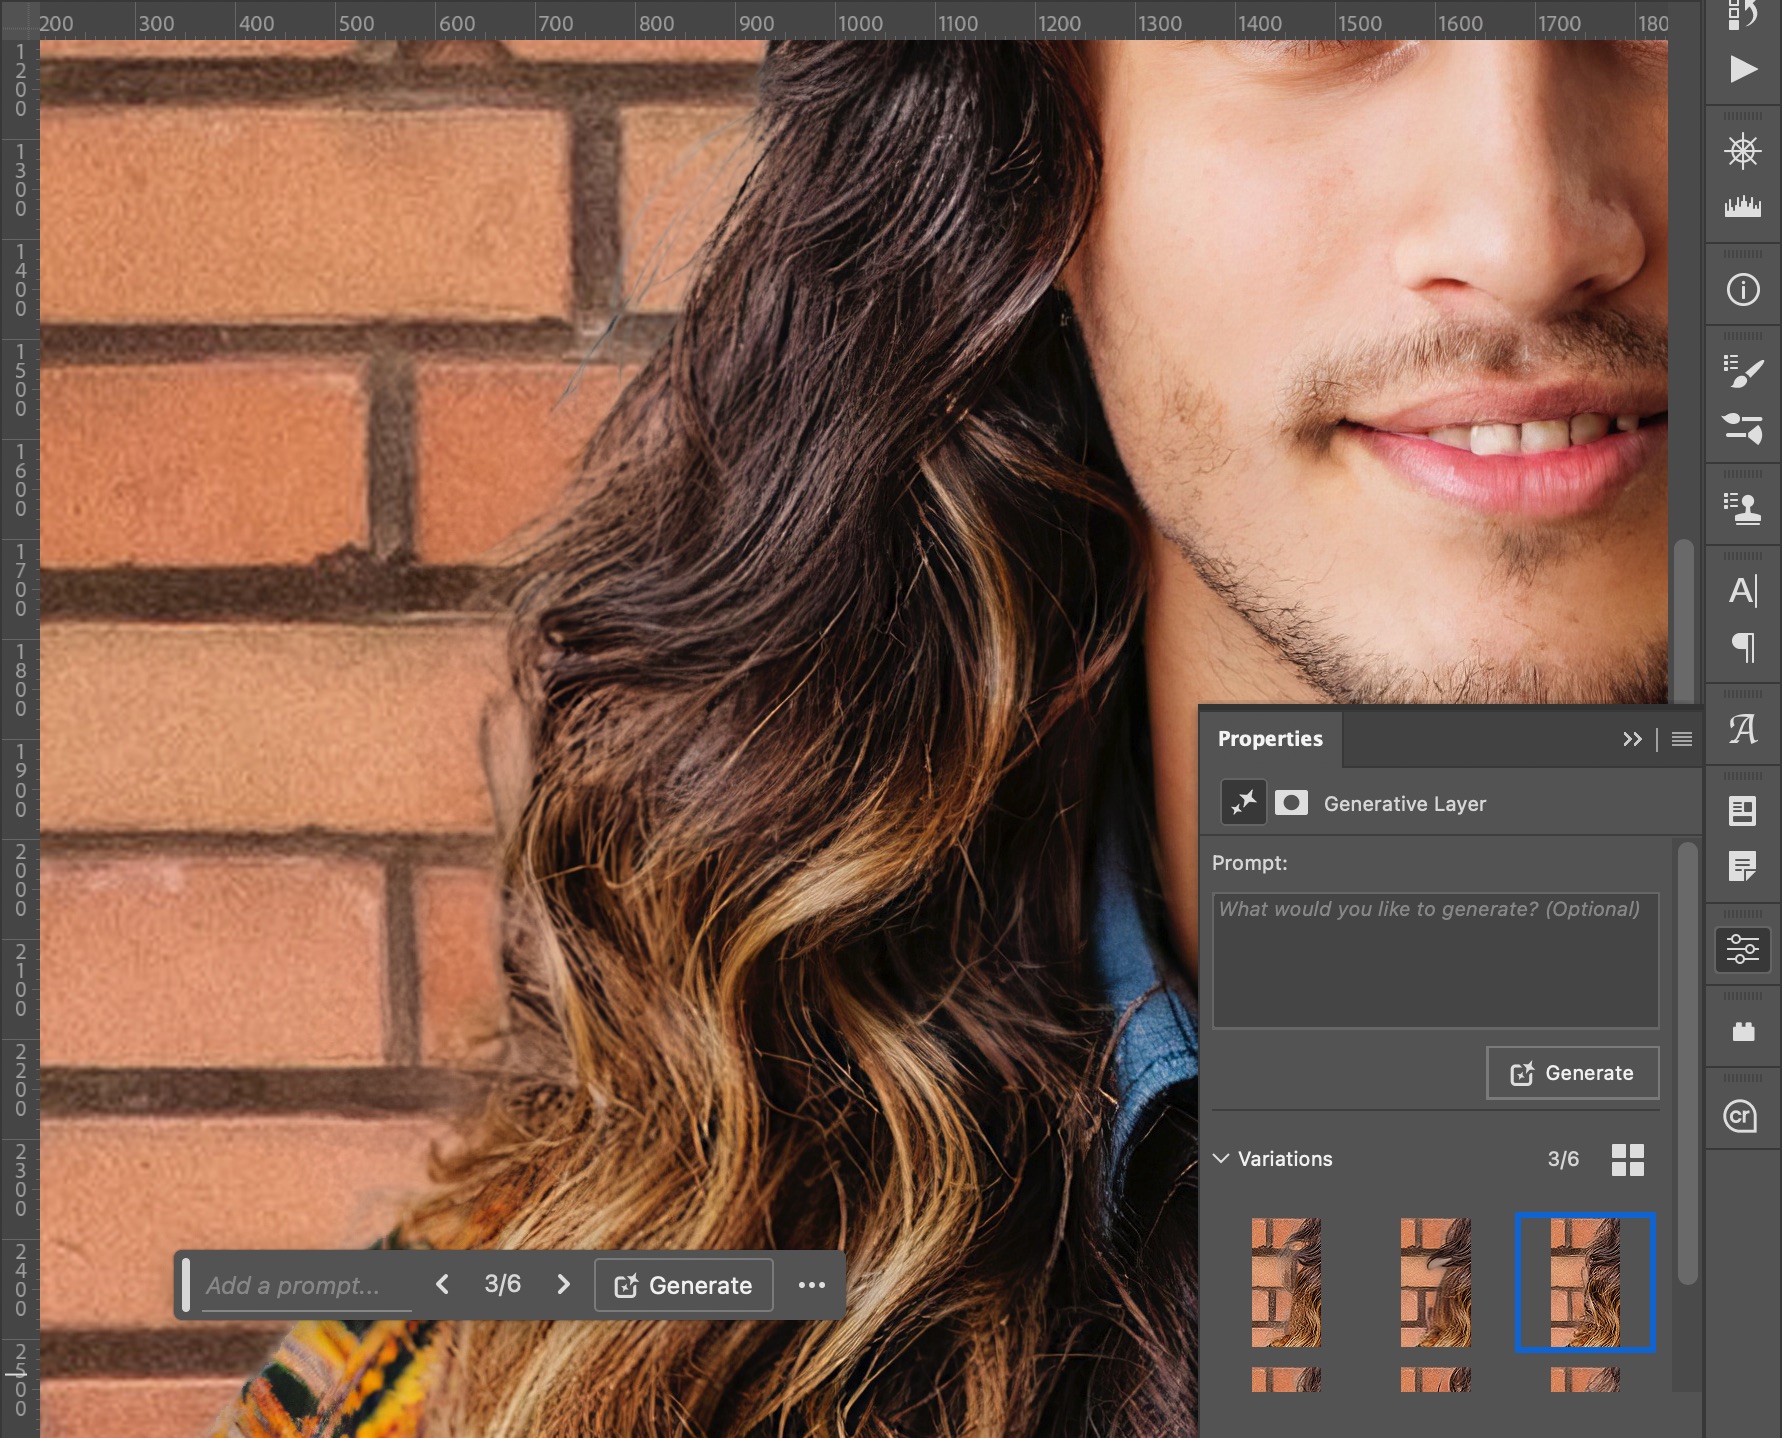
Generative Fill
In all the hype about Photoshop’s Generative Fill feature being able to remove unwanted objects and create new ones out of thin pixels, it’s easy to overlook the feature on a smaller level. Let’s say you’ve masked a person and their hair pretty well, but then need to place them on a patterned background. The previous efforts get you almost there, but artifacts will remain.
Generative Fill could be a way to avoid laboriously attacking the problem with a brush. Using the Rectangular Marquee tool or the Lasso tool on the layer containing the subject, draw a selection around the hair you want to fix. In the Contextual Task Bar, click the Generative Fill button, leave the text field blank, and then click Generate.

You may need to generate several variations, which show up in the Properties panel, to get one that you like. Keep in mind that Generative Fill works at fairly low resolution, so work in batches of roughly 1024-by-1024 pixel areas for the best quality.
Advanced Hair Masking
As mentioned earlier, hair masking is tricky, even with these tools. For more in-depth techniques, watch the following videos from CreativePro contributors and other experts:
- The Single Best Way to Mask Hair in Photoshop!, by Deke McClelland
- Create Flawless Masks with Custom Photoshop Brushes, by Jesús Ramirez, Photoshop Training Channel
- 5 Pro Photoshop Masking Tricks You Don’t Know (Probably), by Jesús Ramirez, Photoshop Training Channel
- hair and fur edges photoshop 2024 Select and Mask, by Colin Smith, photoshopCAFE
- Finally! AI Does IMPOSSIBLE Hair Selection in Photoshop, by Unmesh Dinda, PiXimperfect
This article was last modified on May 7, 2024
This article was first published on May 7, 2024
Commenting is easier and faster when you're logged in!

Recommended for you
Scanning Around With Gene: Listening to Music with Both Ears
I recently splurged and used ten years’ worth of American Express points o...

Photoshop Fun: A Hole in the Hand
Creating surreal images is all about the idea. So what does this image mean? As...
Photoshop New Features Guide
For some time, InDesign users have enjoyed a great free resource that details wh...