

Arnold Schwarzenegger’s iconic robotic endoskeleton was a defining feature of the Terminator movie series. Here’s how you can turn a friend into a Cyberdine Systems android.
Step 1: Find a Terminator
The internet isn’t short of Terminator figures. This one comes from Wikipedia, courtesy of tenaciousme and it’s a close-up of the face – just what you need. The original is rather out of focus, but this is one of the few occasions where you can use Filter > Sharpen > Shake Reduction to bring much of the crispness back into the image.

Step 2: Find a face
If you’re going to insert the Terminator skull into a friend, choose or take a picture from as close to the same angle as you can get. In this image, the bared teeth will fit more neatly with the skull than if the mouth were closed.

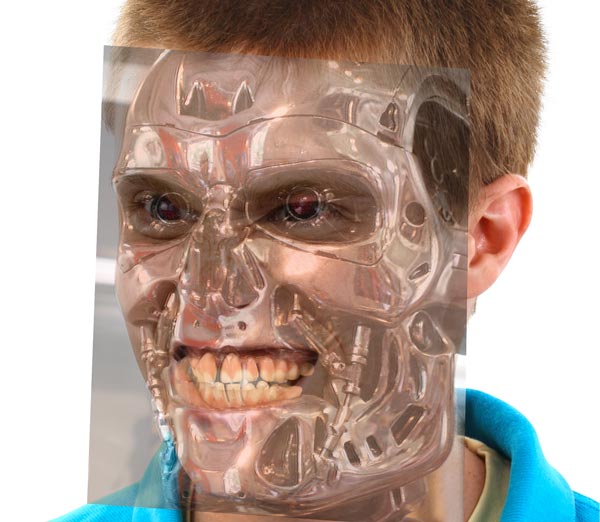
Step 3: Copy the skull to the face
Copy the whole Terminator skull image, and paste it into your face document. Lower the opacity of the layer to around 50% and use Free Transform to scale distort it so that the mouth and eyes line up with those on your chosen face. It doesn’t have to be perfect at this stage.
Step 4: Add a mask
Set the opacity of the skull layer to 100%, and use Layer > Layer Mask > Hide All. Then, with a hard-edged brush, paint in white to reveal the skull where you want it to appear. If your model’s mouth is open, reveal the teeth all the way along inside the mouth.

Step 5: Smudge the hair
The hard cutout works well over the skin, but for added realism switch to the Smudge Tool, and choose a Spatter brush (it’s a default in Photoshop). Smudge the Layer Mask down over the skull to soften the edge around the hair.

Step 6: Make the skin edges
Load the Layer Mask for the skull layer as a selection, by holding Command/Ctrl and clicking on its thumbnail in the Layers Panel. Then make a new layer, and fill that selection with a color somewhat darker than the existing skin.

Step 7: Outline the skin
With the selection from the previous step still active, choose Select > Modify > Contract and reduce the size of the selection by a few pixels (the actual number depends on the size of your image). Delete the modified selection to create a skin outline.

Step 8: Complete the outline
Erase the outline around the mouth and hair areas, so it only shows up between the face and the skull. This gives thickness to the edge of the skin, for a more realistic appearance. If the eye doesn’t look to be in the right place, use Edit > Puppet Warp to bring it down slightly.

Step 9: Add a shadow
Make a new layer above the skull layer, and use Option-Command-G/Alt-Ctrl-G to make a clipping mask with the skull. With a soft-edged brush, paint in black around the edges to add a shadow onto the skull. This adds a visual distance between the face and the skull.
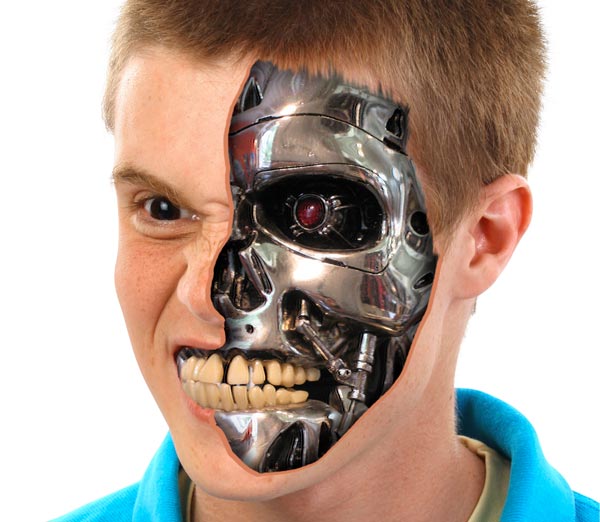
Step 10: Finishing off
A black background will always look best on this sort of image. Make a new layer, set to Hard Light mode, and paint in color at a low opacity, with a large soft-edged brush, to add some atmospheric shading to the head: pink and blue work well here. And while you’re at it, use the Dodge Tool set to Highlights to brighten that dull eye and make it gleam.

This article was last modified on May 6, 2019
This article was first published on May 6, 2019
Commenting is easier and faster when you're logged in!

Recommended for you

Turn a Photo into a Planet Using Photoshop
We’re all familiar with panorama photography, and you may have used Photos...

Photoshop CC 2018 New Features
The 2018 release of Photoshop CC brings a range of new features, tools and worki...

Remove.bg: A Worthy Alternative to Photoshop’s Select and Mask
Get to know this web-based app that performs instant photo cutouts with a remark...