

 For his new film, Indiana Jones and the Dial of Destiny, Disney spent a reputed $100 million dollars to make 80-year-old Harrison Ford look 25 years younger for key scenes. Here’s how to achieve a youthful appearance in Photoshop (and save yourself $100 million).
The starting image
This shot of Ford is taken from Wikimedia Commons, and you can download it here if you want to try this for yourself. Duplicate the background layer before you continue, as you’ll need to use it later. 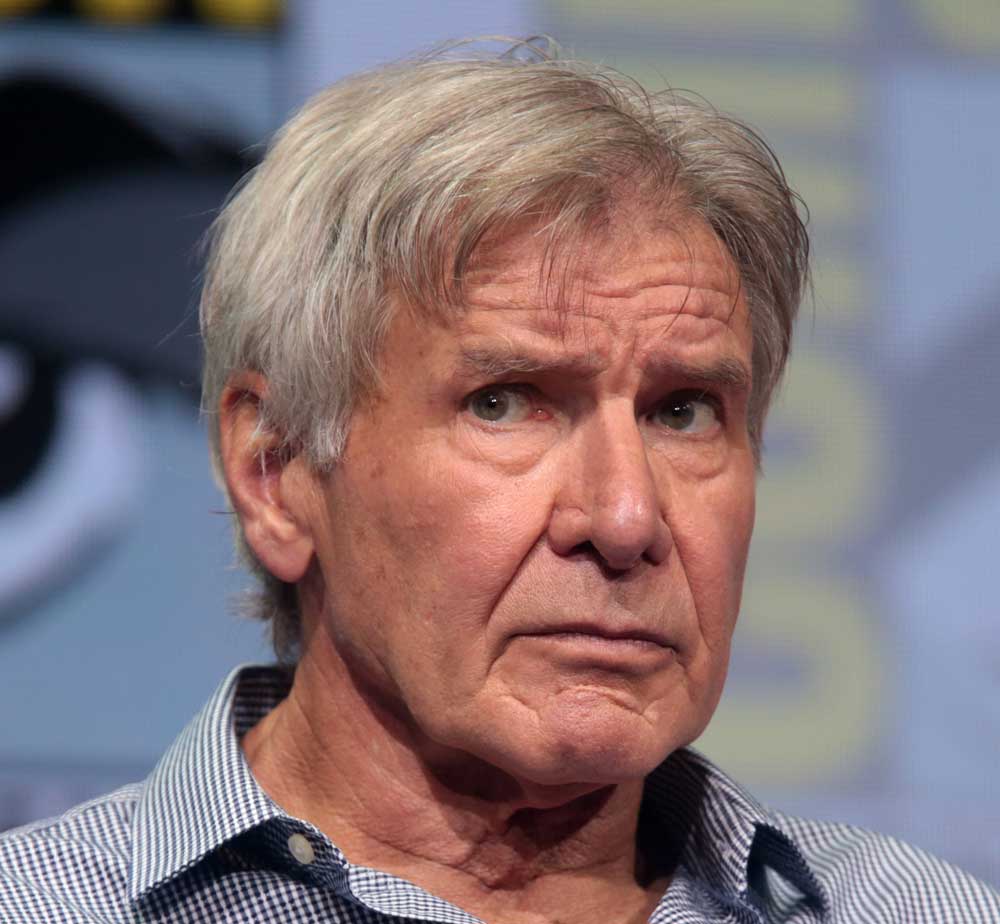
Smooth those wrinkles
The first step, perhaps surprisingly, is to open the Camera Raw Filter from the Filter menu. In the Basic settings, scroll down to the Clarity slider, and drag it all the way to the left to a value of -100. This does a great job of removing almost all the surface imperfections, while retaining the detail where it’s needed. 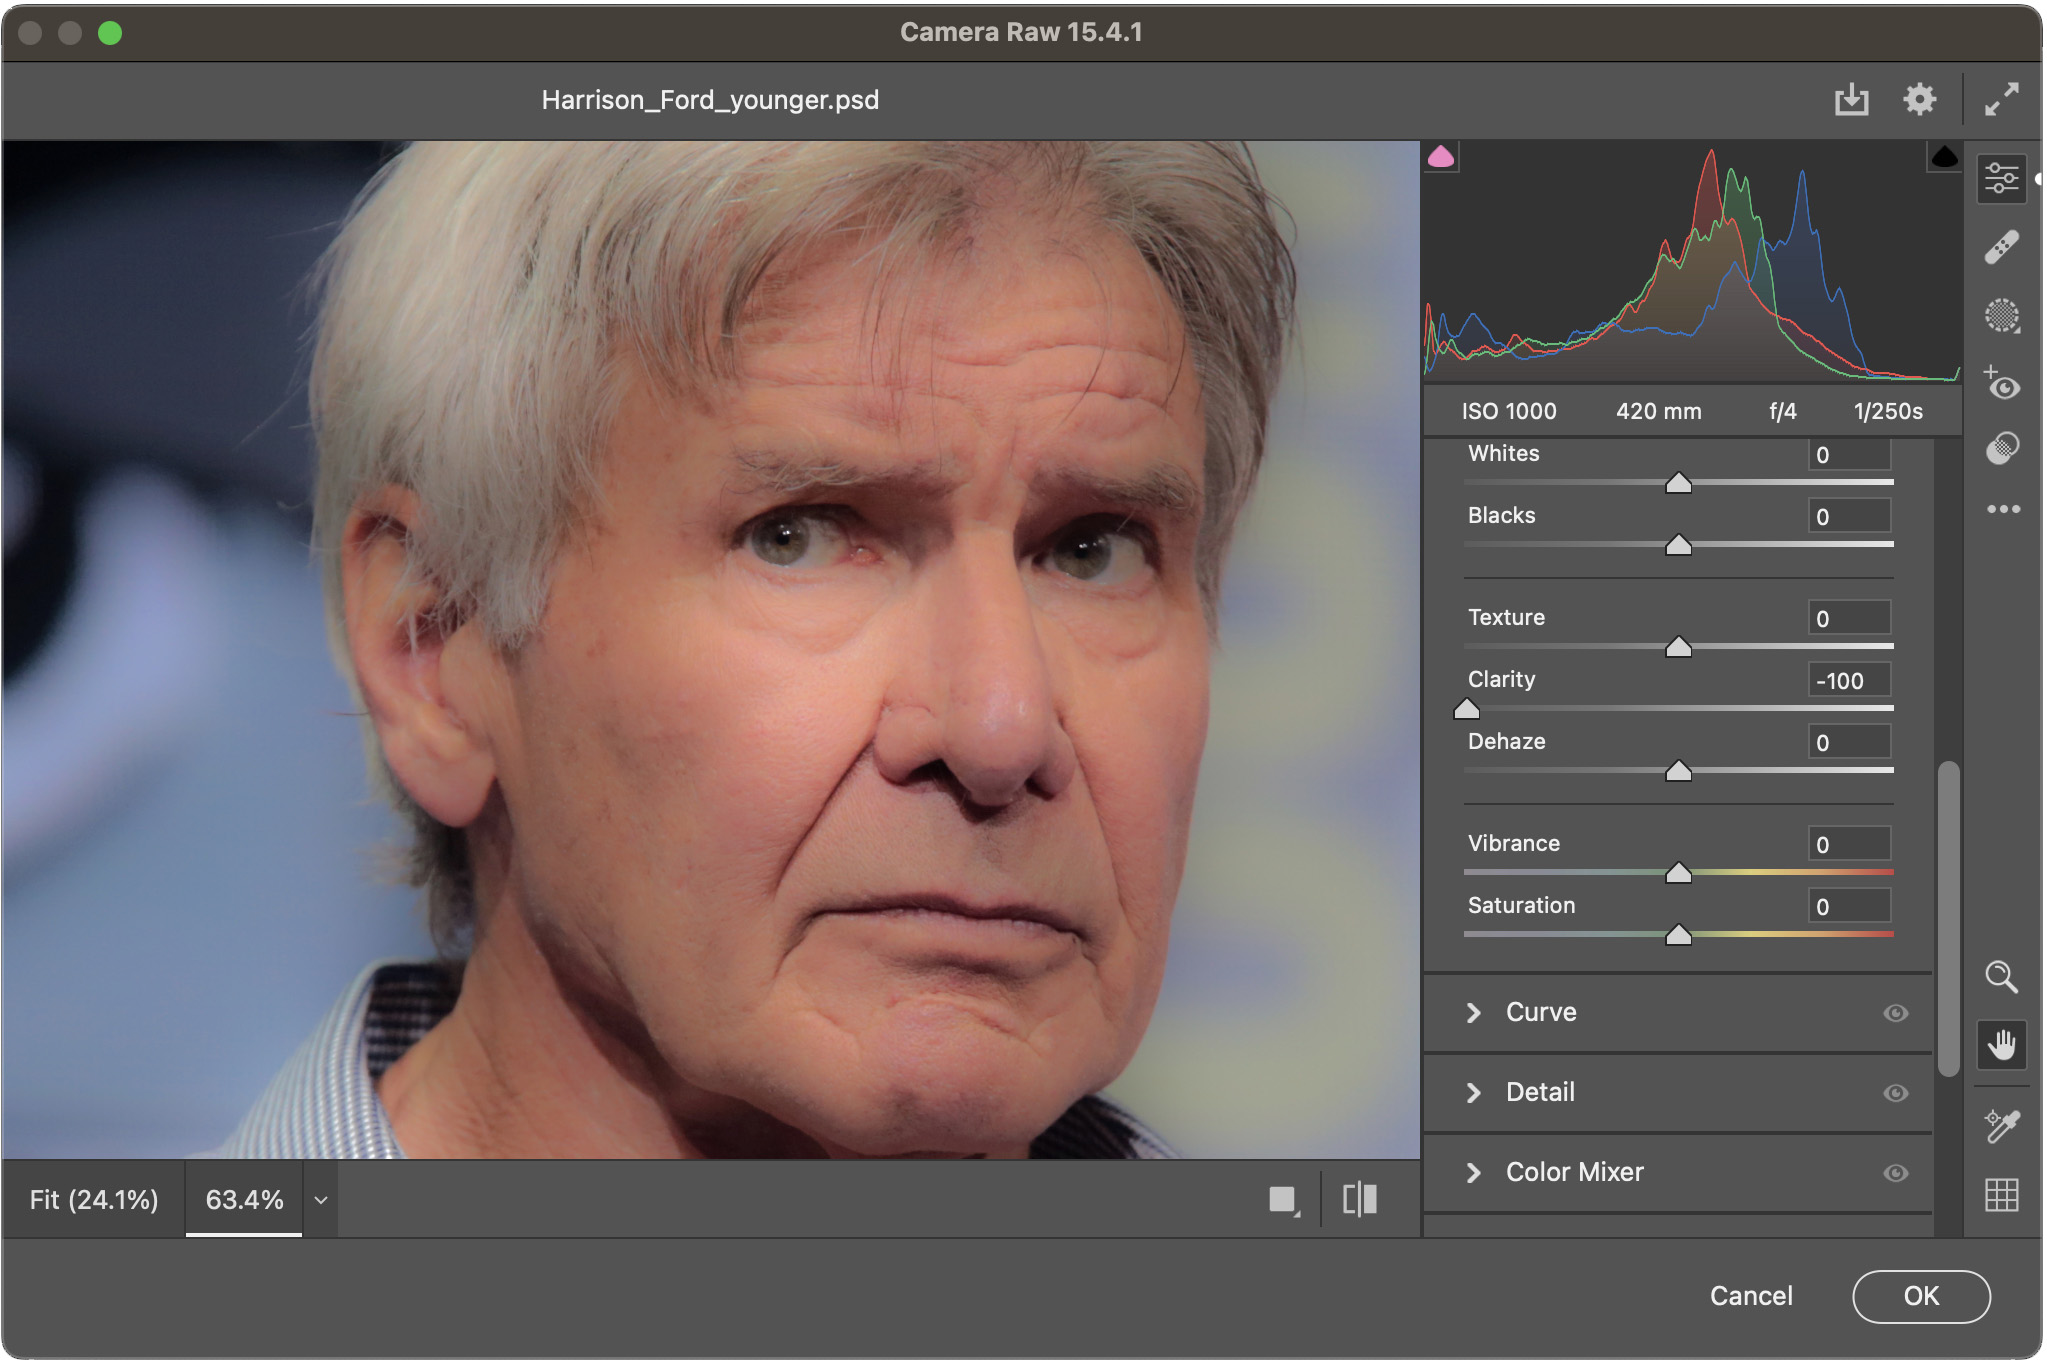
Paint out the larger wrinkles
The Clarity slider does a good job of the small detail, but there are still the larger imperfections to deal with, such as at the corners of the mouth and the blemishes on the cheeks. It’s easy to paint over these with the Spot Healing Brush. 
Reshape the jaw
Harrison’s jawline has understandably sagged over the decades. Use Filter > Liquify, with a large brush size, to gently push the jawline back to its original shape. 
Nose and ears
As we age, our noses and ears tend to become exaggerated versions of themselves. Again, use the Liquify filter to adjust these
features – making the nose less bulbous, and reducing the size of the earlobe. 
More wrinkles
The lines between the mouth and the nose, and the bags under the eyes, are too strong for a youthful Harrison. But erasing them completely would make him too smooth. Instead, use the Spot Healing Brush to paint over each one. Then, as soon as you’ve completed the stroke, choose Edit > Fade to reduce the opacity of the effect, so that some of the original still shows through. 
Tint the hair
It’s always difficult to recolor hair, as the thin strands mean any selection is going to be tricky to create accurately. So here’s a quick and easy approach. Select the hair roughly, using a feathered Lasso selection or, better, Quick Mask (Q) with a soft-edged brush. Then choose Layer > New Adjustment Layer > Curves to bring up the Curves dialog box. Lower the output brightness, then switch to each of the red, green and blue channels in turn, using the RGB pop-up, and drag the curves until you achieve a brown tint. 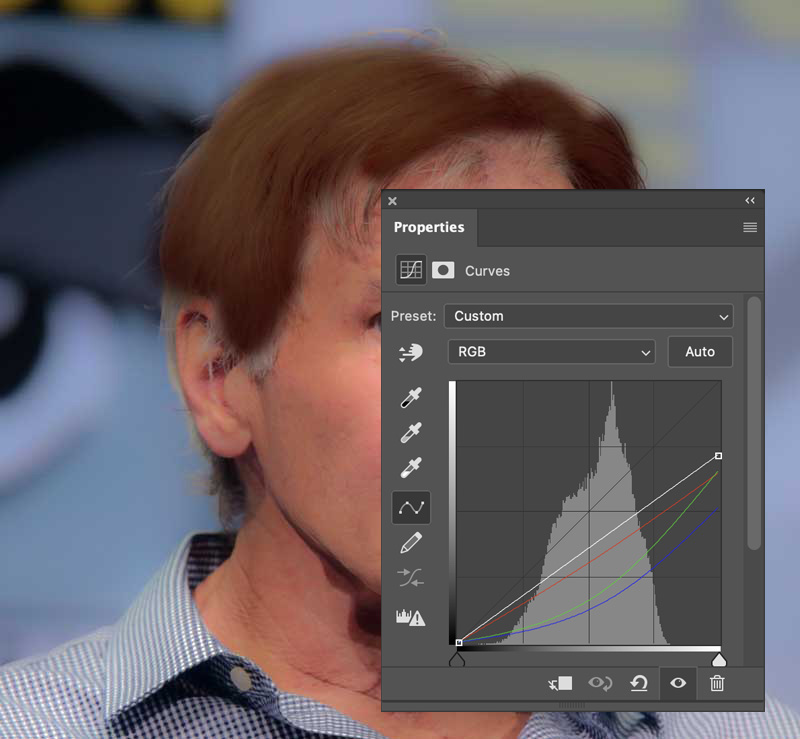
Refine the hair area
When you create an Adjustment Layer with an active selection, that selection turns into a mask for the adjustment. It’s now straightforward to paint on that mask to control the visibility of the adjustment. The easiest way is to use the Smudge tool on the mask to push it where you want it to show up. 
Bring back some definition
The hair tinting process, combined with the Clarity filter, has resulted in the hair looking unnaturally smooth and lacking in detail. Here’s how to bring some of it back. First, load the tint area as a selection by holding Command (Mac)/Ctrl (Windows) and clicking on the thumbnail of the Curves Adjustment Layer’s mask in the Layers panel. Then switch to the original Harrison Ford background. You did remember to make a copy of this layer before starting, right? Use Layer > New > Layer via Copy, and drag this new layer above all the other layers. 
It’s turned gray again!
Yes, it has. But we can get rid of the gray, leaving just the shadows and highlights, by using the pop-up menu at the top of the Layers panel. Change the blend mode from Normal to Hard Light. This has the desired result. 
Fix the alopecia
Harrison may well have a great head of hair for an 80-year-old, but there’s a bald spot right in the center. To patch this, select an area of hair to the side, using a feathered Lasso or, better, QuickMask to make the selection. Choose Edit > Copy Merged, followed by Paste. Then use Free Transform to move and distort the new hair to cover the patch. 
Fix the neck
There are still a lot of wrinkles in the neck area. These can be patched using a combination of the Spot Healing Brush and the Clone tool. It’s worth duplicating the neck area to a new layer first, so you can revert if it doesn’t work. 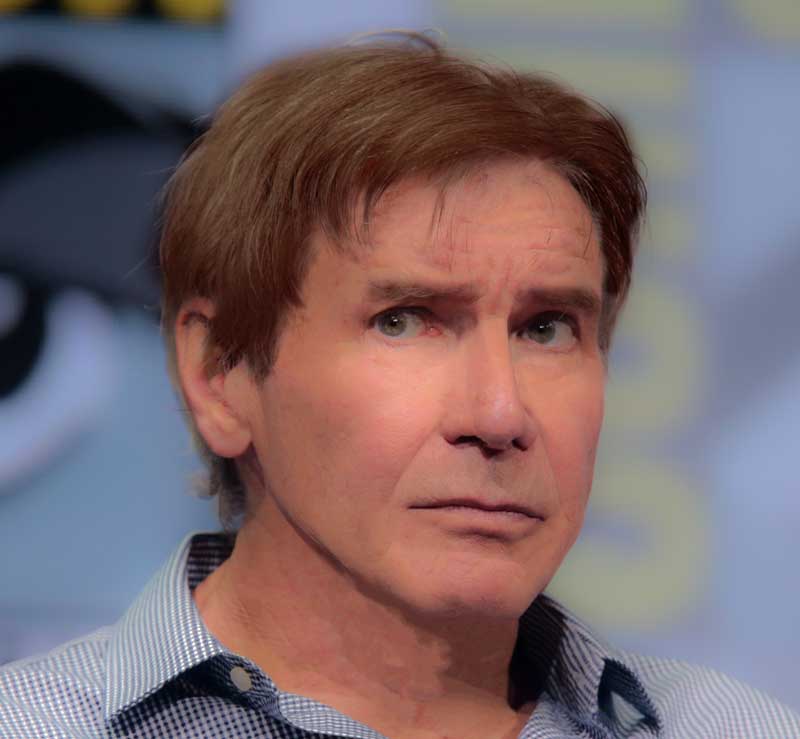
Add some shadow
Patching the neck can also remove necessary shading. It’s easy to paint this back in. Make a new layer, and set its mode to Multiply. Then sample a brown tone from some existing shadow, and use a soft-edged brush set to a low opacity to gradually build up the shading beneath the jawline. 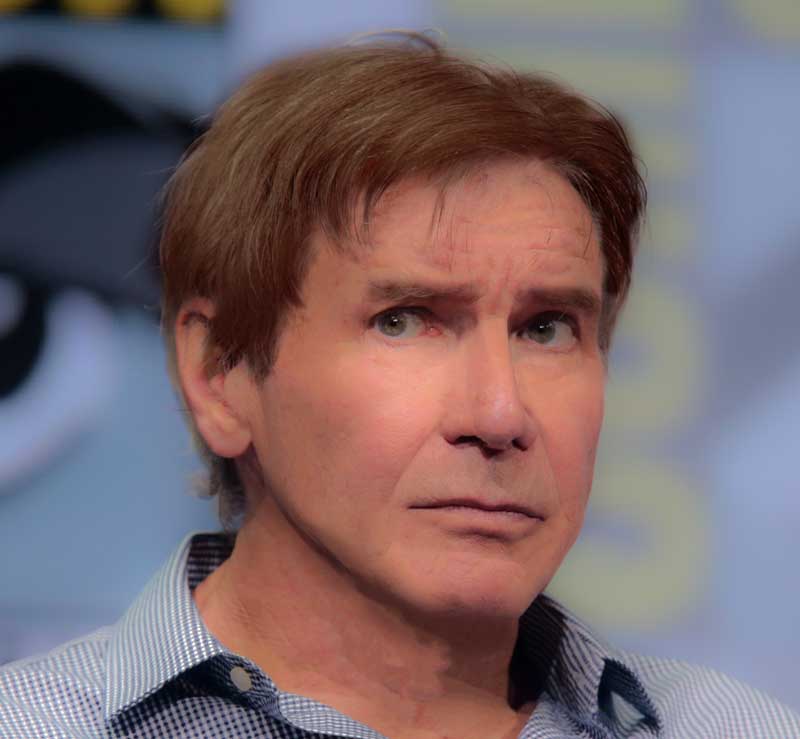
Boost the definition
Dragging the Clarity slider at the beginning of the process resulted in an appearance that was lacking in definition. The way to bring it back is first to go to the original Ford layer and use Select Subject to select his head and shirt. Then go select the top layer, and choose Edit > Copy Merged, followed by Paste. This will place an exact copy of the finished head at the top of the layer stack. Choose Image > Adjustments > Desaturate it to knock out all the color. 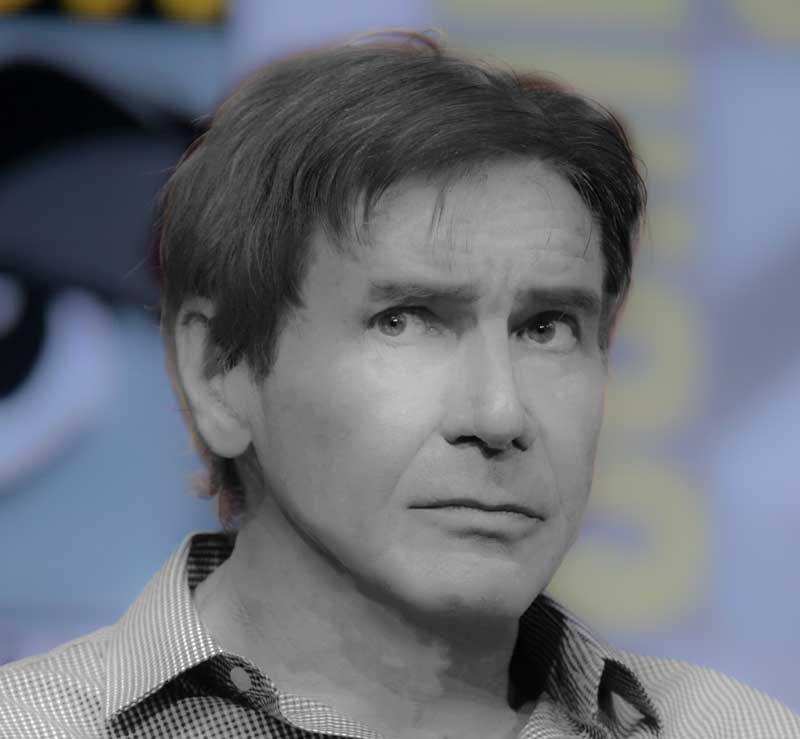
Hard Light, again
As we did with the hair, changing the mode of this layer from Normal to Hard Light has the effect of boosting the light and shade. But this time, it’s overkill: we need to find a way to tone it down. We could simply reduce the opacity of this layer, but there’s a better way. 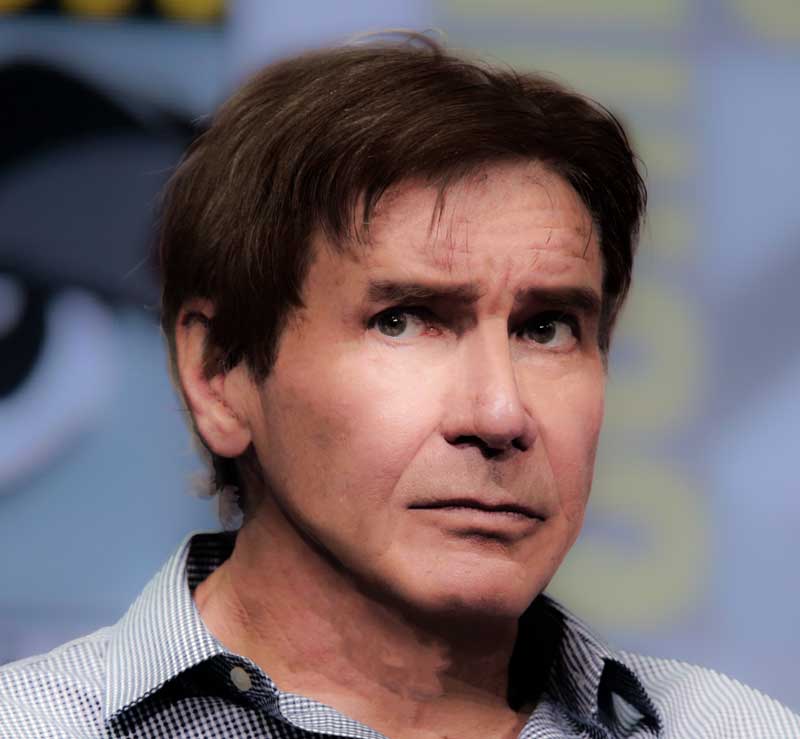
Reduce the effect
Choose Image > Adjustments > Shadows/Highlights. In the dialog box, drag the Shadows slider to the right to reduce the strength of the shadow; and drag the Highlights slider by a lesser amount to reduce the effect of lowering the highlights. 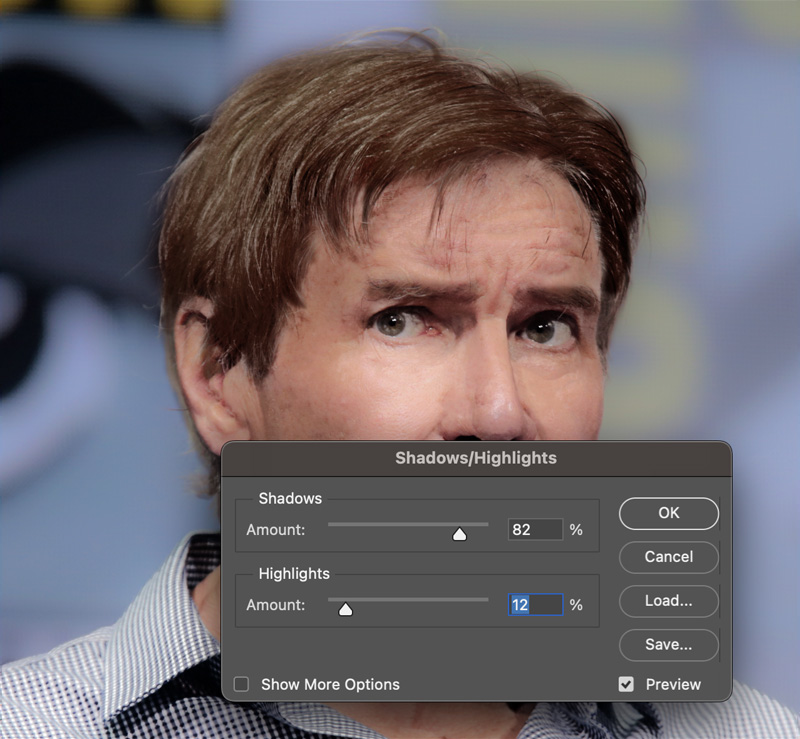
The final image
Here’s the result of making all those edits: Harrison Ford now looks much more like his older self. All you have to do now is repeat the process 30 times for each second of the movie, and pocket the $100 million for yourself. 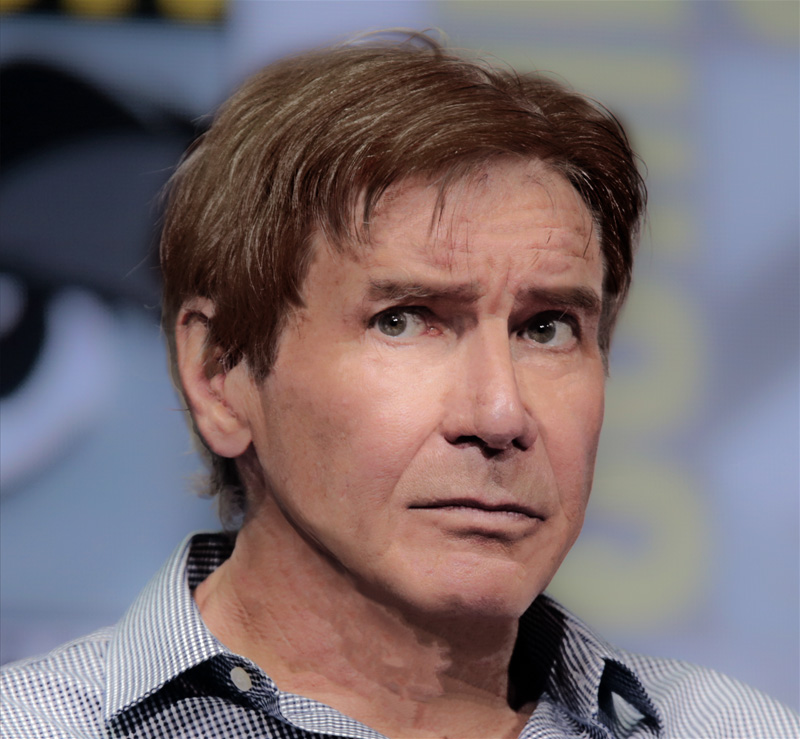
Commenting is easier and faster when you're logged in!

Recommended for you

Set a Swatch to Overprint
When you fill an object or text with the default [Black] swatch at 100% opacity,...

Tip of the Week: Turn Off Multiple Layers Simultaneously
This tip was sent to Tip of the Week email subscribers on January 22, 2015. Sign...
Changing the Default Stroke to Inside or Outside (instead of centered)
When you want to change the default stroke, you need to remember these few essen...