


Animation is everywhere these days and it can be a powerful tool to get more eyes on your art! If you’ve been wanting to experiment with animation but have been put off by the steep learning curve in programs like Photoshop and After Effects, the new GIF Studio plug-in for Illustrator may be the perfect place to start. GIF Studio enables you to design and export animated GIF files directly from an Illustrator document. The plug-in uses a simple system where each artboard in your document becomes a single frame in your GIF file. This quick and intuitive way of building animations opens up a world of possibilities for Illustrator users who want to bring their art to life.
Getting Started: Download & Install the Plug-in
You can find the full GIF Studio plug-in as well as a free trial version on Adobe Exchange or through your Creative Cloud desktop app. After installing either version of the plug-in you can access the GIF Studio interface by going to Window > Extensions > GIF Studio. Upon opening the plug-in for the first time you will find a key with short summaries of each of the tools and functions available (Figure 1). 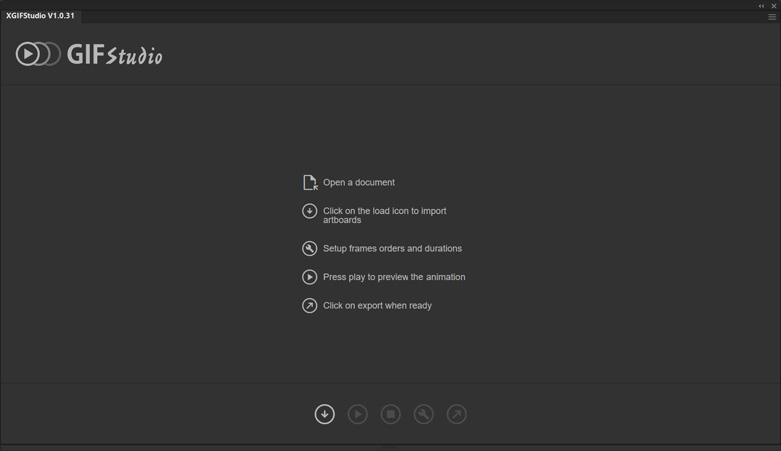 Before using the plug-in, organize the components of your artwork and decide which parts of it will be animated and how they will move or change.
Prep Work: Organizing Your Artwork and Planning the Animation
For this demonstration, I will be making a polar bear character wave by adjusting the rotation of the character’s arm. Taking a look at the file setup, you can see that I’ve organized the artwork into two main layers. First, there is a bottom layer with the background and the main body of the
character which will remain static. Next, there is a top layer with the character’s arm, which I’ve defined as a symbol with the rotation point at the elbow (Figure 2). Tip: Defining the arm as a symbol allows you to easily set the rotation point of the artwork. As a bonus, it will be easier to make any changes to the art once you have multiple copies of it throughout your document. To create symbols from your artwork, select the art you wish to define as a symbol, open the Symbols panel (Window > Symbols), and click the plus icon at the bottom of the panel.
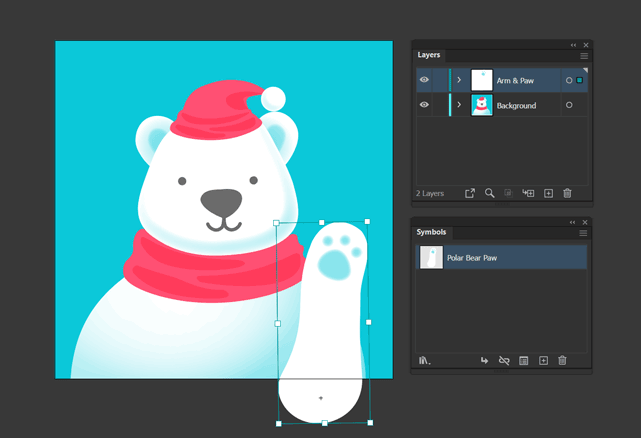
Figure 2. Organizing your file into layers and symbols
Making Frames: Setting up Multiple Artboards
For the next step, we’ll be creating multiple artboards to represent the frames in our GIF animation. The final animation will be a one-second loop consisting of 12 frames, so we will need a document with 12 artboards. There are two ways to go about this task. You can add artboards to your original art file, or you can start a brand new multi-artboard document and transfer your base art to this new file. I like to keep my base art file and animation files separate to keep things nicely organized, so I create a new document at this point. Choose File > New, and in the New Document dialog box, make the artboard size the same as your base art file (in this case 1080 x 1080 pixels) and keep the color space the same as your original art. Set the width and height of the artboard to 1080 x 1080 pixels and the color mode to RGB. Next, set the number of artboards to 12, and click Create.
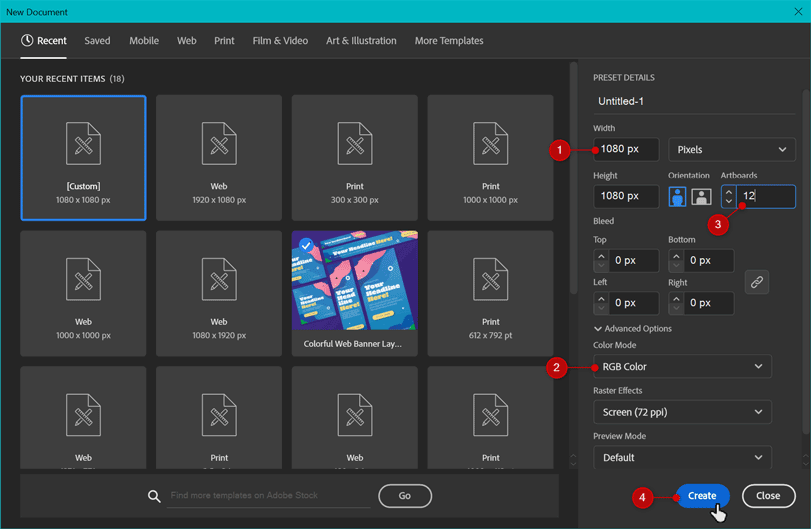
Figure 3. Setting up a multi-artboard document for animation

Figure 4. Rearranging and adding space between artboards
Transferring Art: Copying Your Base Art to the New Document
Like in the original art file, you will want to make two layers in this new multi-artboard animation file. The bottom one is for the static background art, and the top one is for the animated arm symbol. Now, let’s transfer the background art from our original base art file. Switch to your original art file and click in the select column of the Layers panel next to the background layer (Figure 5).
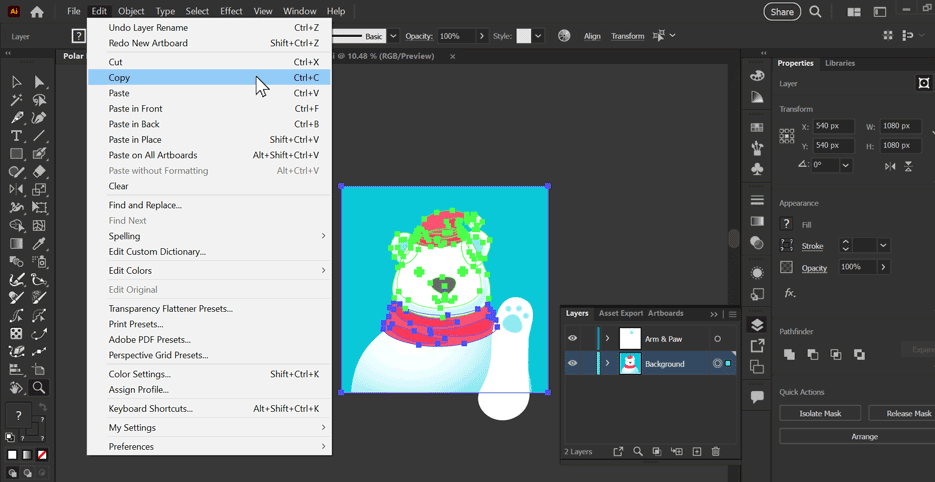
Figure 5. Copy the background art from your original file.
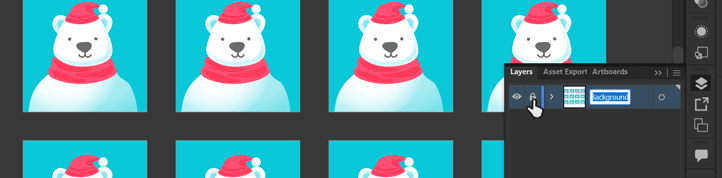
Figure 6. Lock the background layer.
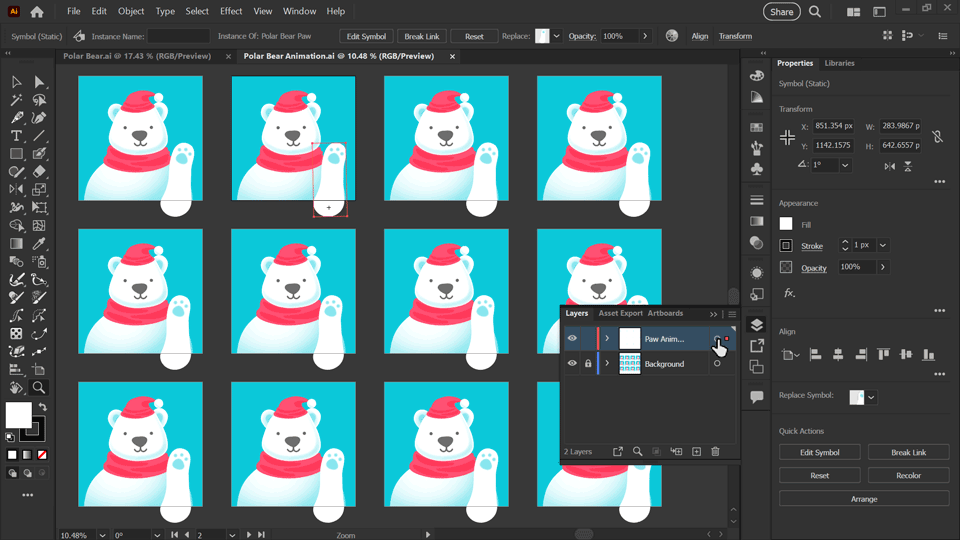
Figure 7. Paste the paw symbol to all artboards on the top layer.
Creating Movement: Rotating the Arm Symbol for Animation
Since our background layer is locked, it will be easy to select the character’s arm symbol on each artboard to adjust its rotation value. Make sure your Properties panel is visible in your workspace. On the first artboard, the rotation of the arm symbol should start at 0 degrees. Select the arm symbol on the second artboard. In the Properties panel next to the rotation symbol, click in the box and change the rotation value to 1 Degree (Figure 8).

Figure 8. Change the Rotation value of the paw symbol to 1 degree
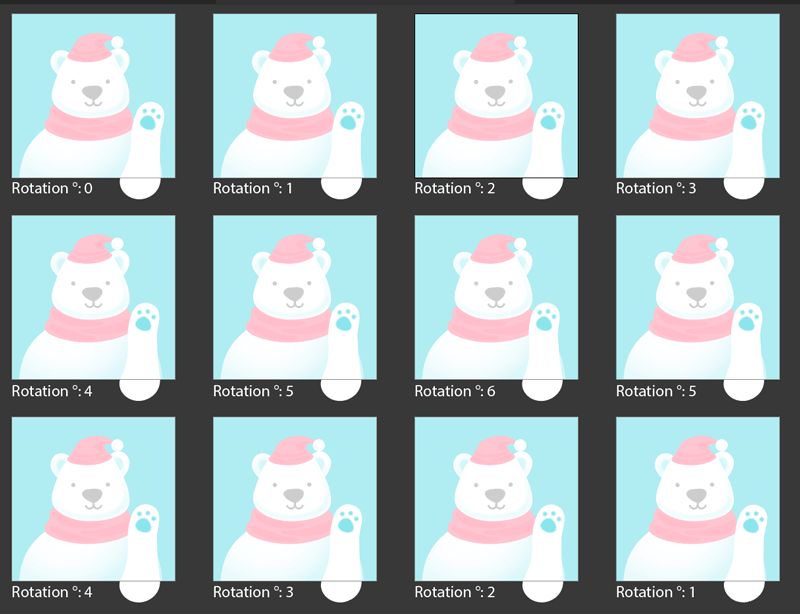
Figure 9. Final Rotation value of the paw symbol for each artboard
Final Steps: Set Frame Durations, Test & Export Your GIF
Now, open the GIF Studio interface by choosing Window > Extensions > GIF Studio. Click the first option in the menu, (the downward pointing arrow icon,) to import your artboards as frames into GIF Studio. Wait a moment while your art loads. You should now see the Settings screen in GIF Studio where you can preview your animation’s frames, rearrange frame order, and set the timing for each frame before you export your final animation (Figure 10).
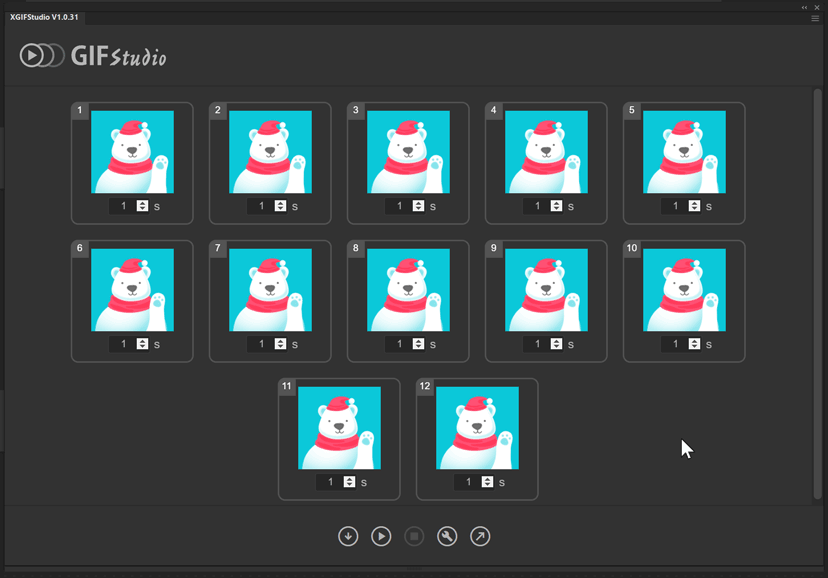
Figure 10. Settings screen in GIF Studio with the artboards loaded as frames
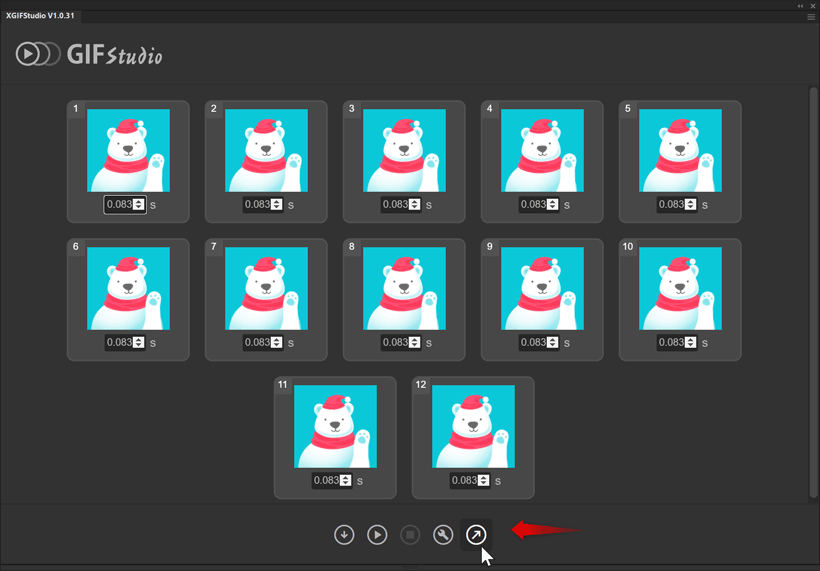
Figure 11. Click to export your GIF file
Commenting is easier and faster when you're logged in!

Recommended for you

Create Flashing Holiday Lights in InDesign
Learn how to make lights flash on and off, with the help of a transparency effec...

A CS5 Treat: The Animation Sandwich
By combining CS5's new animation features with regular InDesign drawing techniqu...

Learning After Effects
How to create attention-grabbing content with After Effects and InDesign