
Photoshop is great when you’re working with images – but still images are not so impressive when you want to get a sense of movement. Here’s a way to make people look as if they’re moving fast, without using any ugly blurring techniques.
Step 1: Choose your image
To make this technique work, you need an image with no loose limbs on the trailing edge. So, for example, if there had been a gap between the man’s attache case arm and his body, the image wouldn’t make sense as the extrusion would look wrong. Make sure the figure is a cutout, on its own layer.

Step 2: Duplicate and extrude
Duplicate the figure layer, Select All, then switch to the Move Tool and hold Option or Alt as you nudge it one pixel to the left or right (depending on the direction of travel) with the cursor key on your keyboard. Here, I moved the figure to the left first, then nudged right. Keep the cursor key held down, as well as Option or Alt, and you’ll gradually produce this long trail of pixels. Keep going till you have a clear vertical area of extruded pixels.
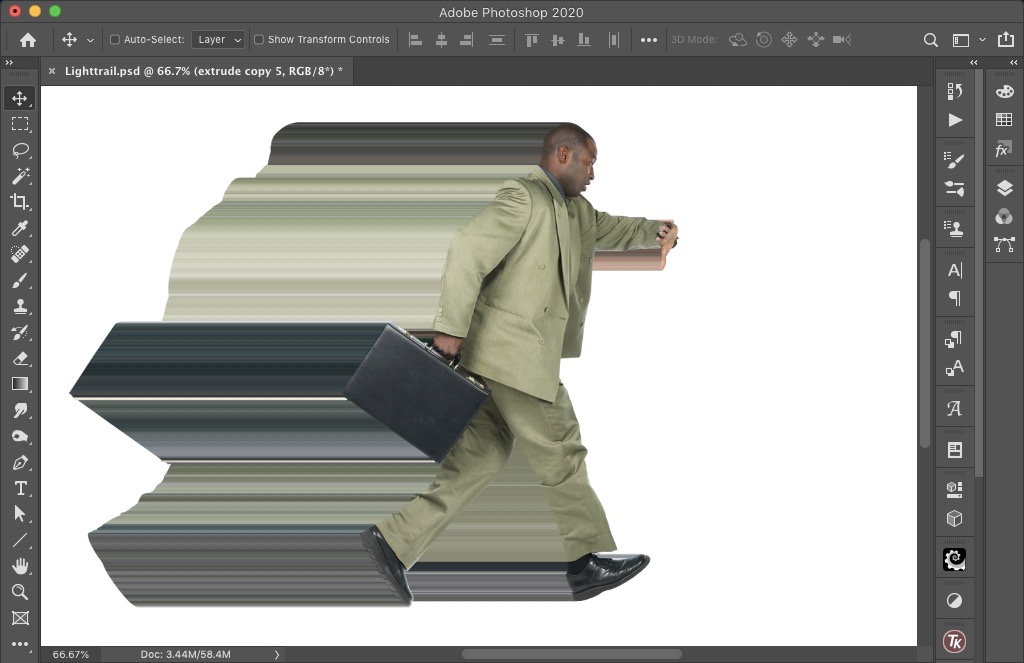
Step 3: Select a vertical area
Use the Marquee tool to make a vertical selection that includes extruded pixels all the way down. Then Inverse the selection (Select > Inverse) and delete everything else. You’ll be left with a tall column of pixels.

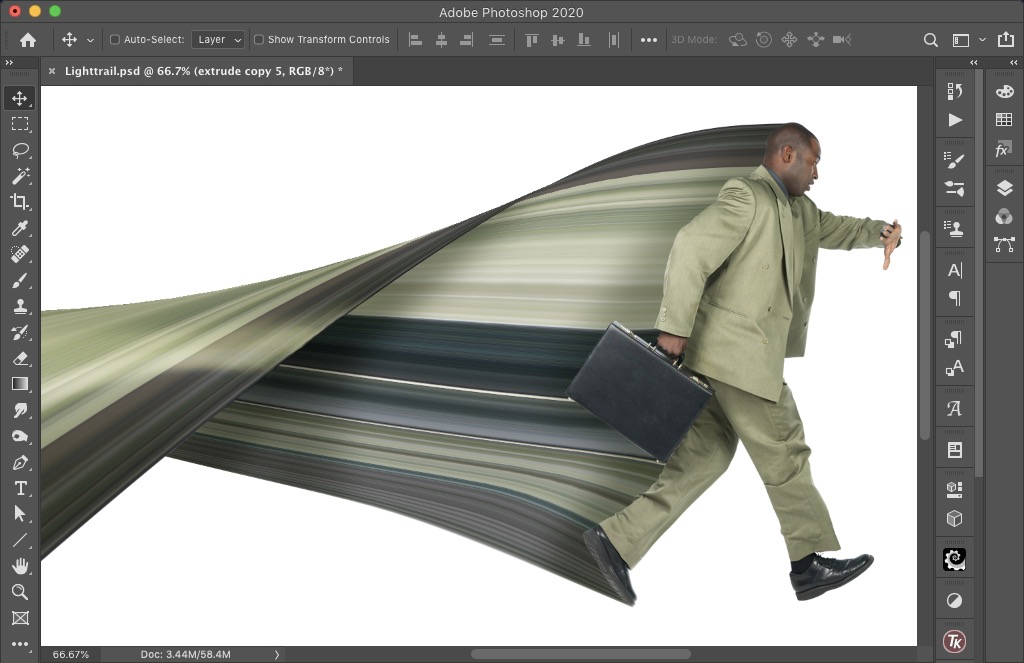
Step 4: Stretch the extrusion
Reveal the original layer, and move the extruded column behind it. Then use Free Transform to scale
the extrusion horizontally: with recent versions of Photoshop you’ll need to hold Shift as you do so to prevent it scaling uniformly.

Step 5: Warp the extrusion
Use Layer > Smart Objects > Convert to Smart Object on the extrusion layer, so you can edit your transformation later if you need to. Enter Free Transform mode again, and click the Warp button on the toolbar. Then drag the top left corner down, and the bottom right corner up, to twist the layer into an overlapping formation. Adjust the warp handles as necessary, to produce a pleasing shape.
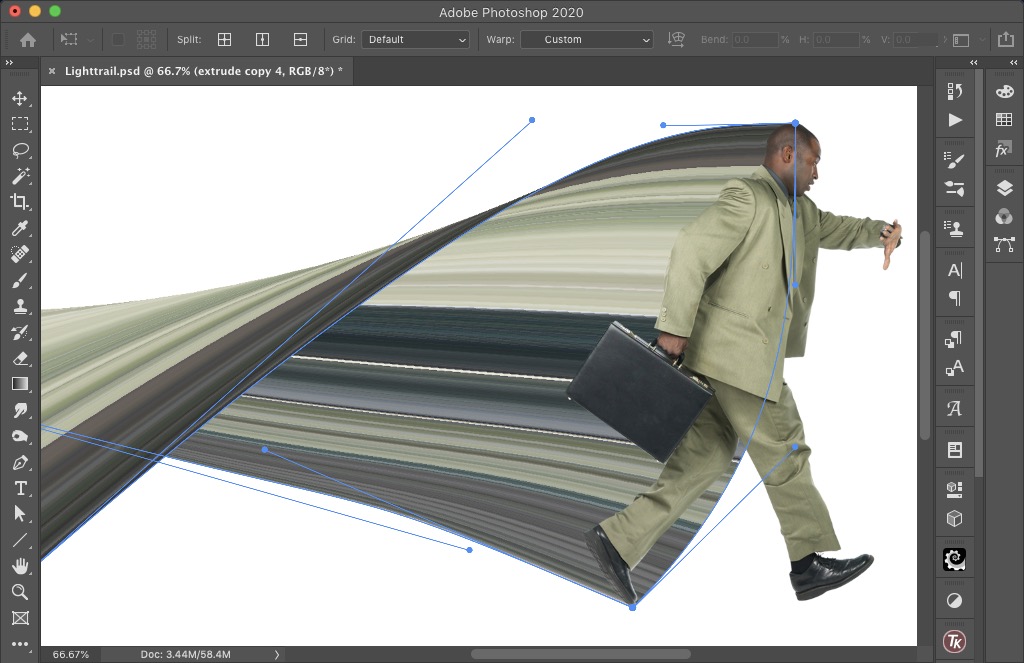
Step 6: Adjust the warp
In the previous step, some of the extrusion elements weren’t lining up with the body – the dark area from the shoes was too high, and the corners of the attache case were in the wrong place. If you’re using the latest version of Photoshop CC, you can hold Option or Alt and click on the Warp to add new anchor points, allowing you to move regions selectively.

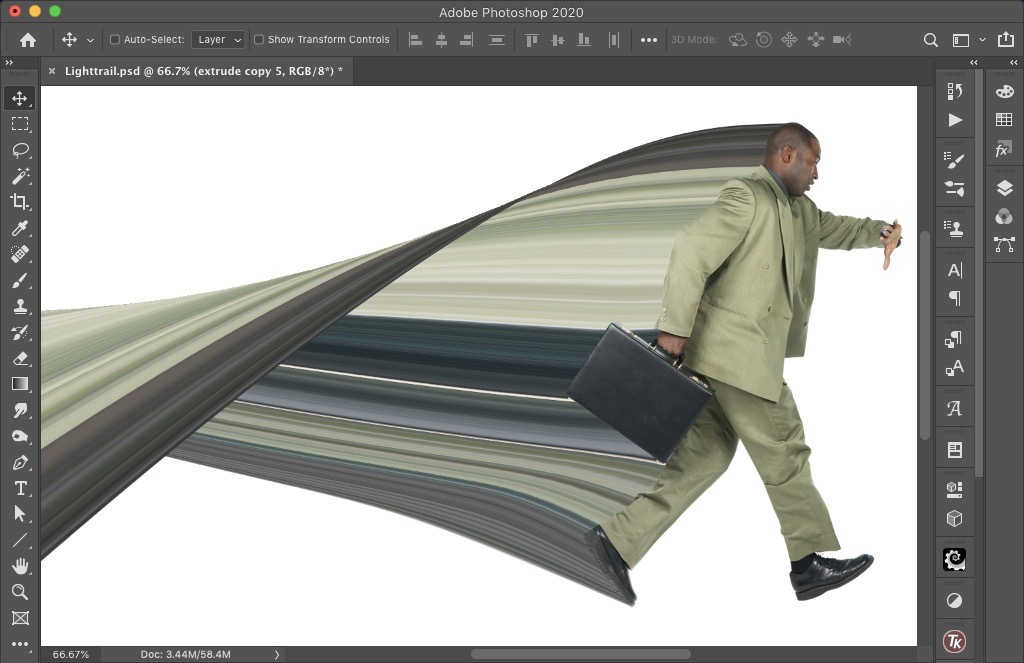
Step 7: Mask the extrusion
Add a Layer Mask to the extrusion, and paint in black over the areas that project in front of the leg. (You can’t erase them, because you’re working with a Smart Object.)
Step 8: Add some shadow
Make a new layer above the extrusion layer, set the blend mode to Multiply, and make a Clipping Mask with the extrusion layer (hold Option or Alt and click between the two layers in the Layers Panel). Sample a green color from the image and, using a large soft brush set to an opacity of around 20%, gradually build up the shadow behind the figure.
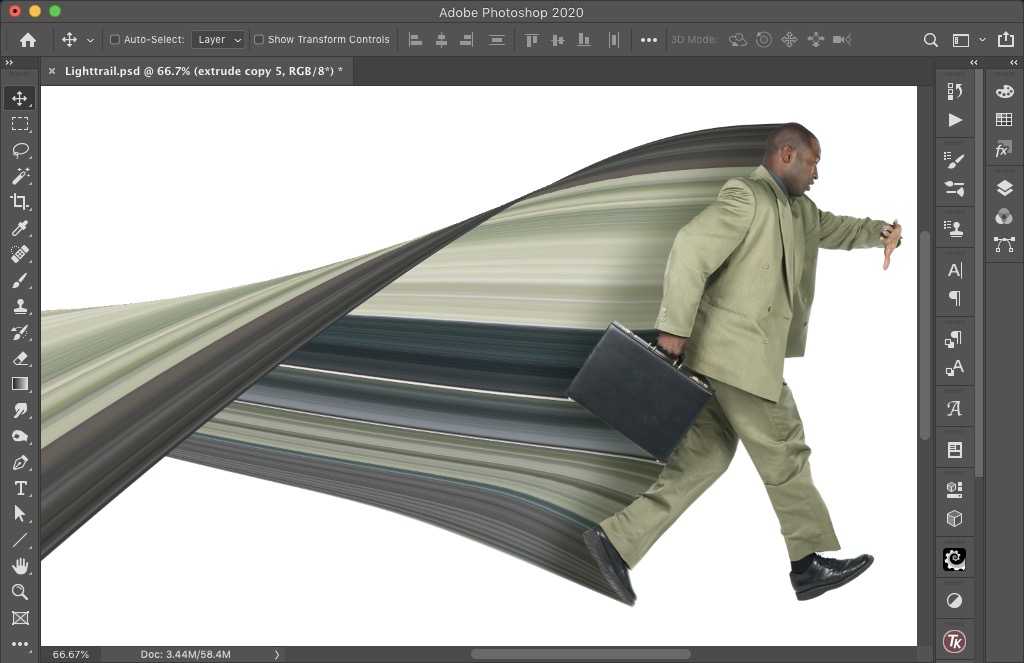
Step 9: Shade the twist
Using the Pen tool, set to Path mode, draw a selection along the edge of the twisted portion of the extrusion layer. Then, on the Shadow layer, paint shadows under here to add a three-dimensional quality to the trail.

Step 10: Add a shine
Make another new layer, set the blend mode to Hard Light, again using the extrusion layer as a Clipping Mask. Sample a light green color from the image, and paint a shine on the folded area for added interest.
Step 11: Add a background
The man will look much more convincing if he’s running down a street. Lower the opacity of the extrusion layer slightly – around 90% works well – and add a slight shadow on the ground beneath him.

Commenting is easier and faster when you're logged in!

Recommended for you

Creating a Neon Glow Light Style in Photoshop
It’s easy to create this glowing Layer Style, which will enable you to mak...

Designing with Water Splashes in Photoshop
You may have seen images that look like they’re made made of dynamic, flow...

InDesign Magazine Issue 107: Photoshop and InDesign
Issue 107 of InDesign Magazine features articles on using Photoshop and InDesign...