

Using color groups is a great way to organize your swatches in Adobe Illustrator. You can create groups that make sense to you—perhaps group your corporate colors, group by job, or group using color harmony rules. You can even add your groups to your Creative Cloud libraries to share with your colleagues.
But do you know how you can quickly create a color group from the colors in a bitmapped image? Object Mosaic—which was designed to divide an image into small squares as a special effect—is the perfect tool.
Create a mosaic from your image
- Paste or place a bitmapped image on your artboard (or rasterize a vector object.).
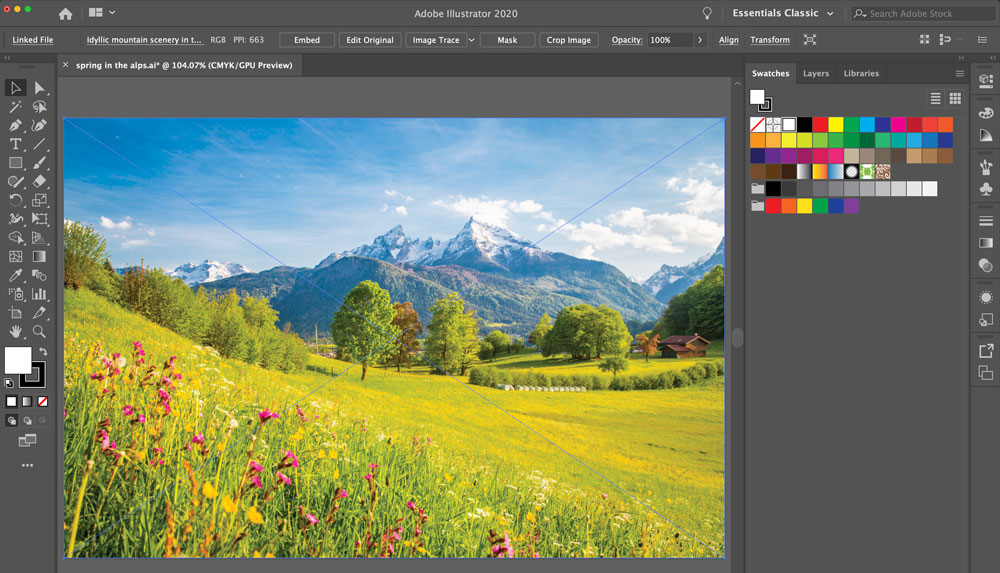
- Select the image.
- Choose Object > Create Object Mosaic. (Note: This command only works on embedded files—not linked files—so if Create Object Mosaic isn’t available, click the Embed button on the Control panel or on the Properties panel.)
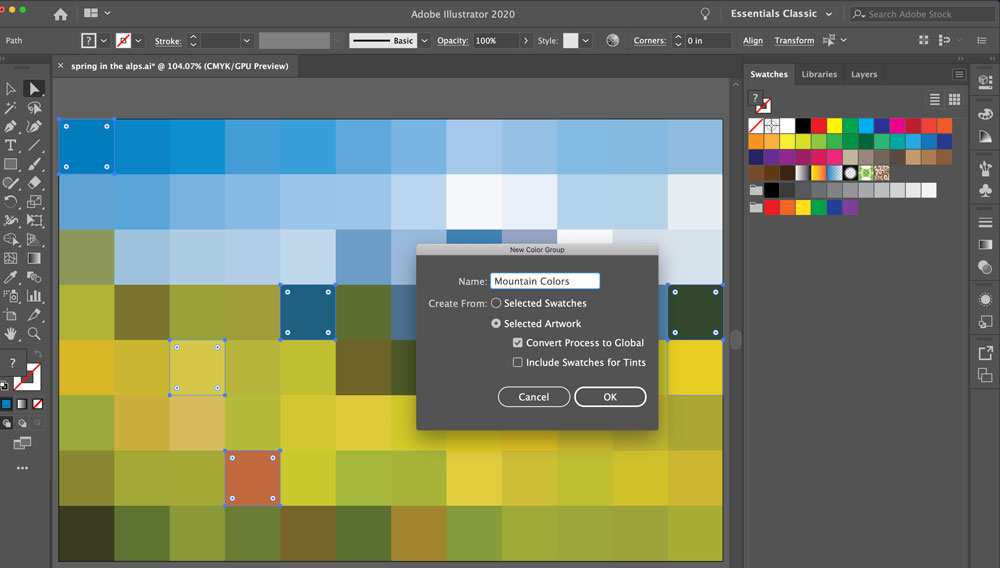
- Set the number of tiles for the width, and then click the “Use Ratio” button at the bottom left of the dialog box to set the height. The number of tiles you specify determines the number of colors.

- When you click OK, the colored tiles appear, grouped on a new layer. The original image is on a layer underneath the new group, unless you enabled the “Delete Raster” checkbox prior to clicking OK, in which case it was removed.

Create a color group from the tiles
- Now select the tiles you want to save in your color group. You can ungroup, but I just use the Direct Selection tool because it is quicker, and the Corner Widget makes it easier for me to see which ones I have selected. Hold the Shift key to add to your initial selection.

- Choose Window > Swatches to open the Swatches panel.
- Choose New Color Group from the Swatches panel menu.
- Name the group. Enable both the “Selected Artwork” and the “Convert Process to Global” radio buttons. (Global colors are the way to go, because if you end up editing their definition later, Illustrator will locate all occurrences of that color in your artwork and update them to reflect your change.).
- Click OK.
That was easy!
If you want to add your Color Group to a Creative Cloud Library, just select the folder icon at the left of the group and click the “Add selected Swatches and Color Groups to my current Library” button. It’s the third button from the left at the bottom of the Swatches panel.
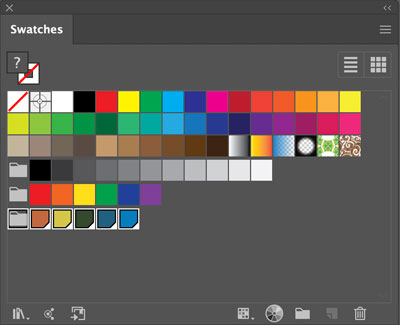
Note: When Color Groups are added to the Library, they are called Color Themes, and you are limited to five swatches per theme.

This article was last modified on June 16, 2022
This article was first published on February 17, 2020
Commenting is easier and faster when you're logged in!

Recommended for you

CreativePro Video: Fill Live Illustrator Text With a Gradient
In this week’s CreativePro video, Mike Rankin shows us how to quickly fill text...

Illustrator Downloadable: Top Tips Ebook
This practical HOW-TO guide for Illustrator users focuses on creative tools effi...
Designing with Maps
Deploy the science (and art) of mapmaking in your designs with the help of ArcGI...