

The following is an excerpt from Speaking Photoshop CC by Dave Bate.

Reprinted, with permission of the publisher, from Speaking Photoshop CC © 2014 David Bate. All rights reserved.
For further information, visit speakingphotoshop.com.
***
Did you ever wonder how the Levels command brings out hidden detail as you darken an overexposed image or brighten an underexposed one? Those Adobe software engineers! You have to give them credit for their creative ingenuity. They seem to have called upon the special capabilities of an accordion to make this all possible. Here’s how it works…
If you want to follow along on your computer, you can find Callie.jpg at www.SpeakingPhotoshop.com. Under the Chapter Files link, click on the Chapter 4 Files to download Callie (and a few other images used for that chapter).

The original image lacks detail in Callie’s dark fur.
Callie, my wonderful Border Collie, is an easy dog to train but difficult to photograph. Notice the lack of detail in her black fur. Let’s watch how the Levels command can improve that for us. Choose Image > Adjustments > Levels to bring up the Levels dialog box. Normally I apply Levels using an Adjustment layer, but it’s much easier to spot the hidden accordion using this technique.

Sliders let you redefine where the Black, Midtone and White Points are. Contrast increases as you drag the Black and White Point sliders closer together. Dragging the Midtone slider has an overall brightening or darkening effect on the image.
When the Levels dialog box opens, take a look at the histogram. It’s a bar chart representing luminosity values ranging from 0 (black) to 255 (white). Bars that are tall have a large number of image pixels with that particular luminosity value. The smaller mountain on the left represents Callie’s black fur, and the larger mountain on the right represents the many snow pixels. You can’t see individual bars because they are all squashed together.
Below the histogram are three sliders: a Black Point slider on the left, a White Point slider on the right, and a Midtones slider in between. These sliders are the key to playing the hidden accordion.
Drag the Midtone slider to the left. Do you see how Callie’s black fur brightens? Do you also notice how detail improves? We now have a much clearer view of her eyes, the inside of her ear, and the shape of her belly. Move the Black Point slider slightly to the right, so the image doesn’t become too washed out. It’s a definite improvement.

Unfortunately, we also have an undesirable side effect. Do you notice how we lost detail in the snow?
Click OK to accept your Levels adjustment.
Where did this change in detail come from? Why is Callie’s black fur so much clearer now? The answer is not as simple as: We brightened her, therefore we see more detail. There’s more to it than that. The accordion did it.
When you reposition any of those three Input sliders, you are asking Photoshop to change its definition of Black, White, or Midtones in the image, which by default are assigned luminosity values of 0, 255 and 128 respectively. As soon as you hit OK, all of the Input sliders latch onto the luminosity bars and drag them along—like an accordion—as they return to their original “homes.”

As the Input Sliders return to their original homes, the blue area (shadows) expands, while the red area (highlights) compresses. The before and after pictures show the increased detail in the shadows and decreased detail in the highlights.
In our case, I moved the Black Point slider slightly to the right and the Midtones slider to the left. When the sliders returned to their home positions, they pulled the luminosity bars apart in the shadows area like the expanding bellows of an accordion. That makes the shadow luminosity bars more different from one another than they used to be, so we see clearer detail. More differentiation creates more visible detail.
But as that Midtones slider was returning to its home position, it was also squeezing the luminosity bars of the highlight pixels closer together, like a collapsing accordion. That created a loss of detail in the snow—less differentiation results in less detail. If we had used a Levels Adjustment layer instead of the Image > Adjustments > Levels command, we could use the layer mask to prevent the adjustment from affecting the snow. If your goal is to improve detail in both the shadows and the highlights of an image, you might want to use a different adjustment tool like Curves or Shadows/Highlights.
Let’s return to the Levels dialog box.
Choose Image > Adjustments > Levels once again to examine the new histogram. There’s proof positive of Adobe’s secret accordion. You can see how individual bars in the shadows region were pulled apart, making them more different from one another than they used to be. This is what created the extra detail in Callie’s black fur. At the same time, you can see how the brighter bars were squashed together, forcing the pixels to occupy a smaller number of luminosity bars. That’s why there’s less detail in the snow.

The accordion effect simultaneously separated the darker luminosity bars as it compressed the brighter ones.
The result is more detail in Callie’s fur and less detail in the snow.
So there you have it. That’s how I know that Adobe software engineers used an accordion when designing their Levels command. And it works great. My hat is off to them
.
This article was last modified on July 9, 2014
This article was first published on July 9, 2014
Commenting is easier and faster when you're logged in!

Recommended for you

How to Extract Images with Hair Using Photoshop’s Refine Mask
The following is an excerpt from Speaking Photoshop CS6 by Dave Bate. You can al...
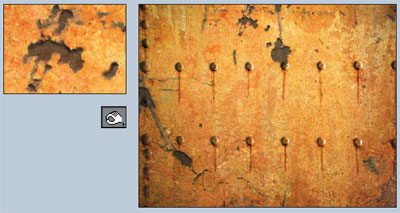
Photoshop How-To: Aging Metal Textures
If, like me, you like the patina of aged, rusty metal, then this Photoshop trick...
CreativePro Tip of the Week: Photoshop Blend Mode Shortcuts
This CreativePro Tip of the Week for Photoshop blend mode shortcuts was sent to...