


Here’s one from the “Gee, I never thought to try that before,” files.
The other day I wanted to hide a placed photo in a document so I could see and work with some objects underneath it. So I went to select the photo and press Command+3, the Mac shortcut for hiding objects in InDesign CS5 and later. But I was rushing and instead of single clicking on the object to select it, I accidentally double clicked. This meant that I had selected the content inside the frame, and not the entire object. And before this really registered in my brain, my fingers had already pressed Command+3. Lo and behold, InDesign dutifully hid the content and not the frame. Pretty neat.
So, for example, here’s a placed photo of a deer on top of a background forest image.

Double click on the deer to select the photo inside the frame.
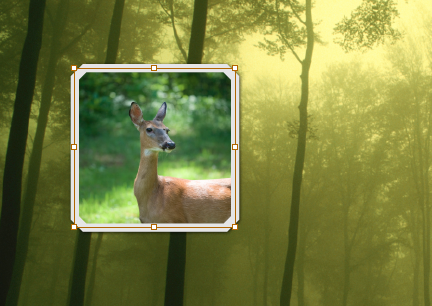
Press Command/Ctrl+3 and the deer vanishes, but not the frame.

Press Cmd+Option+3/Ctrl+Alt+3 to show the deer again, along with any other hidden objects on the spread.
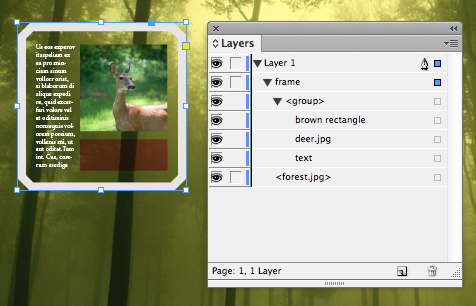
This same technique also works for objects that have been copied and pasted into a frame. So for example, you can hide this group of 3 objects and leave the frame itself showing.

Interestingly, you can’t use the Layers panel to hide a placed photo and not its frame. Regardless of whether you have the frame or its content selected, clicking on the corresponding eye button in the Layers panel hides the entire object. However, you can use the eye buttons to hide objects pasted into a frame.

I’m not sure yet what I’d use this for, but it’s nice to know it’s an option. And I always love learning something that’s been there in InDesign for years, unbeknownst to me.
This article was last modified on December 21, 2021
This article was first published on October 23, 2012
Commenting is easier and faster when you're logged in!

Recommended for you

Changing sizes… mixing scaling and sizing
This is a story about scaling and sizing objects? InDesign CS5 introduced the ab...
Can There Be Too Many Styles? (Yes, There Can)
This is a fictionalized version of my exploration of a recent client’s fil...
60 Minutes…
An answer to the question: How do I create dots for all the minutes on a clock f...