Getting Started with XML in InDesign Part 1
Learn XML’s place in the InDesign workflow.

This article appears in Issue 23 of InDesign Magazine.
Not since DDT was banned more than 30 years ago have three letters caused as much fear and apprehension as the letters “XML” cause in the minds of designers. As I travel around the country promoting my book—A Designer’s Guide to Adobe InDesign and XML—I get the impression that most prefer even the letters “IRS” to XML. You would think things would be different by now; it’s been years since Adobe first incorporated support for XML in InDesign CS. But even as InDesign’s XML features increase and mature, it remains terra incognita for many users. Considering the power and convenience this technology can offer, it’s a shame.
No other application I know of can do as many fun and exciting things with XML right out of the box. In fact, for the vast majority of the projects out there that could benefit from XML all you will need is InDesign, XML, and your basic design skills.
Typical XML Projects
Three types of projects benefit from XML:
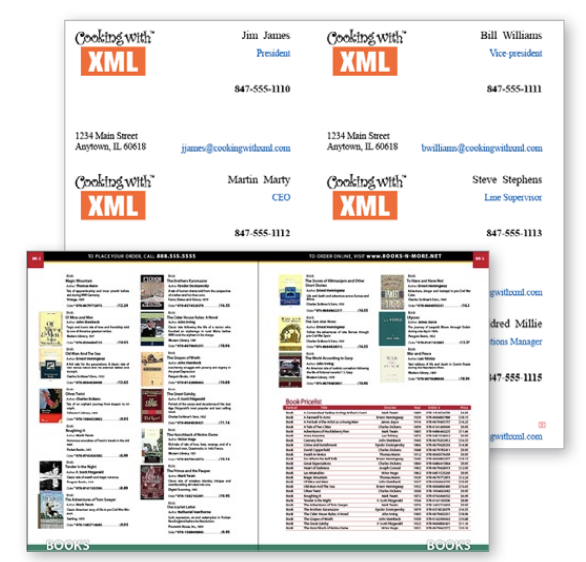
Dynamic Documents. If you are creating projects based on information stored in databases or spreadsheets (Figure 1) (e.g., business cards, catalogs, pricelists, datasheets, and so on), XML is a perfect fit. In this situation, “dynamic” has two meanings. The documents are dynamic because they actually generate themselves: You create a single master XML placeholder and then InDesign clones the structure, design, and formatting for each of the records in the data source. In other words, if your company has 100 employees, you create one business card master and InDesign magically creates the other 99 for you. Dynamic also means that
the data maintains its connection or relationship with your layout. If the original information changes, your InDesign document can be updated, too.
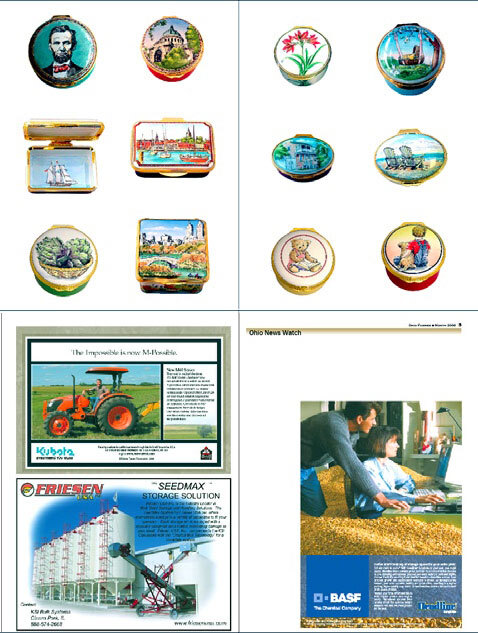
Digital Asset Management. If you regularly print or manage dozens or hundreds of images or text elements within your documents (Figure 2) (e.g., contact sheets, photo galleries, classified or display advertisements, and so on), XML is a perfect fit.
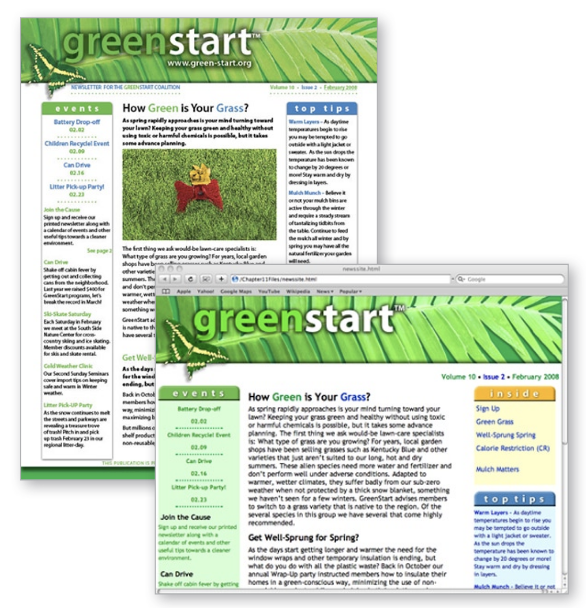
Content Repurposing. If you need to reuse, or repurpose, content in other InDesign layouts or for other media (Figure 3) (e.g., moving print documents to the Web and vise versa), XML is a perfect fit.
This is not to say that XML is for everyone. Some designers may never need it. Others will use XML for a handful of projects from time to time, and a few of you may find that more and more of your workflow ends up using this powerful technology. In any case, there’s no method that’s easier, faster or better than XML for getting data from a database or spreadsheet onto the page.
XML vs. Data Merge
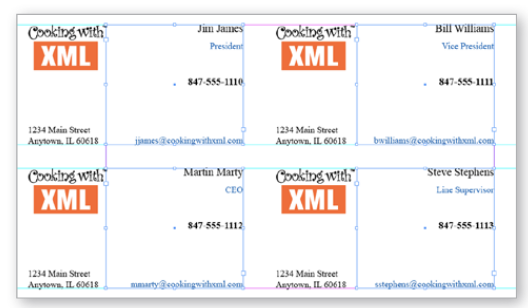
Some people think InDesign’s Data Merge feature is a competitor to InDesign’s XML capabilities. On the surface, Data Merge seems to match XML’s facility at creating data-driven documents (Figure 4), but once you look a little deeper, the similarities evaporate.

There are three basic problems in using Data Merge for anything other than simple projects.
The first issue is in the way the data is structured. Data Merge depends on comma- or tab-delimited text files to transfer information from your spreadsheet or database to your layout. As data is exported, commas or tabs separate the individual data fields, and paragraph returns separate the records. Using regular punctuation to structure the data precludes the use of commas, tabs and paragraph returns within the data. Any punctuation within the fields will actually break the data merge altogether.
Another limitation is that Data Merge produces one unlinked text frame for each record in the data file (Figure 5). This means the resulting document could contain hundreds or thousands of unlinked frames making it burdensome, or impossible, to edit or manipulate. You’re not going to create long multipage text flows with Data Merge.
Finally, the resulting Data Merge document has no relationship with the data file that created it. Essentially, it’s a dead-end street. That means there’s no way to automatically update or reflow the data. For example, if a phone number or address changes you basically have to start from scratch.
An XML workflow has none of these limitations. Punctuation is not an issue because XML data fields can contain almost any type of text as well as punctuation without causing trouble in your workflow. And while Data Merge basically has one way to flow data, XML enables you to work the way you want—allowing you to land data in specific frames or flow it easily across multiple pages. And, most importantly, an XML-structured layout remains connected to the data, letting you reflow or update data in your layout at any time.
The ABCs of XML
No discussion of XML would be complete without an overview of the technology itself. XML stands for Extensible Markup Language. It descends from SGML (Standard Generalized Markup Language), which was developed for the purpose of moving text and data from one application or computer to another while preserving the structure of the content. Markup languages are plain text and non-proprietary; that is, you don’t need special hardware or software to create or edit them.
XML and its close sibling HTML (Hypertext Markup Language) were both developed for the Web, but for different purposes. HTML is a display language. Its purpose is to make text look good on the screen and easier to read in the browser. But HTML has no capability for identifying or structuring data, which is where XML comes in. Its purpose is to tag data so that it can be passed from one application to another without losing its identity and structure. Basically, XML is a plain-text database.
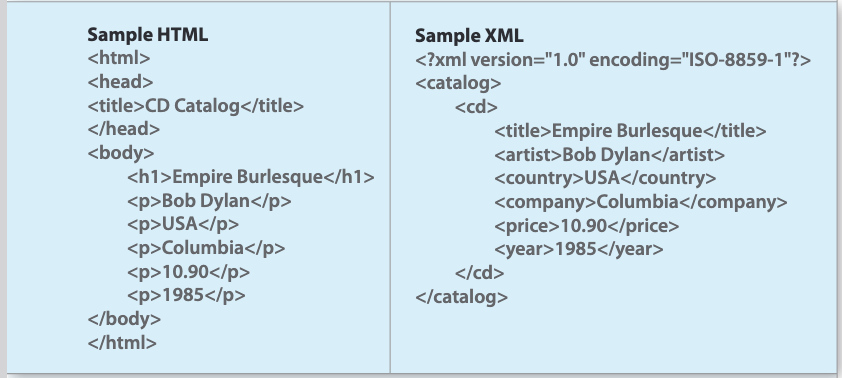
HTML and XML have similarities and differences. In HTML there are approximately 100 code elements (e.g., <body>, <head>, <h1>, <p>, etc), each of which has a specific task or functionality supported by the Web browser. The code only creates structure or formatting to enhance the display of text or graphics on the screen. HTML codes don’t identify the content or provide any hints to what it represents. For example, as human beings we can look at the sample HTML code on the left and guess that “Empire Burlesque” is the title of some kind of creative work and that “Bob Dylan” is the author or performer. But the <h1> and <p> codes don’t specify this information. On the other hand, the XML code on the right immediately and directly tells you that “Empire Burlesque” is the <title> of a <cd> and that “Bob Dylan” is the <artist>.
While you can create your own XML by hand using TextEdit, BBEdit or Notepad, I find it simpler to export XML from a database, such as MS Access (PC) or FileMaker Pro (Mac and PC), or from a spreadsheet, like Excel (PC only). For text-heavy workflows you can use InDesign itself to create XML, or InCopy or MS Word (PC only). To be usable, XML code must conform to simple but very strict construction rules. Unlike HTML, which can contain many flaws and poorly formed elements and still work as a Web page, even the smallest flaw in an XML file will crash your application. The good news is that XML exported from the database and spreadsheet applications mentioned above will automatically conform to the rules. If you want to create XML by hand you’ll have to follow these guidelines yourself:
- All XML must have a root element. The root element appears at the beginning and end of your code and contains all other elements.
- All tags must be closed. Any unclosed tags will break the code. (Even tags that don’t need to be closed in HTML must be closed in XML.)
Correct: <tag>Data goes here.</tag>
Incorrect: <tag>Data goes here. - You can’t start a tag name with “xml”, a number, or punctuation as the first character, except for “_”. Correct: <my-xml>, <A1>, <_tag>
Incorrect: <xml-my>, <1A>, <?tag> - All tags must be properly nested. <tag1><tag2>Data goes here.</tag2></tag1>
- Tag names are case sensitive.
Correct: <tag></tag>, <Tag></Tag>, <TAG></TAG>
Incorrect: <tag> </TAG>, <Tag></tAG>, <TAG> </tag> - Tag names can’t contain spaces.
Correct: <tag-name>Data goes here.</tag-name>
Incorrect: <tag name>Data goes here.</tag name> - Attributes must appear within quotes (” “). <artist type=”singer”>Bob Dylan</artist>
- Whitespace can be preserved. (If you put two spaces in a row, two spaces are displayed.)
- Do not use a tag reserved in HTML (i.e., <h1>, <p>,<table>, etc.) unless you want the text formatted thusly when it’s displayed in a browser.
While most XML applications will warn you, or crash, when the XML is poorly formed, I prefer to check the quality of the code before I get to that point. The best way to do this is to use a dedicated XML editor that checks your code to make sure it conforms to the rules as you write it. Two programs I can recommend are Altova XMLSpy (PC only) and SyncRo Soft <oXygen/> (Mac and PC).
To learn more about XML and other Web-based technologies, check out www.w3schools.com.
If Only We’d Had XML
To demonstrate some of the capabilities of an XML workflow, let’s see how it can be used to quickly
and easily create versions of a training workbook in multiple languages.
A few years ago, my company created a series of training workbooks for a corporation with facilities in the US, Canada, Mexico, and Puerto Rico. The workbooks included text, graphics, and standard forms and were printed in English, Spanish and French.
The production scheme was simple. We first created an English version of the workbook. Then, we exported the text of each booklet to an RTF file and sent it off to the translators. When the translation came back, we copied the passages one by one and pasted them into the proper text frames.
While we completed the Spanish and French versions in less time than the original English version required, copying and pasting foreign words and phrases line after line was extremely tedious and susceptible to human error.
Today, we could produce this training series using an XML workflow in a fraction of the time and cost, while reducing or even eliminating the possibility of human error during production. In the rest of this article, we’ll look at how to do that.
The steps for creating multiple-language versions of the workbook are straightforward. First, you complete a master English version of the workbook. Then you add an XML structure to the document. Then you export the content to XML and send it out for translation.
Complete the Master Workbook
You can download sample files for the following tutorial by clicking on this link.
1. Open Participant Guide 1.indd.
2. Select Window > Tags.
3. Select View > Structure > Show Structure to open the Structure pane. You can also open the Structure pane by clicking the double-headed arrow at the lower left corner of the InDesign interface (Figure 6).

4. Select View > Structure > Show Tag Markers.
5. Select View > Structure > Show Tagged Frames.
6. Observe the completed layout (Figure 7).
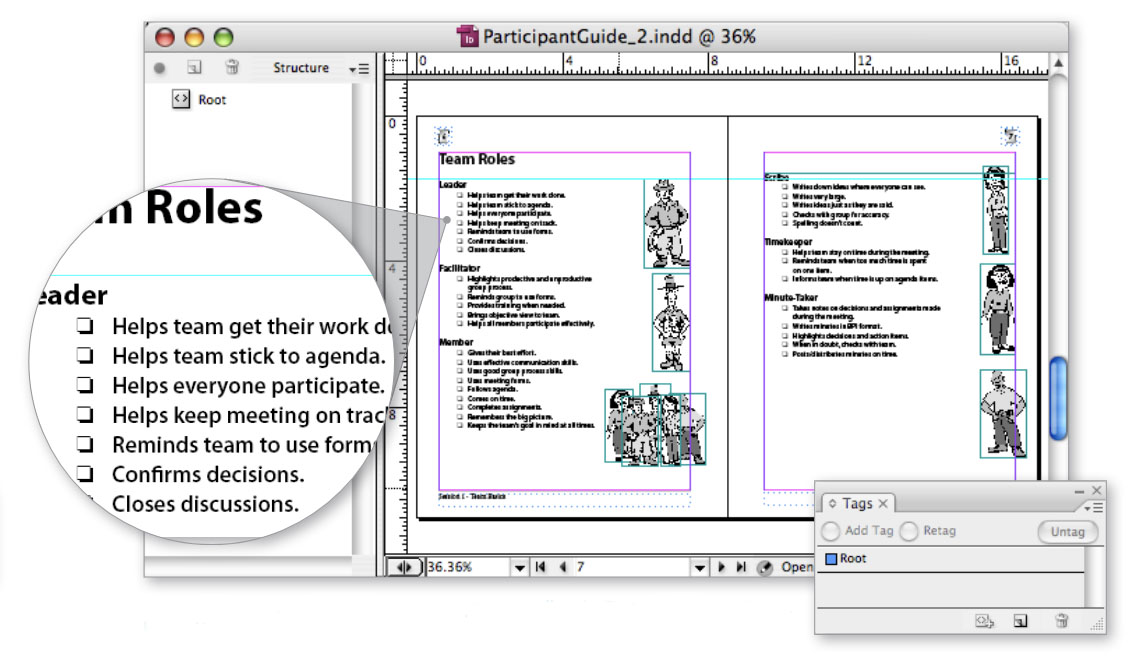
The 8-page English workbook is a normal InDesign document with no XML structure whatsoever. Before you can export to XML, you first have to apply tags to the text and frames within the layout.
Add XML Structure
It’s time to apply XML tags to all the text and graphics, while at the same time preserving the existing design and formatting. This can be a potential problem if you’re not careful. Remember, XML doesn’t have any design features of its own; you have to rely on InDesign to do this part. You can trick InDesign into doing this by creating XML tags for each of the Paragraph and Character styles you want to preserve in the final workbook.
7. Select New Tag from the Tag panel menu.
8. Name the new tag Form-fill (Figure 8) and click OK. Now repeat, creating the following tags:
- Formula-text
- Level-1
- Level-1-break
- Level-1-numbers
- Level-1-numbers-break
- Level-2
- Level-2-break

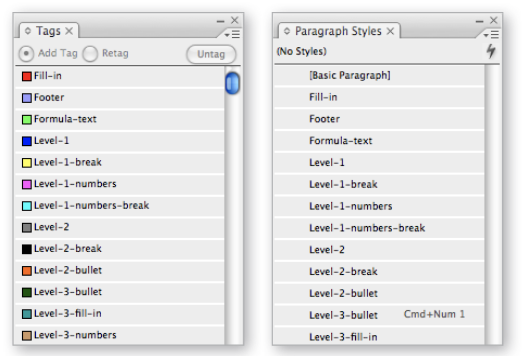
9. Getting tired of making tags? There’s another way to create tags, too: Choose Load Tags from the Tags panel menu and choose the ParticipantGuideTags.xml file. When you click OK, all the required tags will appear in the panel, including Level-2-bullet, Level-3-bullet, Level-3-fill-in, Level-3-number, Subtitle, Title, and Topic-Heading.
10. Note how most of the tags now match the names of the paragraph styles exactly. But there’s a small problem: Some of the styles have spaces in their names. As described in the sidebar “The ABCs of XML,” spaces are not allowed in XML tag names. While you don’t have to rename the paragraph styles, doing so will speed up your XML workflow. In future XML-bound workflows, just remember to create paragraph and character styles that are XML-compatible as you go.
For now, let’s rename the “Formula text”, “Level 1”, and “Level 1 break” paragraph styles to use dashes instead of spaces (Figure 9).
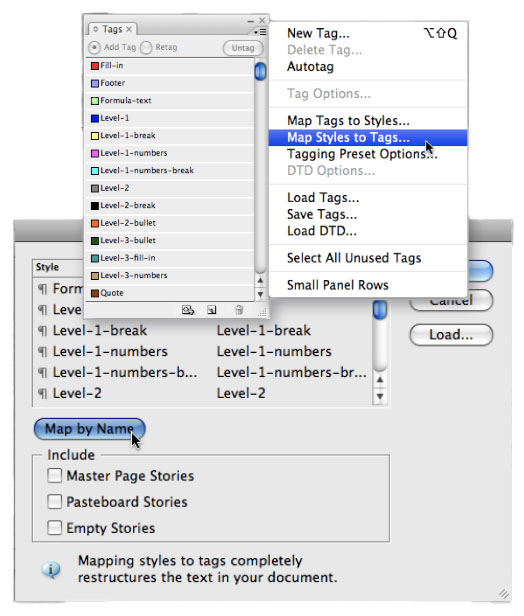
11. You’re ready to apply the XML structure. Select Map Styles to Tags from the Tags panel menu. Click Map by Name. The dialog will automatically pair up the styles with their matching tag names (Figure 10). Click OK.
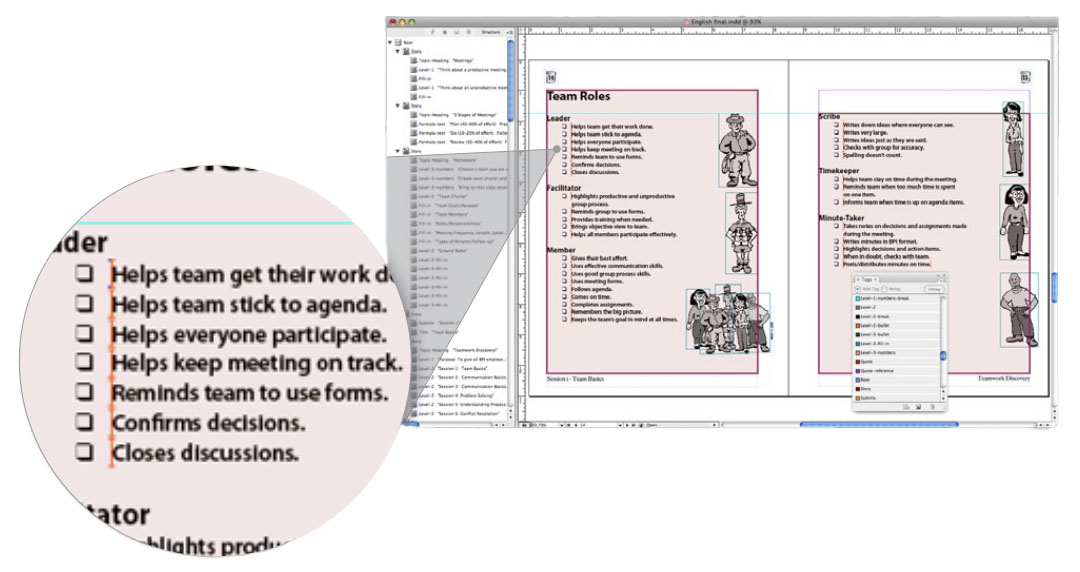
The pages and frames now display the tag markers and color indicating the newly created XML structure (Figure 11). Look carefully how text formatted with Paragraph styles has been automatically tagged with XML structure. However, one thing that may slip your notice is how text that is unstyled—or using a Paragraph style without a matching XML tag—is not tagged! Untagged text and graphics are not a problem in and of themselves. If they reside in their own untagged frames, they are not exported in the XML file. This is fine for items like headers and footers. But if untagged text resides within a frame that is tagged (or contains any tagged content), then the untagged text will be exported in the XML along with the structured content. You can be sure that these stowaways may cause all sort of mischief in your workflow when you try to reimport or reuse them later. To prevent this from happening, always format your text with Paragraph styles; create XML tags for all the styles you want to export in the XML and keep unstyled, untagged text in standalone frames.
Exporting Content to XML
Once you’ve tagged all the text you want exported, it’s time to pull it out of your InDesign document and into an XML file on your hard drive.
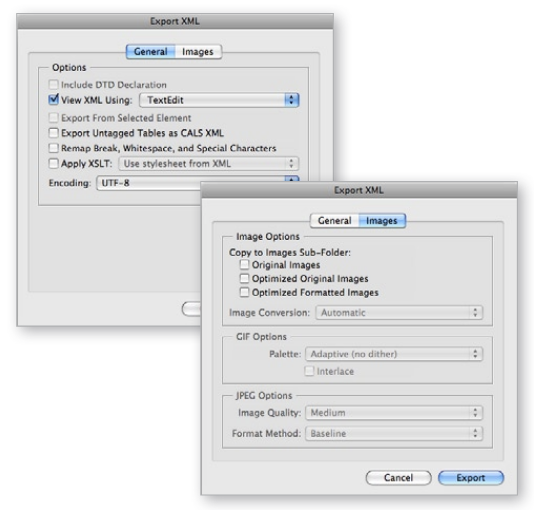
12. Select File > Export or press Cmd-E/Ctrl-E. Name the file English.xml. Click Save. Select the options in Figure 12 and click Export.
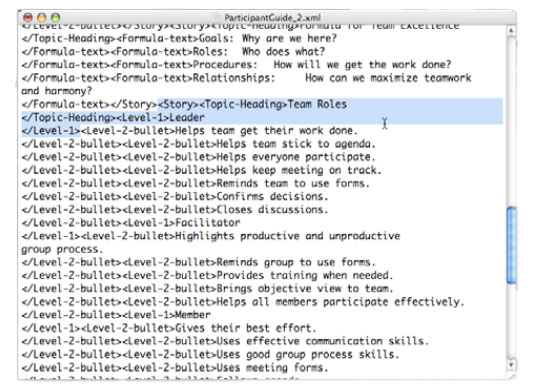
That’s it. The English.xml file is ready to be sent off to the translators (Figure 13).
In the next issue, Part 2 of this article will show you how to edit the XML file and then re-import it properly into InDesign to create the Spanish and French versions of the workbook.
Commenting is easier and faster when you're logged in!
Recommended for you

Formatting Text With XML in InDesign
by Andrej Balaz The first time I learned about the XML workflow in InDesign was...

Converting Nested Styles into Local Character Styles
Need to convert nested style formatting into "real" character style formatting?...

Getting Started with XML in InDesign Part 2
Learn how to complete an XML workflow circle and follow along with the downloada...


