
Recently, I worked on a project where I had to bring XML data into InDesign. Prior to this, I had heard about XML but never worked with it, so this project was a big challenge to me. I learned a lot along the way and thought it would be helpful to others if I shared the details of my experience.
XML Basics
Like HTML, XML is also a markup language for describing data. XML stands for eXtensible Markup Language. “Extensible” means that it allows users to define their own tags, unlike in HTML where you’re limited to using the predefined tags. All the other rules which apply to HTML tags also apply to XML as well. For example, a tag must begin with < and ends with >. A beginning <tag> should have an ending </tag>. For example:
<tagname>Some text</tagname>
The Project Template and Data
For my project, here’s what the template and XML looked like.

Sample Template PDF
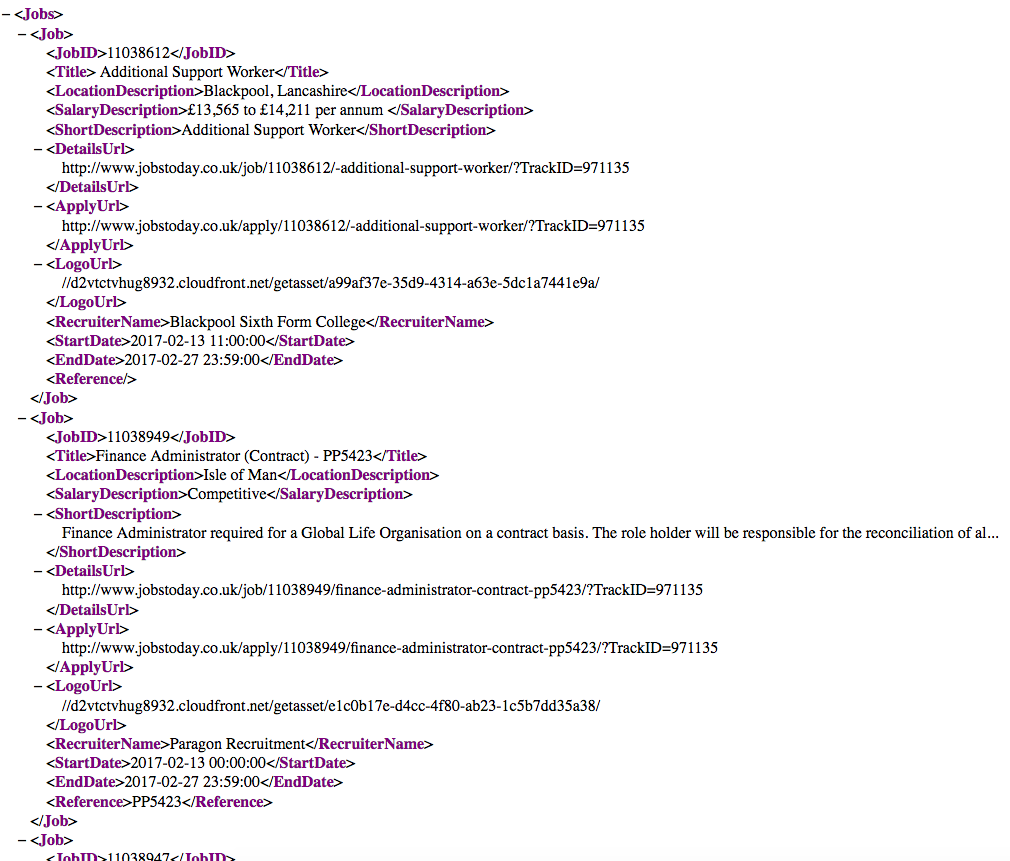
Sample XML Data
So the first big question is… how can this data be imported to InDesign? For starters, the XML and template don’t match. There are only 4 columns in the template with a Category head, but there are 12 tags in each record in the XML file without a Category.
XML Process
Here’s what I came up with for a process:
1. Create a new document, and design the layout as per your requirements.
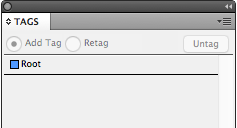
2. Now open the Tags Panel from the Window > Utilities > Tags menu.
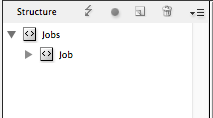
3. Also, open the Structure Pane from the View > Structure > Show Structure menu.

4. In the Tags Panel and Structure pane, you’ll see the default Root Tag. Every document must have a single root tag that will encompass all the other tags and data. A root tag doesn’t have to be called ‘Root’. It can have any name. In my example, I have a root tag called Jobs.
5. In the new InDesign document, import the XML either from the File menu or the fly-out menu of the Structure pane. You’ll see an Import XML dialog box, something like this:

6. Select the XML file you want to import and click on Show XML Import Options and Merge Content and click Open. When you click Open, you’ll be greeted with another dialog box full of options. Deselect all of them for now. We’ll deal with them later. Click OK.

7. The XML gets imported in the document but it still resides only in the Structure pane. All the tags used in the XML are now visible in the Tags panel.

8. In the Structure pane, you’ll see a Jobs tag instead of the root tag, with a gray triangle before it.

9. The triangle indicates that the Jobs tag contains child tags (with or without data). When you twirl open the Jobs tag, it will show its content. In the example below, you’ll see that the main tag contains child tags as well.
Tip: To expand all the tags including child tags, Alt+click/Option+click on the gray triangle.

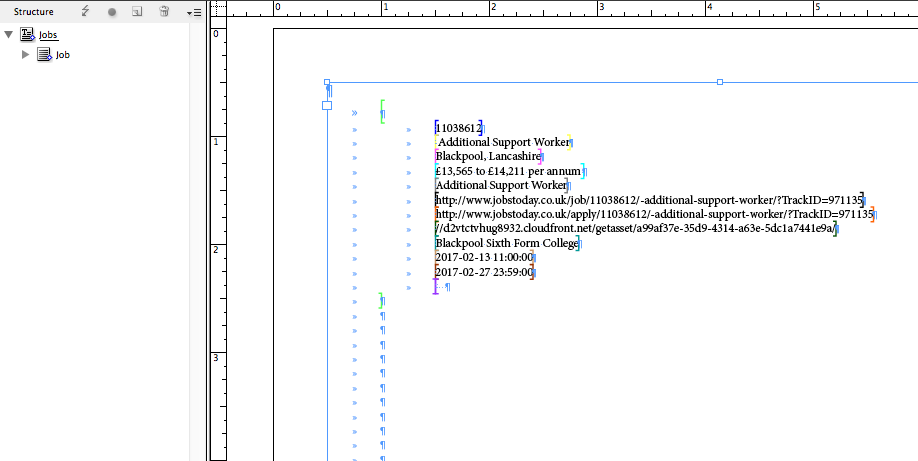
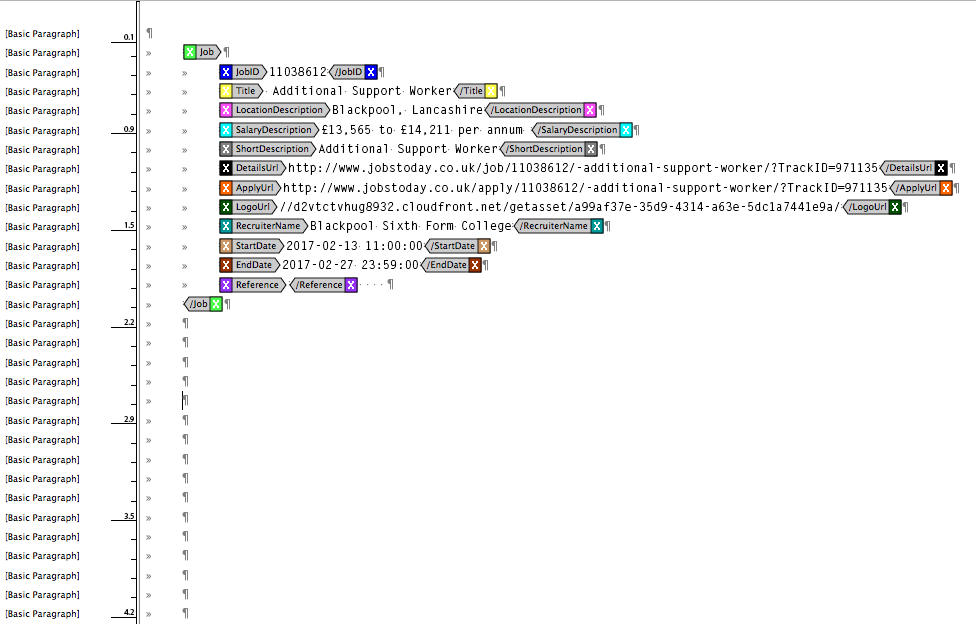
10. When you expand the <Job> child tag, you’ll see one full record containing subtags. The tag icon with horizontal lines means that the tag contains text.

11. To check, let’s select and drag the <LocationDescription> tag in our Document.

12. In the above example, you’ll see that the text is now imported to our InDesign document. And the tag icon changes in the Structure pane. The icon now looks like a paragraph with a Drop Cap ‘T’. Which means that this tag is now in use. Secondly, the tag name <LocationDescription> is underlined, which means that the tag content is currently selected.
13. You can verify the content in the XML file. Go to the first record in the XML file and then look for <LocationDescription> tag, you’ll find the text “Blackpool, Lancashire“.

14. This drag & drop method gives us the flexibility of importing particular text from XML to InDesign. Similarly, to see the entire content of a record, simply drag & drop the child tag to your Document.

15. If you look at the same text in Story Editor, you’ll see the tags as well. In fact, using Story Editor is a best practice when you’re working on data with tags since it helps you to rearrange the tagged content in the layout without messing up with the tags.

16. The data looks okay but it is not in the format we’re looking for. There are line breaks, spaces, tabs etc, which need to be cleaned-up at the time of importing the XML. Let’s clean this up by removing the unwanted text and/or spaces.
17. If you look back at the template, you’ll notice that we need only four tags to be imported: Job ID, Recruiter, Job Type and Salary. The tags in the XML that we’re going to use are <JobID>, <RecruiterName>, <Title> and <SalaryDescription>. We also need to rearrange these by moving the <RecuiterName> after the <JobID>.
18. Let’s go back to the step where we imported the XML in a new InDesign document with all the XML Import Options turned-off.

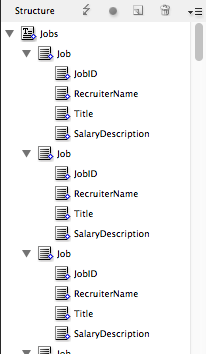
19. Now delete all the tags from second tag onwards. Select the second tag <Job> and then scroll to the bottom until you see the last tag, then shift-click the last tag <Job>. Once you have the selection, click on the Trash icon on the top-right of the Structure Pane.

20. This will now leave you with only one Tag / Record within the root tag.
21. Now select the <Jobs> (root) tag and drag and drop it into the layout. You can verify which element you have selected in the layout by the underline under the <Jobs> (root) tag in the Structure pane. Also, notice that the text is more messed up here compared to the one we dragged previously.
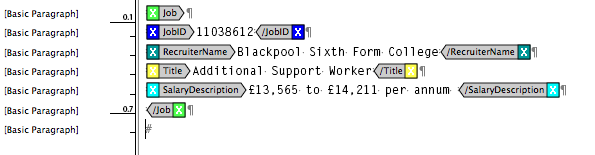
22. Open the text in Story Editor for clean up. Pay special attention to tags. Remove all the extra carriage returns, tabs, and spaces. Also, remove all the unwanted tags and move the <RecruiterName> tag before the <Title> tag.
23. After the cleanup, it will look like this, but it still needs some work.
24. Since the output is needed in a tabulated form, therefore, we’ll replace the returns with tabs. <Job> and </Job> tag is the starting and ending tag of each record.
25. In between these tags resides one full record starting from <JobID> and ending with </SalaryDescription>. Also, notice the return symbol (hard return) after the </SalaryDescription> tag, which tells XML that a hard return is required after each record. Without this return, all the text will come in one single paragraph. The final look will be like this:

26. Now format the text to give it a nice clean look. Formatting can also be done after importing the complete data set, but I prefer to do it first. Format the text as desired. I have applied some minimal formatting here.

27. Once our basic template or text frame is ready to hold data, we’ll now import the XML once again to fetch the complete data. Select Import XML from the File menu or fly-out menu of the Structure pane. You’ll see the Import XML dialog box. Select the XML file you want to import and check Show XML Import Options and Merge Content and click Open.
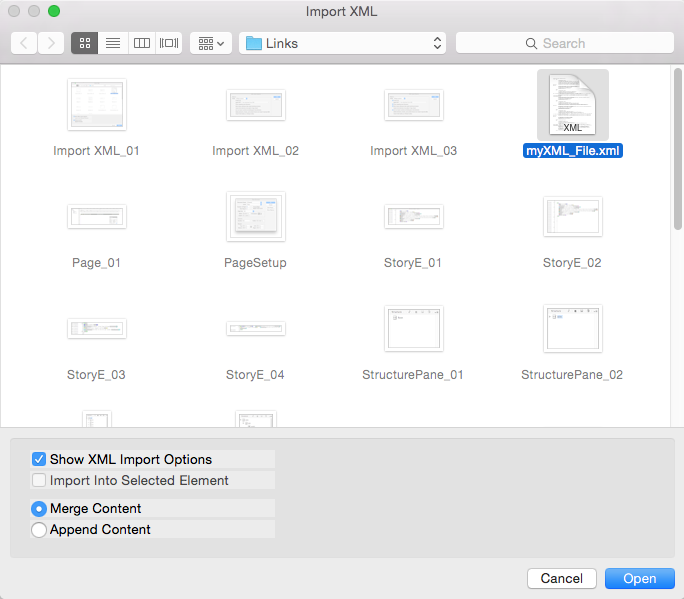
28. You’ll be prompted again with another dialog box full of options. This time we’ll select some of the options, as shown in the image (described below). Click OK button to import the XML.

Create Link — This option will create a link, which will allow us to update the text without re-importing if any changes are made to the original XML file. This is similar to an image link.
Clone repeating text elements — In our template, we formatted only one record and applied tags to it. This Clone option will clone/duplicate this one instance to all the records in the XML file.
Only import elements that match existing structure — We have used only 4 tags in our template but there are 12 tags in the XML file. This option will ignore all the unused tag(s).
Do not import contents of whitespace-only elements — In the beginning, when we imported a record, we saw that it also bought the spaces, tabs, and returns along with the text. This option will ignore all those extra spaces and import the text only in the desired layout.
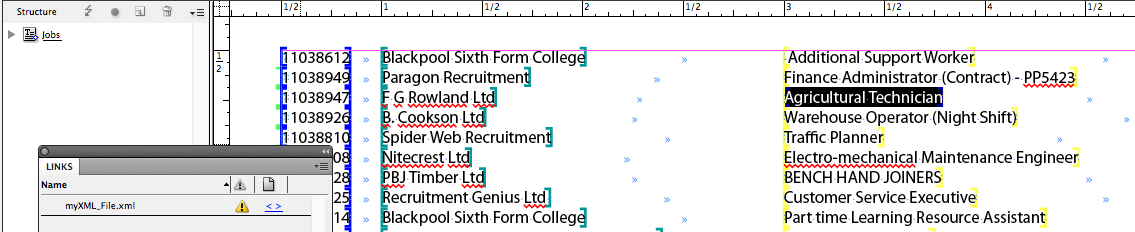
29. All the desired data gets imported into the document and is formatted.
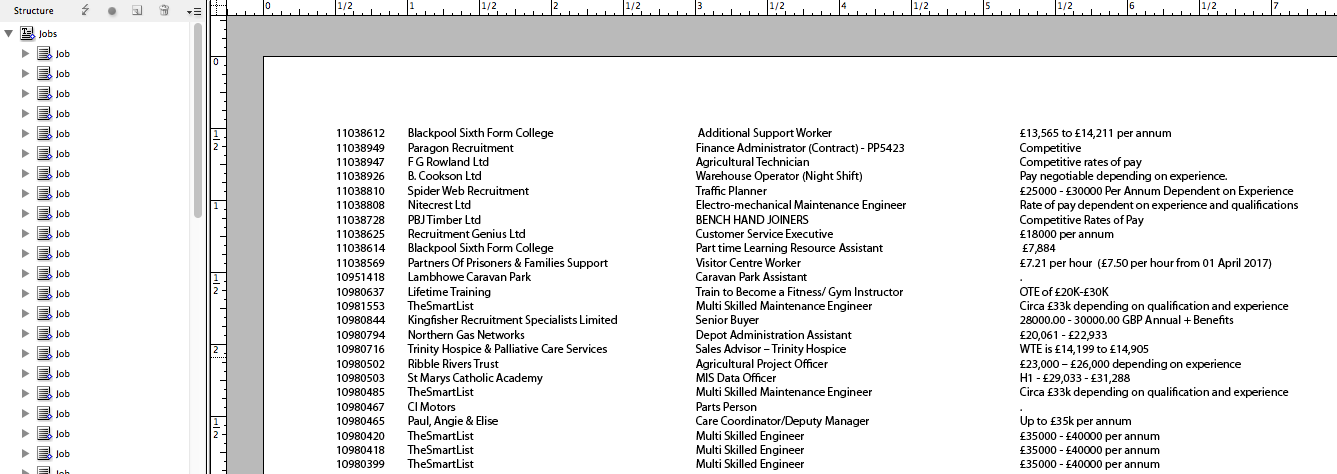
30. If you open and look at the tags in the Structure Pane, you’ll see that every record now contains only 4 tags instead of 12 tags in each child tag.
31. If you look at the Links panel, you’ll see the name of the XML file, which means that any changes made to the XML file can be updated instantly in the InDesign file, without re-importing.

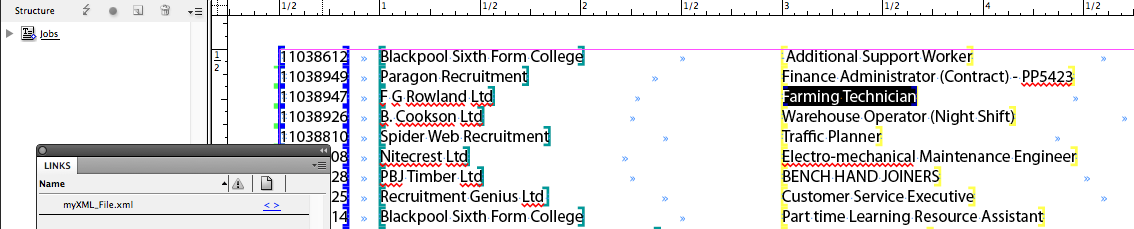
32. Let’s try this by making a small change to the XML file. XML can be edited in any text editor. I have used Adobe ExtendScript Toolkit here. In the third record, (line three of the InDesign file), I have changed the title from “Agricultural Technician“, to “Farming Technician“.

33. As soon, I save the XML file, the Links Panel will show that the file has been modified.
34. After updating the XML file (link), the text gets updated in the InDesign Document.
Off to a Good Start
Since I’m still a novice in XML, this is just a basic workflow but it was good enough to get the job done. I didn’t attempt to use features like XSLT (which is beyond my expertise) to transform the data. If you have any thoughts or advice on how to improve this workflow, please share them in the comments.
This article was last modified on July 20, 2021
This article was first published on July 3, 2017
Commenting is easier and faster when you're logged in!

Recommended for you

Converting Nested Styles into Local Character Styles
Need to convert nested style formatting into "real" character style formatting?...

This Week in InDesign Articles, Number 126
There is more in the InDesign universe that is dreamt of in your philosophy, my...
Formatting Text With XML in InDesign
by Andrej Balaz The first time I learned about the XML workflow in InDesign was...