

This InDesign tip was originally sent to the CreativePro InDesign Tip of the Week email subscribers.
Sign up now and every week you’ll get a new tip, keyboard shortcut, and roundups of new articles, plus exclusive deals sent right to your Inbox! Just scroll down to the bottom of this page and click the subscribe button. We’ll take care of the rest.
Ever wonder why InDesign has two sets of shape tools for making rectangles, circles, and polygons? One set is for creating empty frames. They have the word “frame” in their names: Rectangle Frame Tool, Ellipse Frame Tool, Polygon Frame Tool. And they create the shapes with a big X inside them. These shapes will always start out with no stroke and no fill.

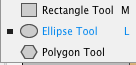
The other set of tools allows you to define formatting, so every new shape you draw can have a certain stroke, fill, corners, or effects automatically. These are the Rectangle Tool, Ellipse Tool, and Polygon Tool.
To set formatting for these tools, select one of them, deselect everything in your document, and then set the formatting you want in the Control panel, Swatches panel, etc. To make these shapes go back to using default formatting, deselect everything in your document, select the tool, and press D (for default).
This article was last modified on March 4, 2023
This article was first published on December 11, 2018
Commenting is easier and faster when you're logged in!

Recommended for you

Tip of the Week: File Instant Bug Reports & Feature Requests With Quick Apply
This InDesign tip on how to file instant bug reports and feature requests w...

CreativePro Tip of the Week: Increasing the Photoshop Canvas Size with the Crop Tool
This CreativePro Tip of the Week on Increasing the Photoshop Canvas Size with th...
Tip of the Week: Edit Original
This tip was sent to Tip of the Week email subscribers on April 30, 2015. Sign u...