

Previous CreativePro.com articles have showed you how to fill type with artwork using InDesign and QuarkXPress and get results like this:

But sometimes you want (or need) to create something similar in Photoshop. Here’s how to do so quickly and easily.
Step 1
Open a landscape photo with definite color. Avoid something with too much of one solid color in one area, or with the same color as the background of the page you’ll eventually be placing the word on. The image below (© iStockphoto.com / KONRADLEW) is a good candidate for this technique.

Step 2
Select Photoshop’s Text tool and click somewhere in the photo. This will create a new text layer. Type in the text you want the image to show through. If necessary, change the font size to something larger by either selecting the text and changing the size on the Options palette, or by clicking-and-dragging a corner of the text with the Move tool. (Make sure Show Transform Controls is selected up in the Options palette). For manual resizing, hold Shift to maintain proportion, and press Enter to apply changes.

Step 3
Change the typeface to a strong, thick font. I chose Impact.

Step 4
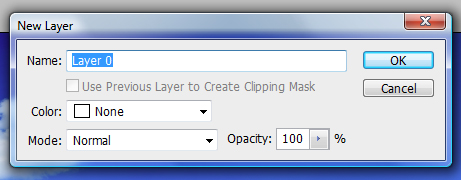
Next, double-click the Background layer to convert it to a normal layer. Name it something — I’ve called mine Layer 0 — and press OK.
Step 5
In the Layers palette, click-and-drag Layer 0 above the text layer.

Step 6
Carefully hover your cursor in between the two layers in the Layers palette and press Option (PC: Alt). The cursor should turn into a different icon, with two circles. Click once.
Your text should now contain the pixels of the photo, but the shape of the text.

Step 7
Select the Move tool and click-and-drag the text layer around the canvas. This lets you place the text so that the best part of the photo shows through.

Step 8
If you save the file as a JPEG, Photoshop adds a white background. To preserve the transparency, save the file as a transparent GIF. To preview what a background will look like with the text, click Add New Layer on the Layers palette, and click-and-drag the new layer to the bottom. Then, click the Foreground color and select a color for the background, such as white. Press Option-Delete (PC: Alt-Backspace) to fill that layer with the color.

Step 9
Let’s try something slightly different example. For this example, I’ve used an image by David Freund, © iStockphoto.com.

Step 10
Now you’ll add three text layers separately. Select Photoshop’s Text tool, click in the photo, and enter the word “Ocean.” Resize the text as desired.
Option-Click (PC: Alt-Click) to duplicate the text and then select the Text tool to change the text to “Surf”. Option/Alt-Click again to change the text to “Sea”. Position the words as you see below, then select all the text layers in the Layers palette and go to Layer > Merge Layers (or press Cmd-E (PC: Ctrl-E).

Step 11
Double-click the photo layer to make it a normal layer. Click-and-drag the merged text layer below the photo layer. Option-Click (Alt-Click) with the cursor in between the two layers. Add a white layer as you see below, or keep the background transparent.

Step 12
You can also add text with a clipping mask to part of a design, as in the example below by Henk Badenhorst (© iStockphoto.com).
Create the clipping mask the same way you did for the first two examples, but also duplicate the photo layer by pressing Cmd-J (PC: Ctrl-J) after selecting it in the Layers palette. Then, drag that new copy of the photo layer to the background, and select the area for the text to show by clicking-and-dragging around that area with the Marquee Selection tool. Finally, press Delete (PC: Backspace) to delete those pixels. You may want to drag a guide from the top ruler to see where the selection should be while temporarily turning the visibility of the copied photo layer off to see where the text begins.

Step 13
Just another example to spark your own creativity, this time using an image by Josef Volavka (© iStockphoto.com).

Chad Neuman is an internationally published freelance magazine writer, graphic designer, photographer, and educator from Florida. Subscribers to his mailing list receive very occasional updates and free vector art/graphics. Subscribe through his Web site at www.chadneuman.com.
This article was last modified on January 5, 2023
This article was first published on March 11, 2009
Commenting is easier and faster when you're logged in!

Recommended for you

Integrating 3D Text into Images with Photoshop
This is a technique you’ll have seen in countless films and TV shows, from...
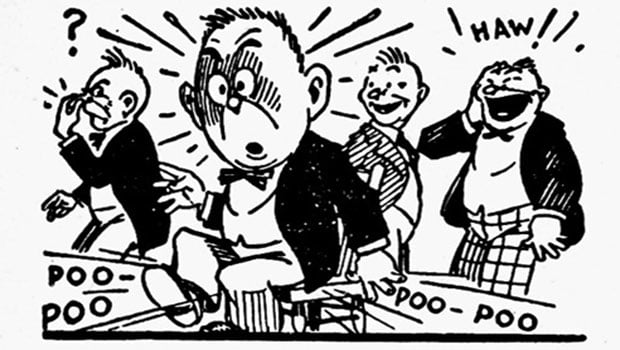
Scanning Around with Gene: The Joke's on You
Before Hollywood brats got “Punk’d,” and before political oppo...

How to Fill Text with Images in Photoshop
The next time you need to place an image inside text in Photoshop, try one of th...