

I was recently given a brief by a client to apply Data Merge to a logo that featured five unique colors (to reflect the colors of horses): white, grey, chestnut, brown, and black.  The customer was settled on those colors but they weren’t sure what order they should be in, and wanted to see every option. The number of permutations of different color sequences for this logo is five factorial (5×4×3×2), or 120. So how could I show all 120 permutations without making 120 versions of the logo one by one? With Data Merge of course! The trick is to make each horse a picture frame that will house a variable picture that contains only a solid color. The logo is in an InDesign file with the type on one layer, and each horse on another layer.
  I also have five separate PDFs containing nothing but the colors the horses need to be. Note that the files are named A.pdf through to E.pdf – this will be important later.
 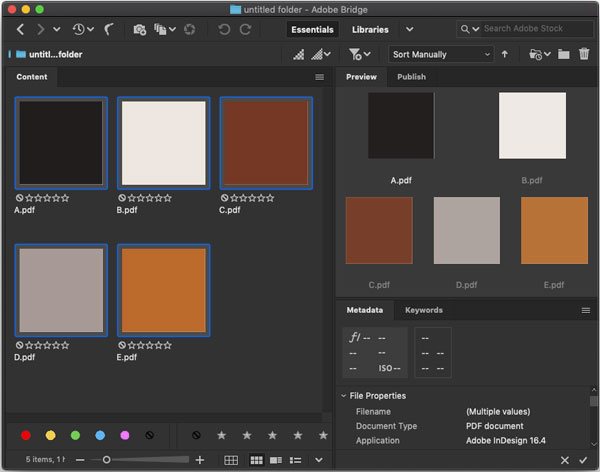 The difficulty comes from getting the data, as all 120 permutations have to be entered correctly with no duplicates and no colors being used more than once in each logo. To enter in these permutations I used the combination calculator. Once on the website, I entered my total number of objects as 5, and my sample size as 5.
 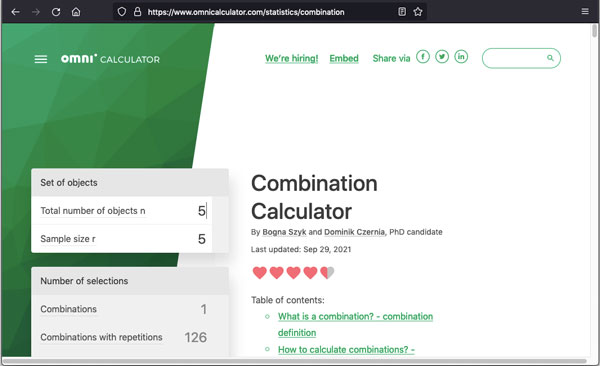 It shows that there 126 combinations with repetitions, but to see the permutations, I clicked on the advanced mode button
  I was only
interested in permutations, so I selected that from the Combinations dropdown menu.  That gave me all the permutations I needed for data for the data merge… once I had formatted them properly.
  To do that, I copied them from the website and pasted them into a new InDesign document. Then I ran the following replacement operation in the GREP tab of Find/Change: Find What
 [A-E] Change To $0.pdf 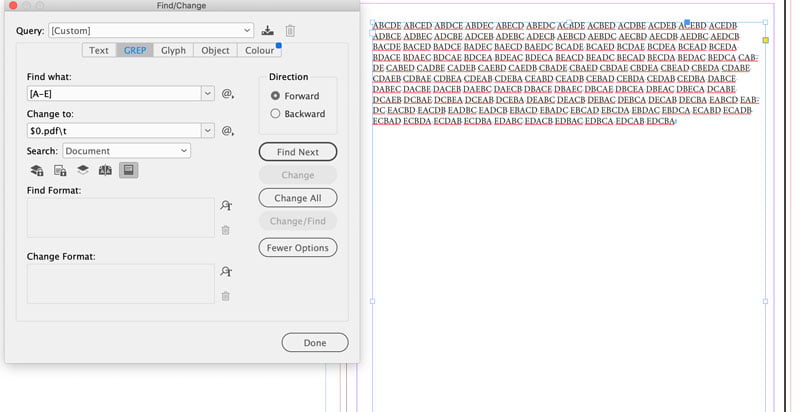 The expression finds the letters A-E and replaces each one with the same letter
 $0 plus a file suffix .pdf and a tab . That changed the permutations into tab-separated filenames. Next, I had to place them in their own rows. 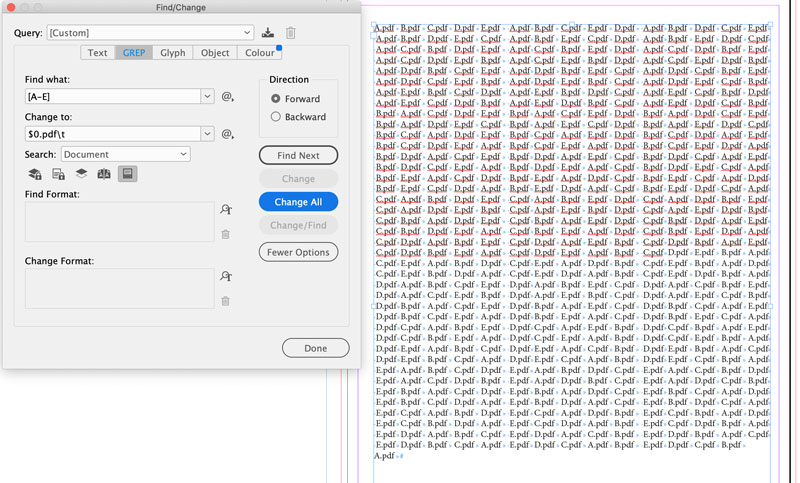 Back in GREP Find/Change I entered Find What:
 (tab followed by any white space) Change to: \r (End of paragraph). 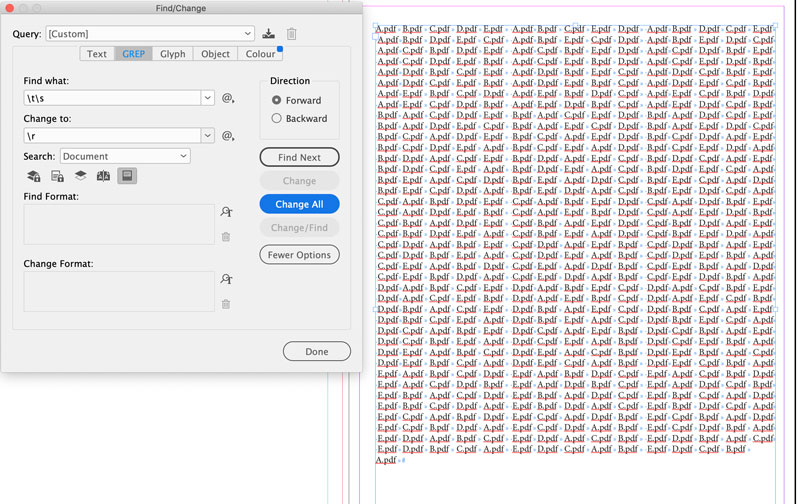 That put the permutations (formatted as my image file names) into their own rows.
  Next, to make it work with Data Merge, I added a line to the top containing the image names, and removed the very last tab in the text.
  Then I exported it as Text Only, making sure to choose UTF16 as the Encoding and Macintosh as my Platform (choose PC if you’re using Windows).
  With my data in hand, I returned to my InDesign file containing the logo and imported the data via the Data Merge panel.
  I then applied the fields to each image and in the Content Placement options, I chose Fitting: Fit Images Proportionally.
 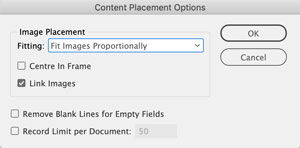 I could then click the Preview checkbox in the Data Merge panel and cycle through all 120 permutations!
  As the final step, I exported the document and sent it to the client so they could compare all 120 options and choose the winner. While this technique was used to demonstrate versions of a logo, it can also be used for variable data campaigns that cycle through combinations of colors for backgrounds, logos, etc… and of course, you’re not limited to five factors. Also note that this is not the only technique for changing colors applied to vector objects in a Data Merge. I’ve written several other articles here at CreativePro describing how to change colors during a data merge in InDesign, including this one.
Commenting is easier and faster when you're logged in!

Recommended for you

Creating Charts and Graphs Automagically with Data Merge and Chartwell
Charts are among the hardest visual effects to create well in InDesign. Most peo...

InReview: MyDataMerge
Well-thought-out app picks up where InDesign’s DataMerge features leave off.

InDesign How-To: Automate This with Data Merge!
This 2006 article is taken from InDesign Magazine,” Issue 11. Clients have...