
Essential Tips for Working with Photoshop Masks
These quick tips will come in handy whenever you need to hide content on a layer in Photoshop.


This article appears in Issue 27 of CreativePro Magazine.
You can apply masks to layers in Photoshop documents to reveal content underneath. Layer masks (which you create with painting or selection tools) can have soft edges. Vector masks (which you create with the Pen and shape tools) have sharp edges. Here are some essential tips to remember when working with masks in Photoshop.
1. Add Masks Quickly
You can add a layer mask to a targeted layer by clicking the Add mask button at the bottom of the Layers panel.
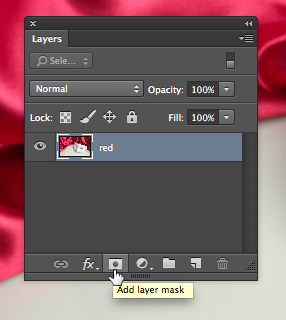
Hold Command/Ctrl when you click the button to add a vector mask.

To create a layer mask that hides the entire layer, hold Option/Alt while clicking the Add layer mask button.
2. Convert Selections to Masks
To make a layer mask from a selection, simply click the Add layer mask button with the selection active.


To make a layer mask from the inverse of a selection, hold Option/Alt while you click the Add layer mask button. To make a selection from a mask, hold Command/Ctrl while clicking on the mask thumbnail.
3. Add a Mask to Your Background Layer
You don’t need to convert the Background layer to a regular layer before masking it. Just clicking the Add mask button will convert the Background layer to Layer 0 and enable the mask.
4. Adjust Masks the Right Way
You can use the Properties panel to select and adjust masks in several ways, including their opacity and edges.

5. Adjust Mask Opacity
To adjust the opacity of mask and (and
thus the opacity of the masked content) drag the Density slider. Hover your cursor over the word Density and hold Option/Alt as you drag to make the slider go slower and have a finer degree of control.
6. Quick-Disable Masks
Click the eye button at the bottom of the Properties panel or Shift+click a mask thumbnail to enable or disable a mask.
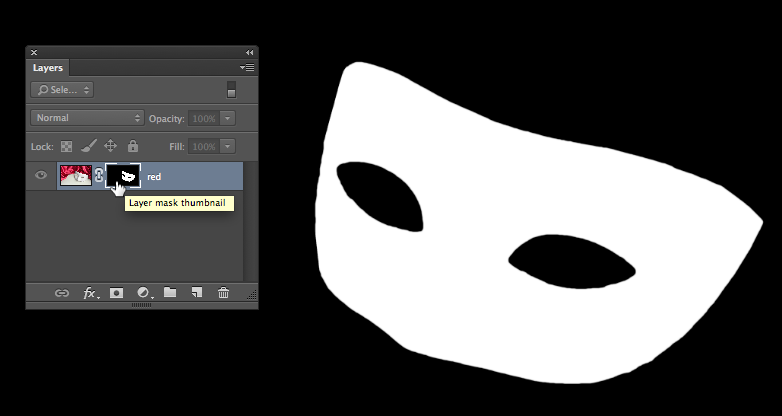
7. View Your Masks
Hold Option/Alt while clicking on a layer mask thumbnail to toggle between viewing the entire image or just the mask.
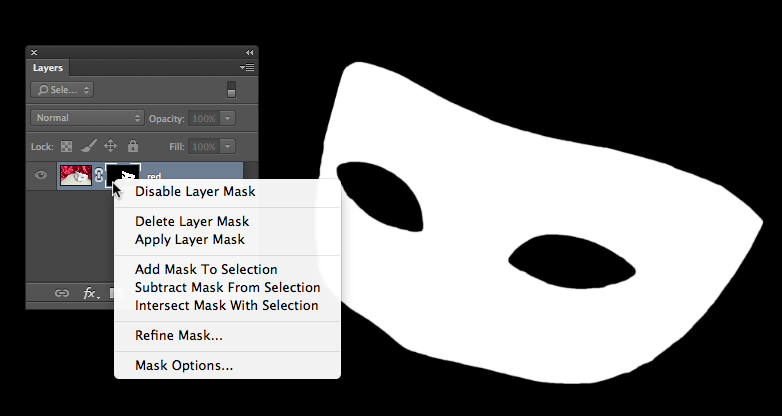
8. Use the Mask Context Menu
Right-click on a mask thumbnail in the Layers panel to access a menu where you can enable/disable the mask, apply it, delete it, and more.
9. Move and Copy Your Masks
To move a mask to a different layer, just drag its thumbnail in the Layers panel.


To copy the mask instead of moving it, hold Option/Alt as you drag.

10. Moving Masks or Layers Independently
By default a mask is linked to the content of the layer it’s applied to, so they will move together. If you want to be able to move either independently, click the chain icon between the layer and mask thumbnails in the Layers panel. Click in that area again to re-establish the link.

11. Convert Vector to Pixel Masks
To convert a vector mask to a layer mask, right click on the vector mask thumbnail and choose Rasterize Vector Mask.

12. Use Other Layers as Masks
You can use the content of a layer to mask layers above it by creating a clipping mask. Hold Option/Alt while clicking the line dividing the layers in the Layers panel.


Bonus Troubleshooting Tip: Get Out of QuickMask!
If you try to click on a layer mask thumbnail and nothing happens (you can’t select the layer mask) try pressing Q to exit QuickMask mode. You can also tell if you’re in QuickMask mode by checking the button at the bottom of the toolbar and by the presence of an alpha channel in the Channels panel.

Commenting is easier and faster when you're logged in!

Recommended for you

Modeling a 3D Bracelet with Photoshop
Photoshop’s 3D modelling environment has matured to the stage that with CS6 Exte...

Halloween Photoshop Techniques
Looking to whip up some quick Halloween fun in Photoshop? Over at the lynda...

Turn Your Mobile Phone into a Microscope With the Micro Phone Lens
Got a smartphone or tablet? Like macro photography? Then you might want to check...