


Adobe’s software is well-known to creative pros — there’s Photoshop, Illustrator, InDesign, InCopy… Wait, a minute, InCopy? If you’re one of the many people who don’t know much about InCopy, you’re cheating yourself. Combined with InDesign, InCopy can put the burdens of entering editorial corrections and copyfitting right back where they belong: on the editors.
To get a firsthand feel for how InCopy could help you, follow along as I show it to you in action in the offices of Chicago Wilderness magazine. For much more on InCopy (including a handy section on convincing editorial and management that it’s worth buying), see my feature story in the December 2005 | January 2006 issue of InDesign Magazine, available for download on December 12.
Getting Started in InDesign CS2
The art department for Chicago Wilderness magazine, which uses InDesign, is almost done with the four spreads from a feature called “Into the Wild” (Figure 1).
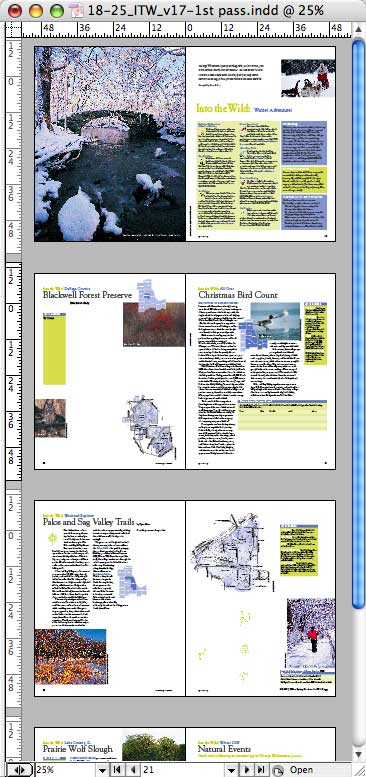
Figure 1. This eight-page article is well underway.
But in Figure 2, which is the second spread, you can see that text is missing on the left-hand page, and there’s overset text on the right-hand page. The designer needs to export placeholder and stories to the InCopy workflow so editors can work with the text within the layout.
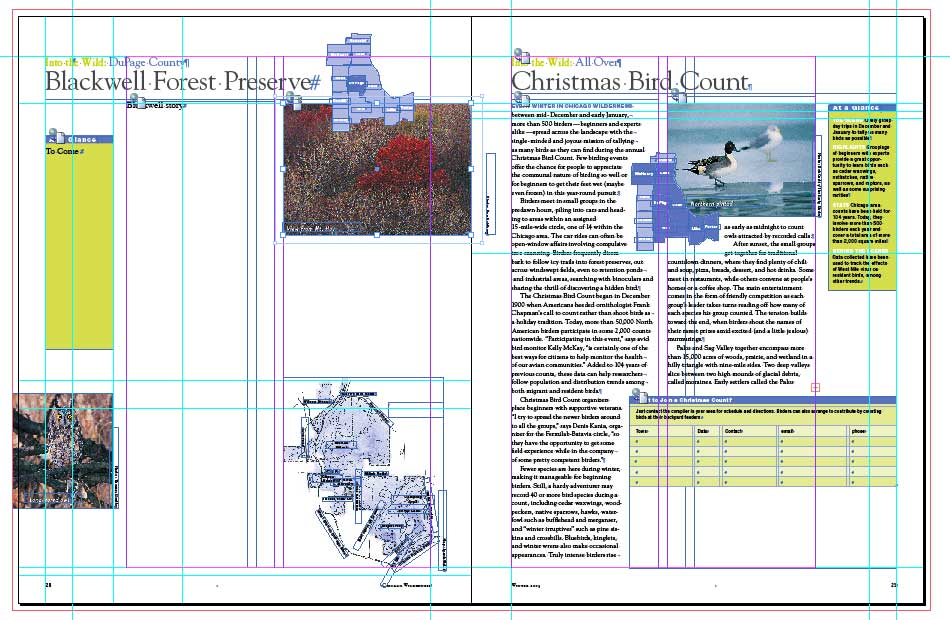
Figure 2. The designer of this spread must export the placeholder and stories so that editors can work with the text within the layout. Click on the image above for a full-sized view.
A new feature of the CS2 workflow is the Assignment. It lets designers create “subsets” of an InDesign file containing just those spreads that an editor needs to work on. In Figure 3, you see the designer creating an assignment for the editor, Joe, consisting of the single spread he needs to work on.
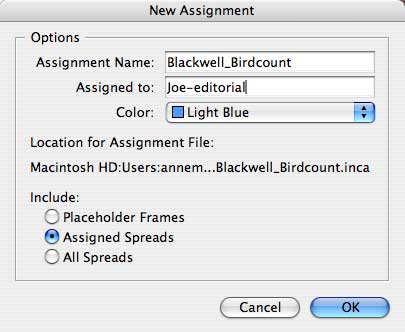
Figure 3. The designer controls what part of the text an editor can touch. This is called an assignment.
Both InDesign and InCopy have an Assignments palette (Figure 4) to help everyone track which stories belong to which assignment in the workflow and who’s working on what (Whew!).
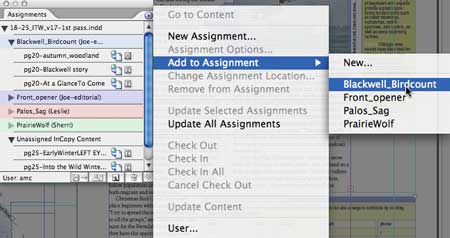
Figure 4. The Assignments Palette.
InDesign CS2 users can ignore the assignments feature and instead export each story (text frame or threaded frames) to the InCopy workflow as “Unassigned”. In this scenario, InCopy users open the full InDesign layout file and are able to work on any stories exported to InCopy.
Since assignment files are faster to open over the network than full layout files (especially for this photo-heavy magazine), Chicago Wilderness goes the Assignments route. Everyone saves assignments and stories to the company server.
Opening the Layout in InCopy
Alerted that an assignment is ready for him, our man Joe in editorial boots up InCopy and navigates to the project folder on the company server. He goes to the issue’s Assignments folder and double-clicks the one he wants to work on.
The two pages of the spread appear in Layout view in InCopy CS2. Since Joe has enabled Show Assigned Frames from InCopy’s View menu, the text frames he needs to work on appear with a blue border and screen (Figure 5). At this point the file is read-only — Joe can print it out or export it to PDF, but he can’t work on any stories. He needs to check them out first, which makes them editable for him but prevents others from editing the story at the same time.
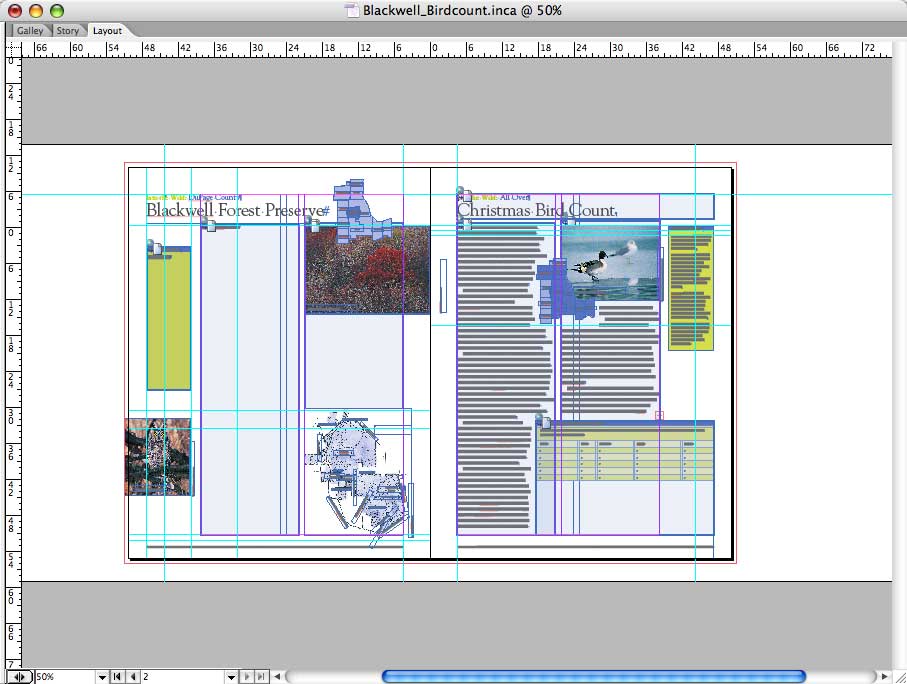
Figure 5. At this point, Joe can only read the stories he needs to edit. Click on the image above for a full-sized view.
Joe selects the name of the assignment in his Assignments palette and chooses Check Out, which simultaneously checks out to him all the stories that are part of this assignment (Figure 6). The Assignment palette then adds pencil icons next to the parts, which indicates that he’s checked them out and can edit them.
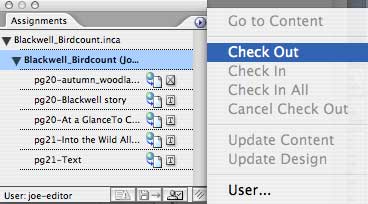
Figure 6. After he checks out the assignment, he can start to work.
Perfect Copyfitting in InCopy
In InCopy’s Layout view, Joe can see that the story on the right is overset (he sees the same overset icon as in InDesign), but to access the overset text, he needs to switch to one of the other two views in InCopy: Story (show on the left of Figure 7) or Galley (on the right). Meant for power editing, these views show all the stories in a layout, and if a story is overset, the overset is indicated by a red line. Galley shows accurate line endings, Story does not.

Figure 7. To access overset text, Joe must be in Story or Galley view.
The copyfitting toolbar at the bottom of the InCopy window shows real-time word counts and copyfitting status in all three views (Figure 8). Green is good!

Figure 8. Want real-time word counts or copyfitting status? Look for the copyfitting toolbar. Click on the image above for a full-sized view.
After Joe edits the text in Galley to remove the overset text, he switches to Layout view to confirm that it all fits (Figure 9). And of course it does — this is InCopy! He can continue editing in Layout view, as well.
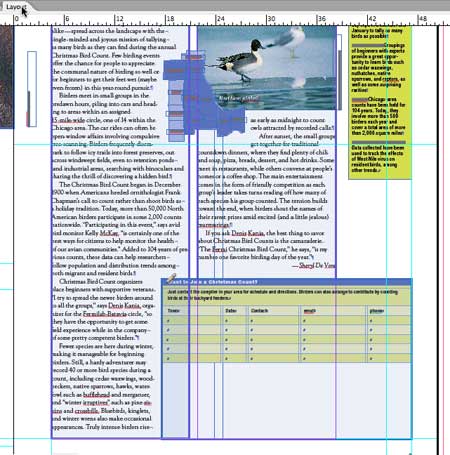
Figure 9. The copyfitting toolbar didn’t lie — everything fits.
Customizing the View
Now Joe turns to the left page of the spread with the placeholder text frames (Figure 10). An outside writer sent him a Microsoft Word document with text for the article and sidebar.
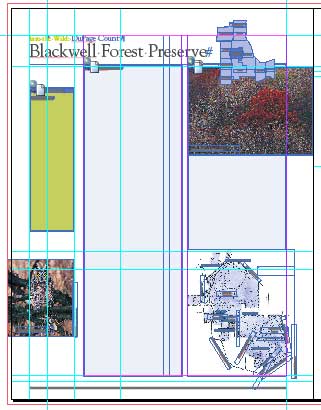
Figure 10. The left-hand page of the spread is ready for Joe to add text.
Before Joe starts working on this page, he fiddles with the preview settings — all the guides and blue screens are making him crazy. InCopy’s View menu lets users turn all the non-printing errata such as guidelines and frame edges on and off. Figure 11 shows the page in Preview mode, still fully editable.
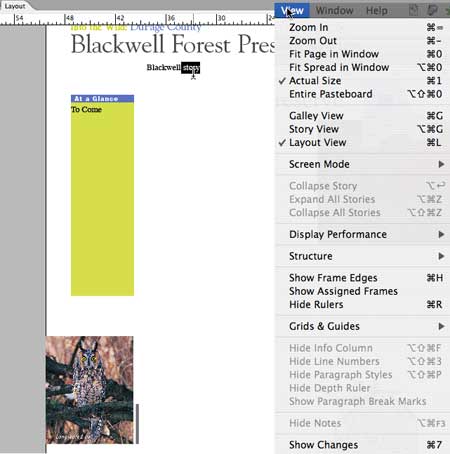
Figure 11. Ah, that’s easier on the eyes.
Placing a Word file into InCopy
Many people are surprised to learn that InCopy can place text and images just like InDesign can. The crucial difference is that InCopy can place files only into existing frames that the user checked out. InCopy users can’t create new frames, and the program won’t create them on the fly.
Joe goes to InCopy’s File > Place menu and selects the Word document with the main story. He turns on Show Options so he can strip out all the wonky formatting the author added (Figure 12).
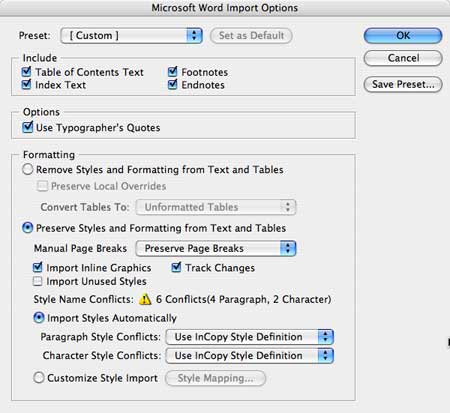
Figure 12. Joes sees these options when he places a Word file.
After placing the story in the text frame, Joe opens the Paragraph Style palette and applies styles to the unformatted text (Figure 13). The styles were created by the art department and are included automatically when stories are exported from InDesign to InCopy, even empty frames.
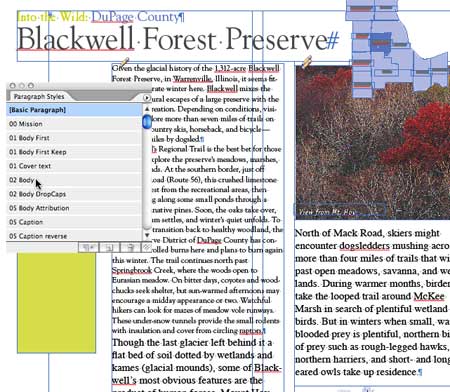
Figure 13. Joe applies styles.
Updating the Stories in InDesign
Joe finishes working on the stories in the assignment and hits the Save command in InCopy one last time before going to lunch.
The designer is working on something else in InDesign, but once Joe’s done, InDesign notifies the designer that stories have been modified via the usual yellow triangles next to the filenames (Figure 14). These appear in two places in CS2, the Assignments palette and the Links palette. The designer can use either palette to select the stories and choose Update from the menus or via a keyboard shortcut.
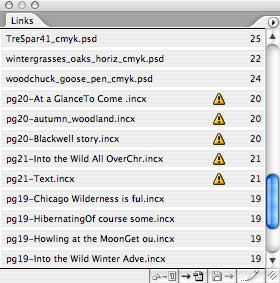
Figure 14. InDesign signifies that stories have been modified with yellow triangle symbols in the Assignments palette and the Links palette.
Within a few seconds, the spread is updated (Figure 15). Looks good!
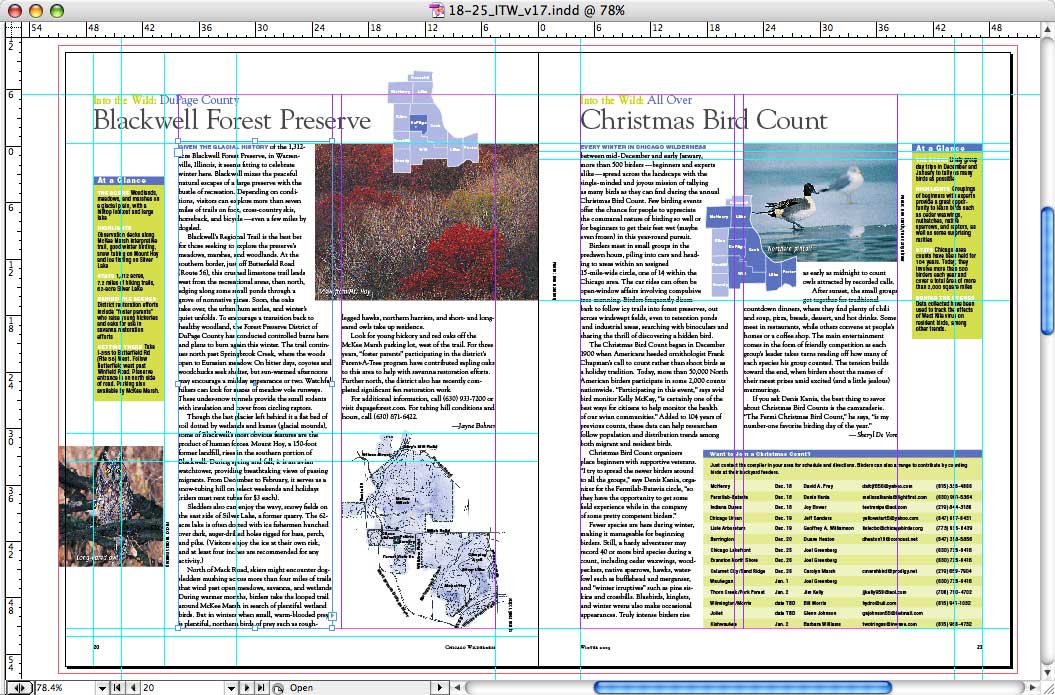
Figure 15. The text for this spread is final, and the designer didn’t have to do a thing. Click on the above image for a full-sized view.
Anne-Marie Concepción is a designer, writer, and Adobe InDesign/InCopy trainer based in Chicago with clients around the world, She’s the co-host of the InDesign Secrets podcast with David Blatner and writes the free tips and tricks e-zine DesignGeek, available at her studio’s web site, www.senecadesign.com.
This article was last modified on January 10, 2022
This article was first published on December 2, 2005
Commenting is easier and faster when you're logged in!

Recommended for you

How to Install Plug-ins In InDesign
Download the plug-in onto your computer and if necessary, decompress it (unstuff...

The Apple Watch Effect
Unless you were trapped under a rock (or a pile of Android tablets) recently, yo...
Scanning Around With Gene: The Art of Scripophily
I recently came across a terrific book on eBay called The Art of the Market: Two...