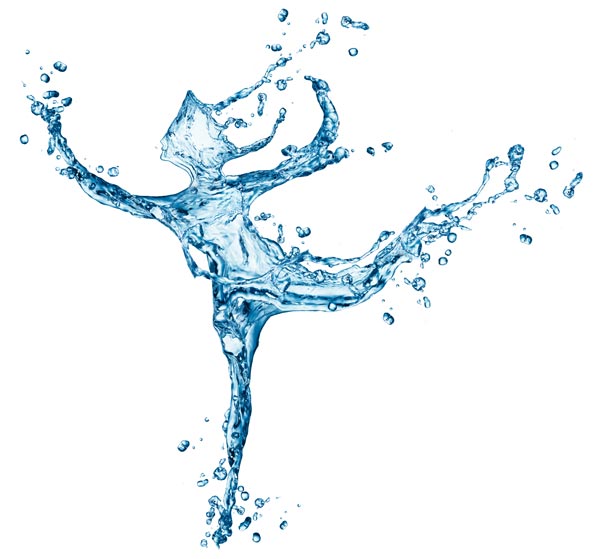
Designing with Water Splashes in Photoshop

You may have seen images that look like they’re made made of dynamic, flowing water, and wondered how they were created. They are necessarily slightly complex to build, but if you take them step by step you can make a convincing design in under an hour. Here’s how to build an image of a dancer from a single photograph of a water splash.
Step 1: Find some water
Do a Google image search for “water splash” and the good news is that you’ll find plenty of examples. The bad news is that it’s almost impossible to find a free image that’s good enough to use. This one comes from depositphotos.com, a vast online library that regularly offers 100 images for $100.

Step 2: Cut out the background
Select the white background with the Magic Wand tool, making sure it’s set to Contiguous so you don’t select the white inside the splash. Choose Select and Mask and view it on a black background so you can see the cutout clearly. I recommend adding a small Smooth value to clean up any ragged edges, and then set a small negative Shift Edge value to lose any white outlines.

Step 3: Add a base image
You’ll need an image upon which to build your composite. This silhouette of a dancer comes from svgsilh.com and you can download it here. I’ve set this image to a low opacity and moved it behind the splash layer. I’ve also rotated the splash to give me more room to work.

Step 4: Select a leg
The portion of the splash bottom left makes a good starting point for the vertical leg. Using the Lasso Tool, select the drip along with a piece of the water at the top, and copy it to a new layer. Move it into place on top of the silhouette.

Step 5: Distort the leg
I strongly recommend making the leg layer into a Smart Object (Layer > Smart Objects > Convert to Smart Object) so that you can adjust its shape later as needed. Use Edit > Puppet Warp to distort it so that it follows the line of the leg. You don’t need to be exact: the dancer silhouette is just a guide to get the proportions and balance right.

Step 6: Add the other limbs
Continue to select pieces of the original water splash, converting each one into a Smart Object. Use Puppet Warp on each limb to distort it into shape – again, using the silhouette as a rough guide. You can reuse existing layers: the first leg has here been repurposed as the left arm.

Step 7: Make the head
I found a piece of the original splash that looked more or less like a head in profile (the wide area, two thirds of the way down). Copy this to a new layer, scale it and place it on the body.

Step 8: Distort the head
Once again, turn the layer into a Smart Object and use Puppet Warp to distort it into a more convincing profile. By making it into a Smart Object first you can reposition the pins at any point. Choosing Puppet Warp will load the pins in the position where you last left them.

Step 9: Add some features
To strengthen the impression of the splash as a head, I copied small sections of the original splash as new layers to make the suggestion of an eye and a mouth. They’re barely visible, but they make it easier for the viewer to interpret the image.

Step 10: Mask the layers
Each of the layers you copied from the original splash will have hard edges where you used the Lasso to select them. You can’t erase the edges, as they’re Smart Objects; instead, use Layer > Layer Mask > Reveal All and paint over the hard edges on the mask in black with a soft-edged brush to blend the layers together.

Step 11: Add some more splashes
Copy some more splashes and water droplets from the original splash layer, and arrange these around your figure to add a greater sense of movement. Here’s the finished image.

This article was last modified on July 23, 2021
This article was first published on January 20, 2020
Commenting is easier and faster when you're logged in!
Recommended for you

CreativePro Video: Always Paste to Center in Photoshop
See the simple trick for pasting large selections in Photoshop to the center of...

What’s New in Photoshop 2021
Feature-rich update offers plenty to excite and impress even the most jaded Phot...

Photoshop CC 2015.5 New Features
Adobe has promised subscribers to its Creative Cloud plan that it will release m...


