
Designing Calendars
Nigel French examines several different approaches to designing calendars, from tried-and-true to truly remarkable.


This article appears in Issue 113 of InDesign Magazine.
If you’re looking to advertise your business, a calendar is a great promotional vehicle: a chance to put your products or portfolio in front of clients and potential clients and have it update every month for an entire year. How many other marketing pieces have such a long life span? To make the calendar beautiful, as well as functional, we need a fresh approach, and that’s a challenge when you’re working on a design problem that has been solved every year since the dawn of (recorded) time.
In this article, I’ll look at different approaches to designing calendars with InDesign (with some help from Illustrator and Photoshop). They range from the obvious and utilitarian, to the minimalist, to the conceptual. Each variation will bring up unexpected uses of InDesign’s toolset and require some interesting workarounds.
I’ll start with the venerable wall calendar—spiral bound at the top, with photographs organized around a theme, one per month. Next, I’ll create a compact calendar with the year laid out on a single page. Given how much information needs to fit into a limited space, this will be purely typographic, and with all elements reduced and simplified as much as possible. And finally, I’ll design a more abstract calendar in a circular format, emphasizing the cyclical nature of time. Here I am unconstrained by the need to be practical. I’m more concerned with taking the concept of a calendar year and displaying it in a visually compelling way—as much an infographic as a calendar.
I’m not a designer—I just want my grandkids in a calendar!
A browser search for calendar printers will return many affordable online services where you can upload your images, choose from a
number of predefined template layouts, and receive your calendar in the mail a few days later. If all you need is a simple calendar based on your images, then this is a cost-effective solution. Graphic resource sites like Creative Market (Figure 1) Adobe Stock (Figure 2), and Adoramapix (Figure 3) offer a range of affordable calendar templates.
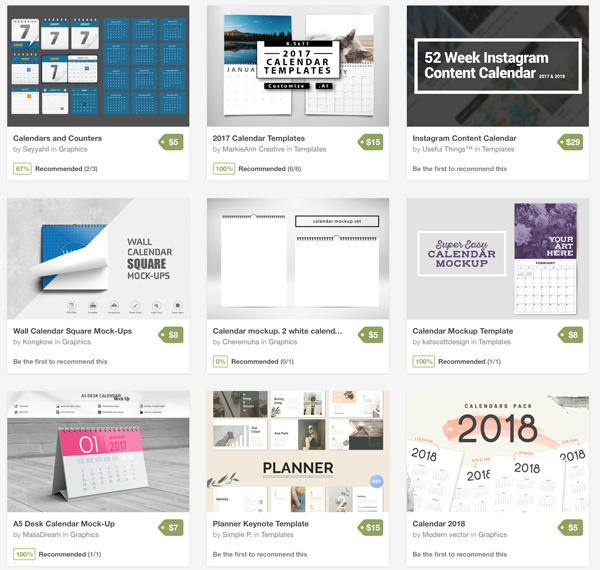
Figure 1. Calendar templates at Creative Market
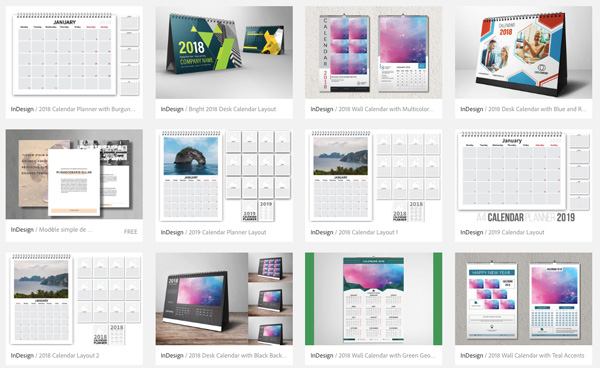
Figure 2. Calendar templates at Adobe Stock.
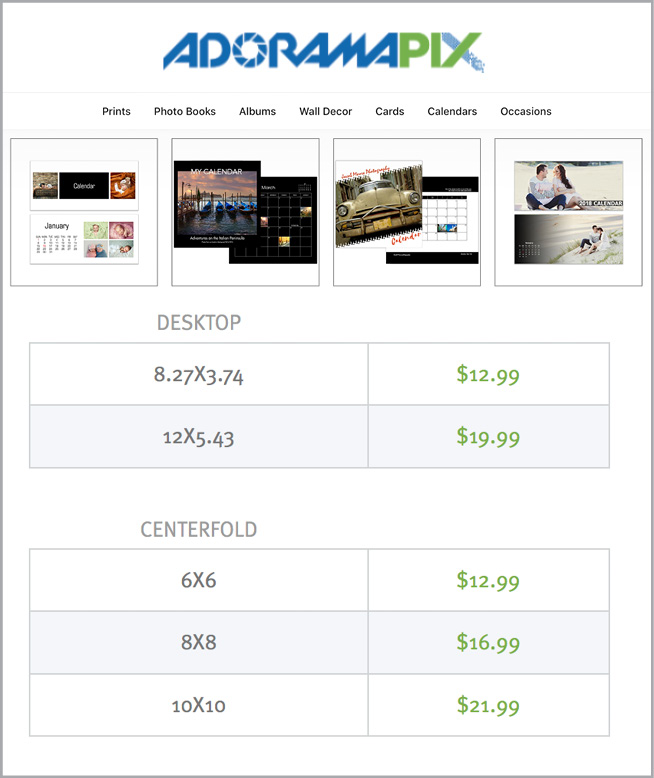
Figure 3. Pricing and size options at Adoramapix.com
To kickstart the creative process, I made a Pinterest board of inspiring calendars (Figure 4).

Figure 4. A collection of inspiring calendar examples on a Pinterest board
In these examples, there’s a bold use of typography, especially the numerals. In some examples, the numbers are so large that they tend towards abstraction. There’s also a strong use of color to aid navigation and to signify the changing of the seasons. You can find further examples on this Behance page (Figure 5).

Figure 5. Looking for inspiration on Behance.net
Wall Calendar
An essential first step in the creation of a wall calendar is to choose the images. I’m using one per month, plus one for the cover. The images are organized around a theme, in my case landscapes from my local area, and each conveys the month it represents (Figure 6). Stylistically, I’ve tied them together by applying the same color treatment in Adobe Bridge (Figure 7).

Figure 6. A page of the finished wall calendar

Figure 7. Viewing the images in Bridge
To create the calendar grid, I use the Calendar Wizard script by Scott Selby, discussed previously in this article and in Issue #80. This powerful script, which is free for personal use, contains a dizzying wealth of customizable options, all of which are presented logically. As with any project, you can save time and clarify your thinking by starting with a pencil sketch, but you should still expect some trial and error to get the result you want. When you know what you’re after, you can capture the settings as a preset.
To control the size of the calendar grid and its position on the page, first create a new document, set its margins, and then, in Calendar Wizard, choose Current Document (Figure 8).

Figure 8. The Calendar Wizard interface
You can choose which, if any, holidays to include and optionally add a separate holiday layer, making it easier to personalize the calendar with your own birthday/holiday images. Because Calendar Wizard uses table styles, cell styles, and paragraph styles to build its calendars, once you’re happy with the structure and content of the information, you can quickly customize its appearance by editing the style definitions.
With the calendar grids on the pages, the next step is to add a picture frame to the master page. To control the picture fitting, create and add an object style to the frame (Figure 9).

Figure 9. Create an object style to control the picture fitting.
Now, choose File > Place, select all your images, and move through the pages, placing them (Figure 10).

Figure 10. Calendar with images placed
The back cover is a grid of the calendar pages, giving an overview of the whole calendar (Figure 11).

Figure 11. Back cover grid
To create this, first export the document as a PDF. Next, place the resulting PDF file (Figure 12). Hold Shift to toggle Show Import Options and choose the page range.

Figure 12. Import Options for placing PDF
To generate live captions for the images, start out by entering the caption text into the images’ metadata using Bridge. Next, set up the options for your captions, and then, in the Links panel, choose Captions > Generate Live Captions. Once the captions have been generated, you can control their appearance by applying an object style, which can include such formats as Text Frame Auto Size options, text insets, and the size and position of the caption frame (Figure 13).

Figure 13. For live captions, enter metadata, set up caption options, generate the captions, and apply an object style.


Figure 13, continued. For live captions, enter metadata, set up caption options, generate the captions, and apply an object style.
Circular Wall Calendar
So far, so predictable. But what if you want to go beyond a conventional linear calendar grid? As a variant of the wall calendar, I’d like to present the months as a circle, rather than a rectangle (Figure 14).

Figure 14. A page from the circular wall calendar
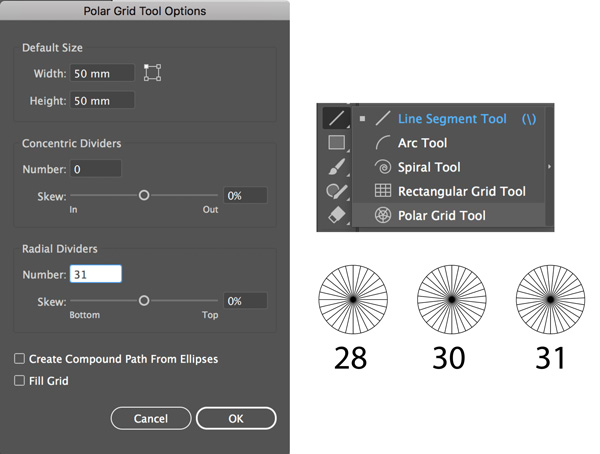
Figure 14a. The Polar Grid Tool in Illustrator

Figure 14b. The Live Paint tool
Using Illustrator’s Polar Grid tool (Figure 14A) (found in the toolbar under the Line Segment tool), I create three circles, each with a different number of radial dividers: 31, 30, and 28. I select the first of these, and then, with the Live Paint tool (Figure 14B)—it shares the same tool space as the Shape Builder tool—I hover over a selected object to see the message “Click to make a Live Paint Group.”
Once I do so, I can fill each segment independently. I color each of the polar grids with a color palette derived from the color wheel. I then use Illustrator’s Recolor Artwork feature to remap those colors to a color palette suggested by the month’s featured image. This involves a few more steps, but it’s worth it.
InDesign’s Color Theme tool is useful for creating a color theme from an image, but it is limited to five colors and isn’t of any use if you want color palettes containing between 28 and 31 colors. So instead, I use Illustrator’s Object Mosaic. Copy and paste the image from InDesign to Illustrator, and then choose Object > Create Object Mosaic (Figure 15).

Figure 15. Using Illustrator’s Create Object Mosaic to derive a color palette from an image
Choose a grid size that will yield enough colors: I’m using 9 × 6 (I check the Use Ratio box). Object Mosaic reduces the image to an abstraction of color squares. With the mosaic selected, make a color group (Figure 16) based on the selected art. Simplify the color group by deleting colors that are too similar.
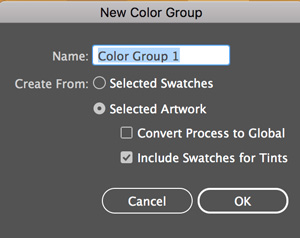
Figure 16. Creating a Color Group from the selected artwork
Now select the first polar grid, and choose Edit > Edit Colors > Recolor Artwork (Figure 17).

Figure 17. Use Recolor Artwork to remap the colors of the color wheel to the custom palette derived from the image.
Select the newly created color theme to remap the colors. For different results, you can experiment by clicking the Color Reduction Options button () and using the controls in the dialog box to choose the colors you want.
Because I want the flexibility of editing the color wheels in situ, I copy and paste—rather than place—them into InDesign. I make smaller copies for each of the weeks, ungroup the circles, and then delete the unwanted segments of days to come and color the segments of days passed. This step is made easier with the use of layers that can be locked and unlocked as necessary (Figure 18).
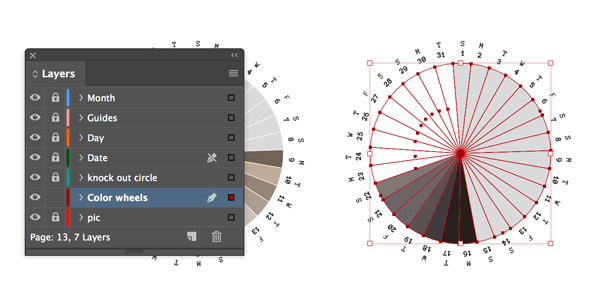
Figure 18. Take advantage of layers to selectively lock certain content.
Compact Calendar
It’s interesting to see how minimalist you can get and still carry the message. In my third calendar, I want to use almost exclusively numbers, conveying meaning through color-coding and spacing (Figure 19).

Figure 19. Finished compact calendar
To start, I made a tall, narrow column of numbers 1–31, and then duplicated it 11 times, adjusting the numbers for the different months. For the numbers to align under each other, I choose a font with tabular lining numerals, turn off optical margin alignment, and make sure that I’m using Metrics kerning (Figure 20). To ensure that the numbers cross-align, I use a baseline grid.
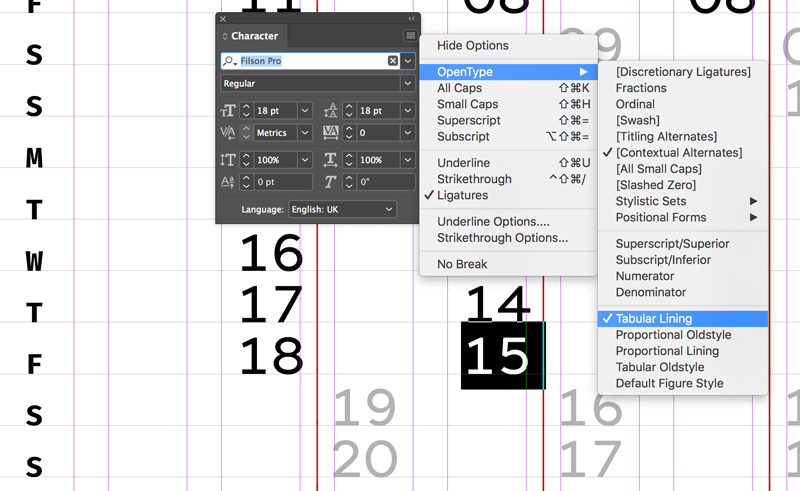
Figure 20. Choosing the right style of numbers is all-important. And be sure you use Metrics kerning and turn off Optical Margin Alignment.
To signify the weekend, Saturdays and Sundays are right aligned. The vertical line running through the column is a paragraph border. While it’s possible to merge consecutive borders, that won’t work here, because the border settings are different: they’re offset to the right for the days of the week, and to the left for the weekends. To ensure they line up, measure the column width, and then make the right offset half that amount but negative (Figure 21, top). For the weekends, apply the same value to the left offset (Figure 21, bottom).

Figure 21. To ensure the borders line up, make the border offsets half the column width.
Circular Calendar
Exploring further the idea of a circular calendar, I want to represent the whole year on a radial grid (Figure 22).

Figure 22. The completed circle calendar
This isn’t particularly functional, but who cares? With our laptops and smart phones, we’re never more than two seconds—or two feet—away from a functional calendar, so do we really need another? After all, there’s still room for an analog wrist watch in the modern world, even though there’s an abundance of other more fully-featured time-keeping devices.
The process starts in Illustrator with the under-appreciated Polar Grid tool, which divides a circle into a specified number of radial and concentric dividers. If you know how many dividers you want, it’s easiest to click on the page and type in the dimensions. Through trial and error, I worked out that I needed 56 radial dividers and 12 concentric dividers (Figure 23a).

Figure 23 a&b. Creating the polar grid in Illustrator
Here’s how I came up with those numbers: In the finished version, there are seven concentric rings, going from Monday, on the outside of the circle, to Sunday, towards the center. Because the polar grid is drawn from the center of the circle, the first five segments will be too small to be usable and will be deleted. For the radial dividers, I start with 52 weeks of the year. For 2019, we actually need 53 weeks, the first and last being incomplete. I’ve also added three segments to contain the days of the week, to help the viewer navigate the calendar.
Now convert to the grid to a Live Paint Object by clicking on it with the Live Paint Bucket, which shares its tool space with the Shape Builder. This will, in effect, make each of the intersecting segments individually editable. Fill the slice at the top of the circle with a color—it doesn’t matter which at this stage (Figure 23b).
Apply a stroke of None, and then choose Object > Expand (Figure 24).

Figure 24. Expanding the Live Paint object to editable segments
This should leave you with just the colored segments (Figure 25).

Figure 25. The first “slice.” This can now be copied and pasted into InDesign, where it can be converted to text frames.
It is this that we want to copy and paste into InDesign, where we will convert each segment to a text frame. (If you’re wondering why I don’t copy and paste the whole radial grid, it’s because it’s too complex and will be pasted as an EPS, which wouldn’t allow us to edit the segments.)
Having taken the polar grid apart, we’re now going to rebuild it. Position the pasted result on your InDesign page, and draw guides to indicate what will be the center of the circle (Figure 26a). Delete the first five segments closest to the center of the circle (Figure 26b). Ungroup the remaining seven segments.

Figure 26A. Copy and paste into InDesign, ungroup, and then draw a guide marking the center point.
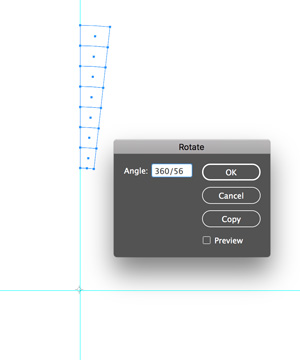
Figure 26B. Delete the tiny segments close to the center of the circle and rotate copies of the remaining 7 segments around the center of the circle, as indicated by the guides. With the Rotate tool, hold Option/Alt, and click on the intersection of the guides. Specify the angle, and choose Copy. With the first copy in place, from the Object menu, choose Transform Again > Transform Sequence Again or press Cmd+Option 4 (Ctrl+Alt+4).
Our next step is to create threaded text frames that we can populate with the dates of the year. Start by rotating copies of the slice around the center point of the circle, as indicated by the guides (Figure 27).

Figure 27. The completed circle with text threads shown
This is a rather labor-intensive process. Once the segments have been rotated around the circle (360°/56=6.43°), it’s a case of threading them all together. Click the out port of the first frame; then, with Option/Alt held down, click in the next, and then the next, and so on, until you have 300+ linked frames. (I tried numerous ways of automating this, but unfortunately none worked. If you establish the text threads of one slice and then use Repeat Transformation to copy the slice, the threads are lost. Rorohiko’s useful script Auto Stitch doesn’t know how to handle text threads that move around a circle.)
To populate the frames with numbers, create a paragraph style that has the following attributes: center alignment; keep with next: start in next frame (to move each date into its own frame); and auto-numbering (Figure 28).

Figure 28. Creating a paragraph style for the date text


Then, all you have to do is put your cursor in the first frame and keep pressing Return until the frames are filled (Figure 29).

Figure 29. The complete circle with auto-numbered dates added
Just a few more tweaks and everything will fall into place…. Select the frames, and set the vertical justification to Center (Figure 30).

Figure 30. Align the text to the vertical center of each frame.
Make a variation of the date paragraph style to restart the numbering at the beginning of every month. Use the BreakFrame script (one of the sample scripts that comes installed with InDesign) to remove the triad segments from the text thread and replace their content with the days of the week.
To add the months of the year around the circle, start by creating a circle slightly bigger than the calendar grid. Using the Type on a Path tool, type the names of the month around a circle, separating each with a tab (but without a tab before January). To determine the position of the tab stops, use the formula 2Pir to find the circumference of the circle. Divide this by 12, and set a center tab at this distance. Next, choose Repeat Tab to evenly space the months around the circle (Figure 31).

Figure 31. Repeat Tab and months around a circle.
2 ×Pi (3.142) × r (190mm) = 1,193.96 /12 = 99.5
To finish the circular calendar, I’ll add a gradient that transitions from the cool blue of winter to the green of spring to the golden yellow of summer and to the brown of fall, and then back again to winter. A circular gradient isn’t possible in InDesign. We can make radial gradients, but these radiate from a center point rather than travel around a circle. To get around the problem, I’ll create the gradient in Photoshop and apply the Polar Grid (Figure 32).
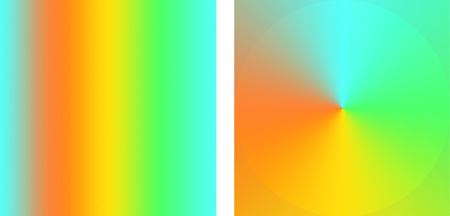
Figure 32. Making a circular gradient in Photoshop: before and after the Polar Coordinates filter is applied
On a separate layer, below the circular grid, draw two circles corresponding to the size of the grid and its knocked-out inner circle. Select both, and then choose Object > Path > Create Compound Path (Figure 33).

Figure 33. Making a compound path from two overlapping circles to create the picture frame that will contain the gradient
Now place the gradient into the compound shape (Figure 34).

Figure 34. The finished calendar
In the Days to Come
In your own explorations of calendar design, start with the obvious, tried-and-trusted route of a linear grid. It’s an approach that’s hard to beat in terms of ease of use. But at the same time, go further. See how far you can push things and still have them make sense. So long as the calendar conforms to the rules you establish (and so long as there are still 365 days in the year and 30 days in September), then anything goes.
Calendric Customs
When designing a calendar, it’s humbling to think that people throughout the ages and across cultures have been preoccupied with the challenge of how to represent the unit of time that we call a year.
As well as there being different calendar designs, there are also different calendars. The most internationally accepted and widely used is the Gregorian calendar. Prior to this, and in widespread usage until 1582, was the Julian calendar. Both have the same months and month lengths but add leap years differently. Consequently, the Julian is currently 13 days behind the Gregorian calendar. For instance, the first of January in the Julian calendar is the 14th of January in the Gregorian.
In the Chinese calendar, each month follows one cycle of the moon. It is used for marking holidays such as Chinese New Year, and in astrology, for instance to help choose the most auspicious date for a wedding, or the opening of a building.
The Hebrew calendar is a lunisolar calendar used for Jewish religious observance. It’s about six minutes and 25 seconds longer than the Gregorian calendar, and every 231 years falls a day behind.
The Islamic calendar is a lunar calendar consisting of 12 months in a year of 354 or 355 days. It is used to date events in many Muslim countries, concurrently with the Gregorian calendar, and to determine when to observe Ramadan, attend Hajj, and to celebrate other Islamic holidays and festivals.
Pre-Columbian Mesoamerican calendars include the Aztec and the Mayan systems. According to some interpretations, the Mayan calendar predicted the end of the world in December 2012.

The Aztec calendar stone on display at the National Museum of Anthropology, Mexico City. Credit: El Comandante – Own work, CC BY-SA 3.0
These are just some of the calendars currently in use or with historical importance. Layered over these we also have concepts like academic calendars, fiscal calendars, and sporting calendars. To generate a year planner based on the calendar year, check out this free script from Colin Flashman.
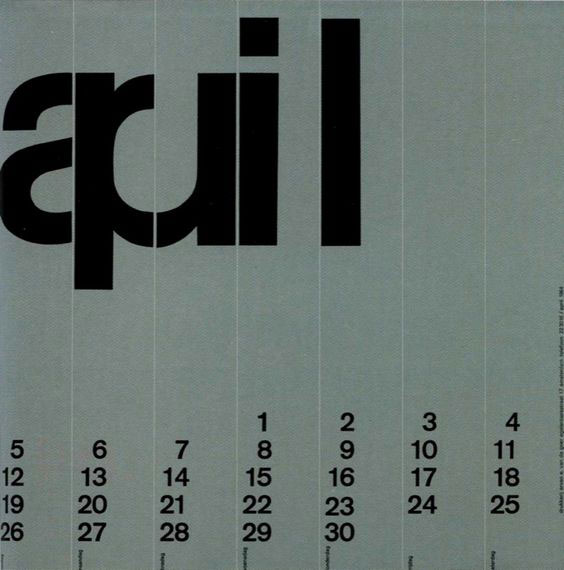
Wim Crouwel’s calendar from 1964 features his trademark minimalist typography and strong adherence to a grid.

Tomek Kowalik’s beautiful circular calendar features 12 open concentric rings radiating out from January in the center. To anyone who complains “There’s nowhere to write stuff,” that’s what your online calendar is for.
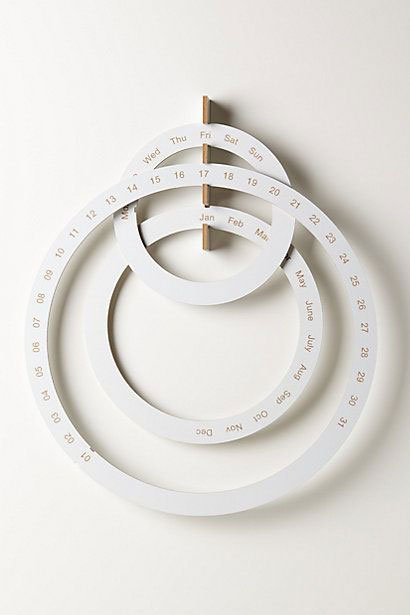
“Like a wheel within a wheel…” Time is cyclical—shouldn’t our calendars be too? This perpetual calendar is available at Anthropologie.com.
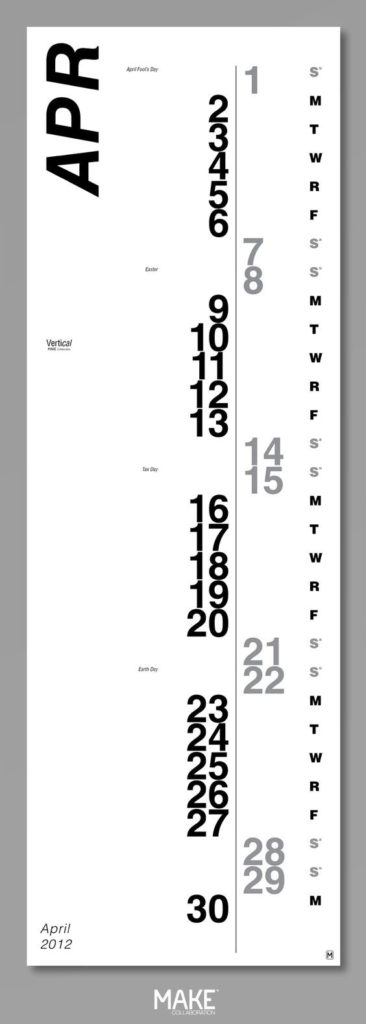
Striking for its shape, this vertical calendar conveys hierarchy and distinction through spacing and weight.

The elegantly simple design from Jonathan Davies shows the importance of communicating with color.
Commenting is easier and faster when you're logged in!

Recommended for you


Designing with Grids
Maya P. Lim shows how working with a grid opens up all kinds of creative design...

The Design, Illustration, Lettering and Typography of Daniel Pelavin
Meet this inspirational jack of many trades whose work encompasses illustration,...