
Design with HTML5 in Dreamweaver CS5.5

Given the growing popularity—and all the hype—around HTML5, it’s no surprise that many of the new features in Dreamweaver CS5.5 are meant to help you create cutting-edge Web page designs with the latest flavor of HTML.
Among the new goodies in Dreamweaver CS5.5, you’ll find two new HTML5 Layouts, complete with CSS style rules. This tutorial shows you how to customize those new HTML5 layouts by adding your own images and text, as well as by editing the CSS to change the background color, font face, and other design features.
If you’re completely new to CSS, altering one of these layouts may seem confusing at first, but it’s still easier than starting from scratch. If you’ve been using CSS for a while, you may appreciate the head start these layouts offer and how easy it is to customize the CSS designs in Dreamweaver. If nothing else, experimenting with these predesigned layouts is a great way to learn more about HTML5. The visible text in these files explains how the pages are designed, and there are comments with notes throughout the code. Note that versions of Dreamweaver before CS5.5 don’t include these HTML5 layouts.
Step 1. Start in Photoshop
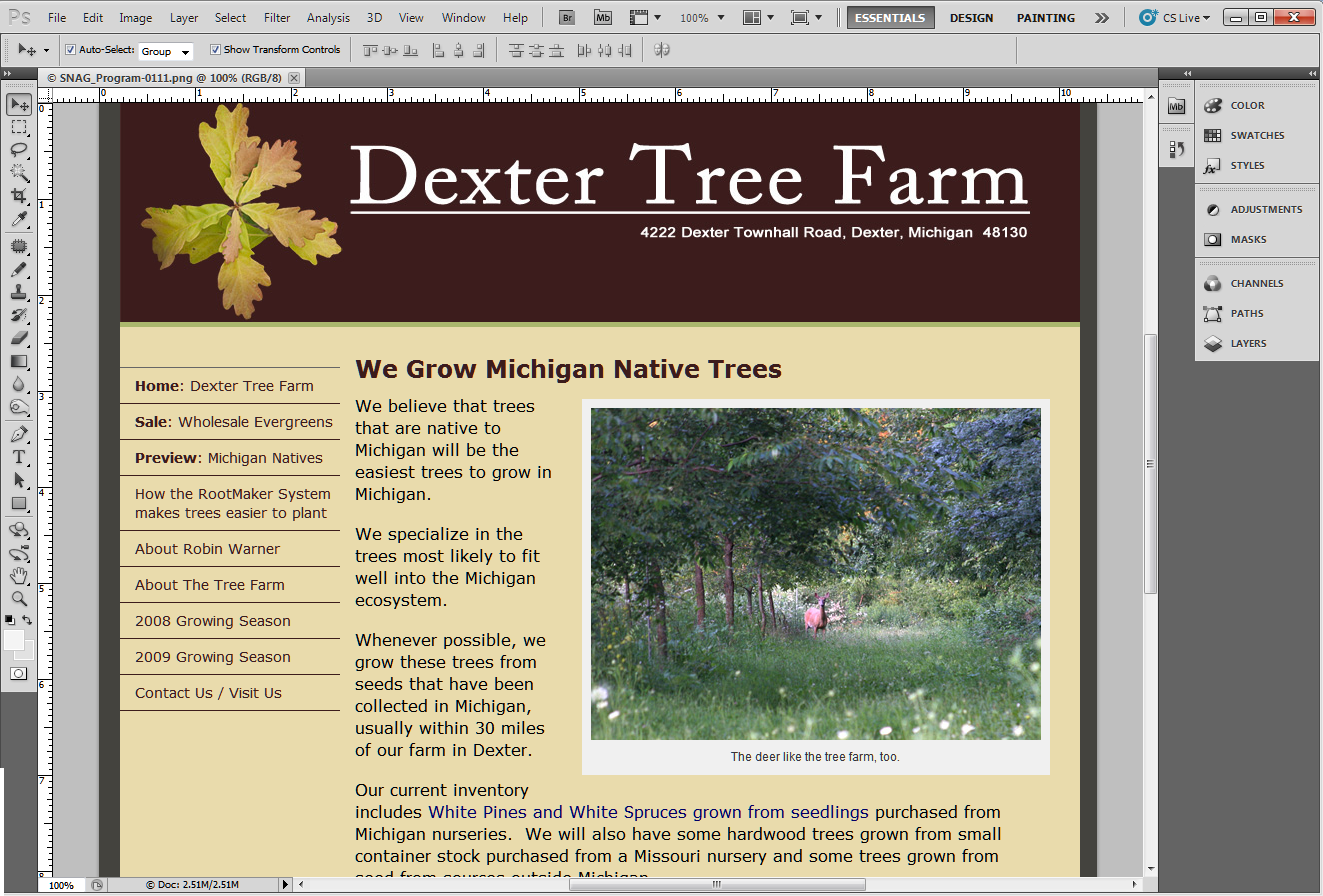
It’s common to mock up a Web design in Photoshop and then recreate it with HTML in Dreamweaver. (You can also your the mock-up in Fireworks or some other image editor, of course, but if you do, avoid the automated slice and export features.) Figure 1 shows the design you’ll create in this tutorial as it appears in Photoshop.
The best approach to creating a well-coded HTML5 page is to build it in Dreamweaver and add just the images you need after you’ve optimized them in the image editor.
Figure 1. Click the image below to see a larger version.
Step 2. Set Up Your Site
When you start working on any site in Dreamweaver (a new site or an existing site that you’re opening for the first time), you need to begin at Dreamweaver’s menu and choose Site > New Site (Figure 2).
Figure 2. Click the image below to see a larger version.

To set up a site, all you have to do is identify the main site folder of your Web site. That means you need to store all of the files that you’ll use in your site in one folder (called the root folder on a server). The site set up process mostly involves identifying that folder in Dreamweaver so that image references and links are set correctly. You also have to give each site a name as you set it up. You can give your site any name you like: The name is only for the purposes of identifying the site in Dreamweaver.
Step 3. Create a New Page
In Dreamweaver CS5.5, choose File > New. In the far left of the New Document window that appears, choose Blank Page. Under the Page Type column, select HTML, and then from the list of CSS Layouts in the Layout Column, choose the last option, the 2-column, HTML5 Layout. (Dreamweaver included CSS Layouts in previous versions, but only CS5.5 has the new HTML5 layouts covered in this tutorial.)
Note that a preview of the selected Layout is displayed at the far right of the dialog. In Figure 3, I’ve chosen the Layout with the long name of “HTML5: 2 column, fixed, right sidebar, header and footer”.
Figure 3. Click the image below to see a larger version.

Although Dreamweaver CS5.5 has only two HTML5 layouts, they’re a great place to start because they’re so customizable. Only the two last Layout options on the list use HTML5. The others are designed using XHTML 1.0 Transitional. When you get all the settings the way you want in the New Page dialog, click Create and the page will open automatically in Dreamweaver.
Step 4. Set the DocType to HTML5
Another new option in Dreamweaver CS5.5 is the addition of the HTML5 DocType to the New Page dialog. In the bottom-right corner of the dialog (shown enlarged in Figure 4), the Dreamweaver CS5.5 DocType options include HTML5. Make sure it’s selected from the DocType drop-down menu. When you have all the settings the way you want them, click Create to generate the new page in Dreamweaver.
Figure 4.

Step 5. Save and Study Your New Page
Save the page as soon as you create it in Dreamweaver. This will help ensure that images and links are set properly as you add your own content and edit the style rules.
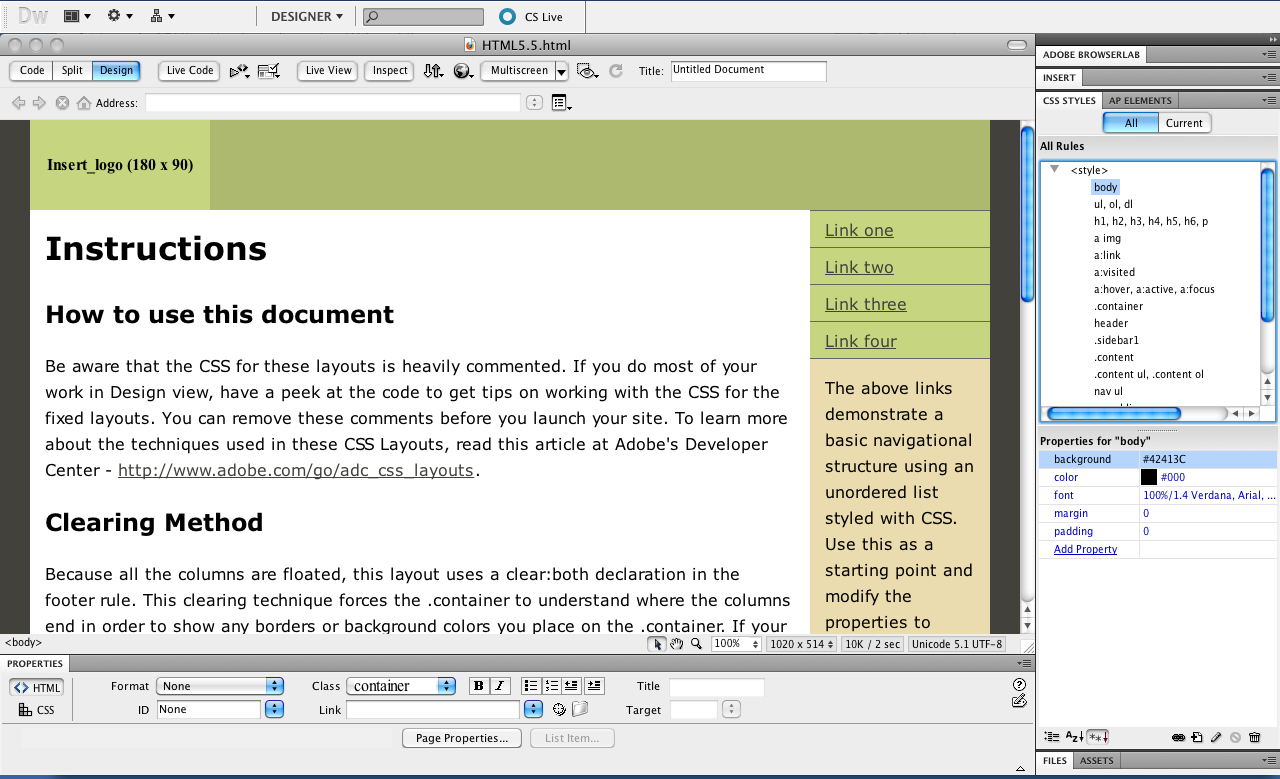
If you’ve used Dreamweaver’s CSS Layouts before, you know they’re not much to look at on their own (Figure 5). Don’t be alarmed by if the size of the sidebar is too small or you don’t like the garish green color; you can easily change all of the elements in these layouts using Dreamweaver’s great CSS editing tools.
Figure 5. Click the image below to see a larger version.
Step 6. Change the Alignment of the Sidebar
In this two-column layout, the sidebar is on the right side of the page. If you want the sidebar on the left, you need to edit the style rule that controls the sidebar alignment. To do so, click to select the .sidebar1 style in the CSS Styles panel, and in the Properties pane at the bottom, use the dropdown in the float field to change the alignment. (You can also double-click on the style name and use the Edit CSS Rules dialog).
Change the float setting in the CSS rules from right to left (Figure 6) and the sidebar will switch from the right side of the page design to the left. You can also change the width of the sidebar, but note that if you change the width of the sidebar column in this layout, you’ll also need to change the width of the main column to accommodate the difference and keep the overall design the same width.
Figure 6.

You can change the entire width of the design by changing the style named .container. You can change the main column width by changing the style rule named .content.
Step 7. Change the Background Color of the Header
Dreamweaver’s HTML5 Layouts are divided into sections, each surrounded by a <div> tag or one of the new HTML5 tags, such as <header>and <aside>. The top area of both HTML Layouts are formatted with the new HTML5 tag <header>and styled with a corresponding CSS rule, visible in the CSS Styles panel.
In Figure 7, I’ve selected the header style in the CSS Styles panel on the right side of the Dreamweaver Workspace and opened it in the CSS Rule definition dialog by double clicking on the style name. (You can also right-click on any style rule name in the CSS Panel and choose edit from the right-click menu.)
Figure 7. Click the image below to see a larger version.
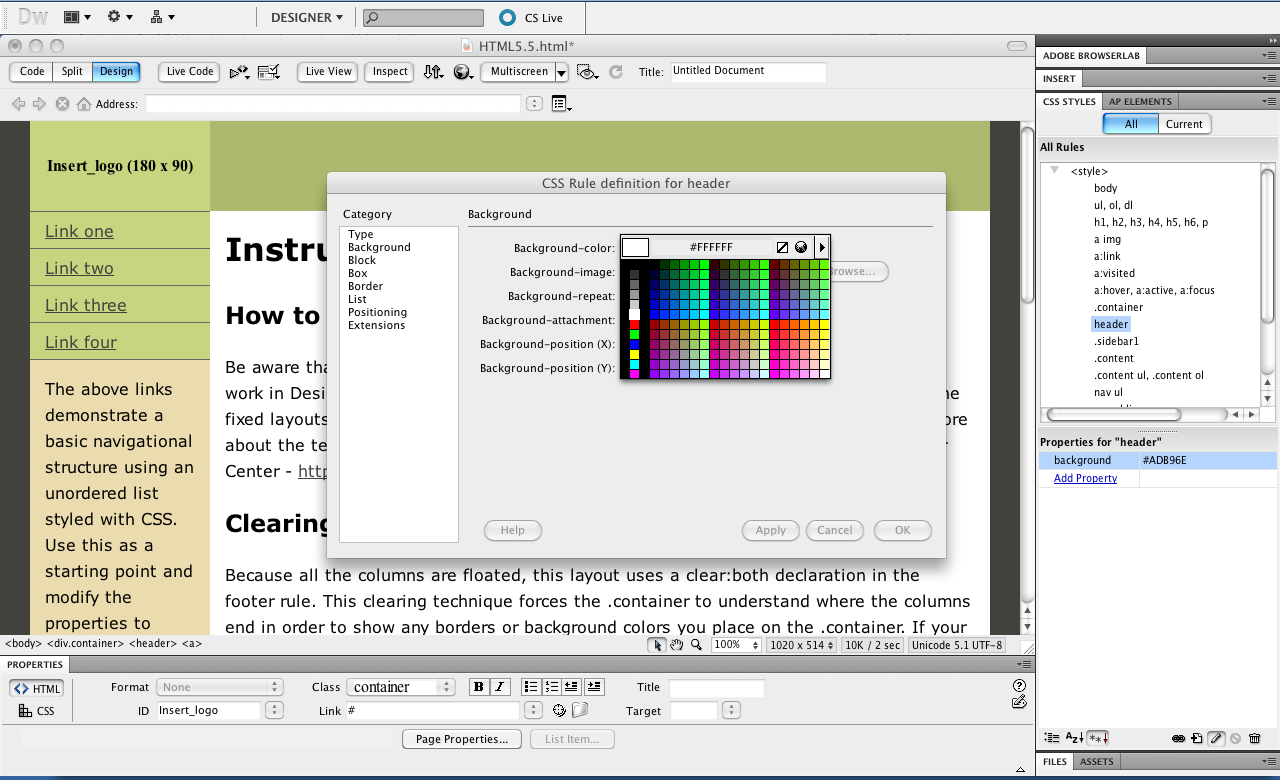
In the CSS Rule definition dialog, shown in the middle of this figure, I selected the Background category, and then used the color picker in the Background-color field to change the background color from the green color to a neutral white to match the background of the main part of the page.
You can also remove the background color from any style to make the background transparent. If no color is specified for the background, the color of the page or a surrounding area will be displayed.
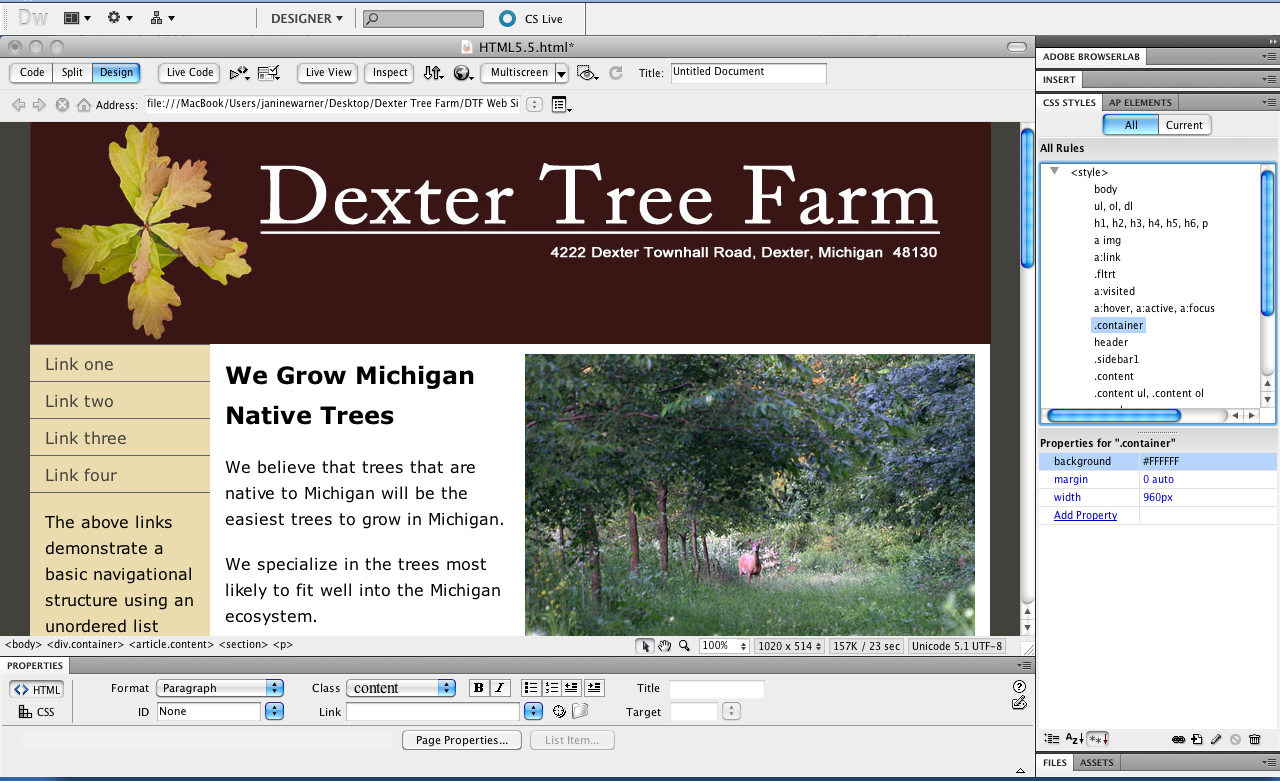
Step 8. Add Your Own Images and Text
You can enter text or a graphic in any area of these HTML5 Layouts, including the header. If you add a graphic, it can span the entire width or just part of the area defined by the <header>tag. In this tutorial, I’ll add a graphic that fills the entire area.
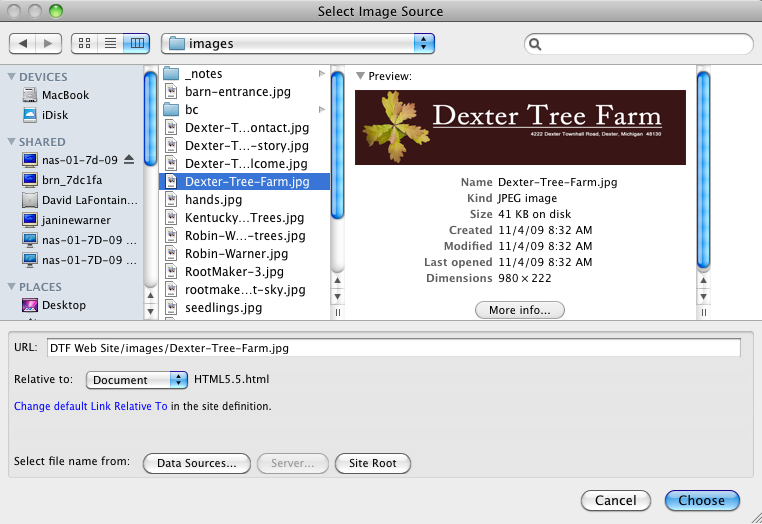
To add an image to the header, place your cursor where you want the image to appear and choose Insert > Image. Locate the image on your hard drive and click the Choose button (Figure 8). Note: If the image is not in the main root folder of your Website, Dreamweaver will give you the option of copying the image into the main folder as you insert it. Alternatively, if you want to use an image that’s already on an Internet Web server, you can enter the URL of any image in the Image field in the Property inspector at the bottom of the page.
Figure 8. Click the image below to see a larger version.
Tip: If you use an image in the header, make sure to remove all of the content and tags included in the Layout. Even a <p> tag can add extra space that you may not want around an image.
If you prefer to use text instead of an image, you can simply type in your own words and then format the text as you would format any other text in a Dreamweaver page.
Step 9. Change the Font Face for the Entire Page
You can change the font face or color of text in any part of the page by changing the corresponding style rules. To change the font style for the entire page, edit the style for the body tag. The <body> tag controls page-wide settings, including font styles and the background color of the page.
To change the font face for the entire page, double-click on the body style rule in the CSS Panel to open the CSS Rule definition dialog (as I’ve done in Figure 9). Choose the Type Category and then use the Font-Family field to choose a font collection.
Figure 9. Click the image below to see a larger version.

Tip: If you want to use more than one font on the same page, you can set the default page font using the body style, and then set a different font in another style rule. For example, you might set a serif font for the main page text, and then specify a san serif font for text formatted with any of the Heading tags, such as <h1> or <h2>.
Step 10. Edit any Style in the Layout
You can edit any of the styles in Dreamweaver’s HTML5 Layouts by double-clicking on any style name in the CSS Styles panel to open the CSS Rule Definition dialog. You can also create new styles by choosing Format > CSS Styles > New.
Using the many categories in the CSS Rule Definition dialog, you can create styles to control text, change backgrounds, align elements, and more.
In Figure 10, I’ve selected the class style rule named .container. This style controls the overall width of the design area in these HTML5 Layouts. You can edit style rules in the Properties pane at the bottom of the CSS Styles panel.
Figure 10. Click the image below to see a larger version.
Step 11. Preview Pages in a Web Browser
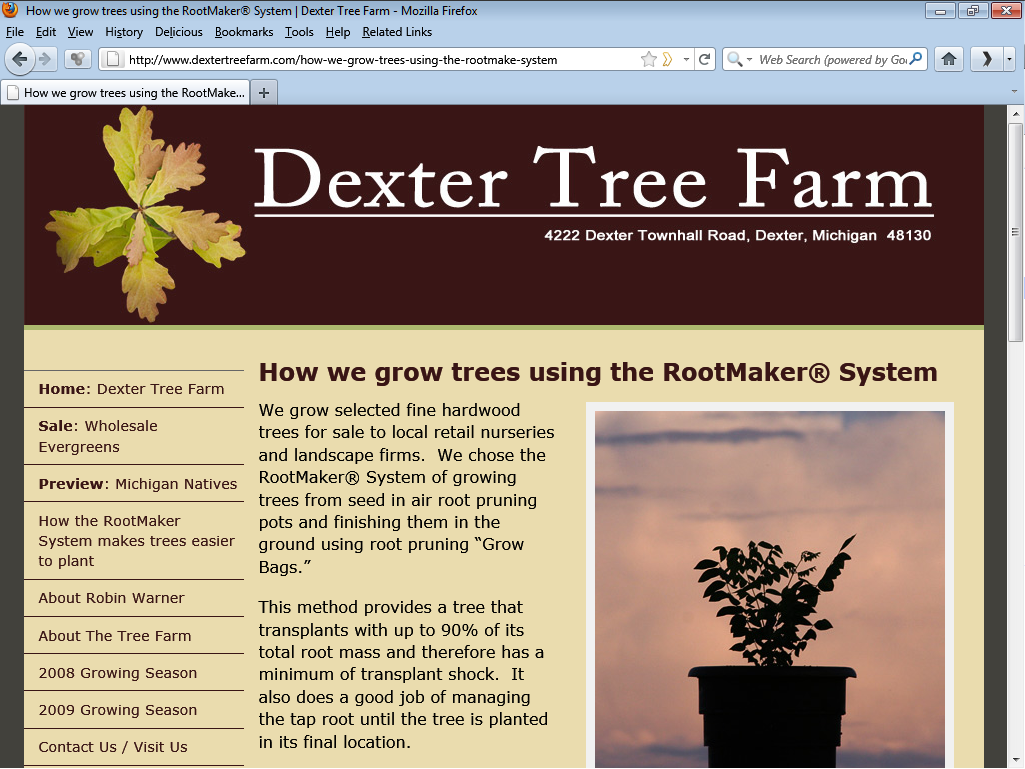
Whenever you’re designing Web pages, it’s good practice to test your work in a variety of Web browsers on both Mac and Windows computers to make sure the layout displays well for all of the people who may visit your site.
Because not all Web browsers display HTML and CSS in exactly the same way, one Web page can look quite different in Internet Explorer on a Windows computer than it does in Apple Safari on a Mac. Older versions of Web browsers are even more inconsistent, and only the latest versions of most browsers support the newest HTML5 tags.
Fortunately, most browsers ignore new tags they don’t understand, so although not all of your features may work in every browser, you can create page designs that look good enough in older browsers, and look great in the latest browsers. Make sure to create clean, well-designed HTML pages and to test thoroughly so you know that they look good in a variety of Web browsers (Figure 11).
Figure 11. Click the image below to see a larger version.
This article was last modified on January 8, 2023
This article was first published on September 12, 2011
Commenting is easier and faster when you're logged in!

Recommended for you

Scanning Around With Gene: Great Pulp Magazine Covers
Originally published March 9, 2012 Pulp magazines and paperbacks, published from...

Enfocus Switch Supports InDesign Server
Switch 08, update 7 includes a configurator fully supporting Adobe InDesign Serv...

Change Measurement Systems on the Fly
You probabaly already know that you can type into just about any of InDesign...